1. Introduction
This manual provides comprehensive instructions for the safe and effective operation, maintenance, and troubleshooting of your Protmex C06302 1/2" Cordless Impact Wrench. Please read this manual thoroughly before using the tool to ensure proper function and to prevent injury or damage.
Avertissements généraux de sécurité
- Portez toujours l'équipement de protection individuelle approprié, notamment des lunettes de sécurité, des gants et une protection auditive.
- Veillez à ce que la zone de travail soit bien éclairée et dégagée de tout obstacle.
- Tenez les enfants et les passants éloignés pendant l'utilisation de l'outil.
- N’utilisez pas d’outils électriques dans des atmosphères explosives, par exemple en présence de liquides, de gaz ou de poussières inflammables.
- Store the tool and batteries in a dry, secure location away from extreme temperatures.
2. Contenu du colis
Your Protmex C06302 Cordless Impact Wrench package includes the following items:
- 1 x Protmex C06302 1/2" Cordless Impact Wrench
- 2 x 21V 4.0Ah Lithium-Ion Battery Packs
- 1 x chargeur rapide
- 4 douilles à impact (17 mm, 19 mm, 21 mm, 24 mm)
- 1 x Tige d'extension
- 1 x étui de transport
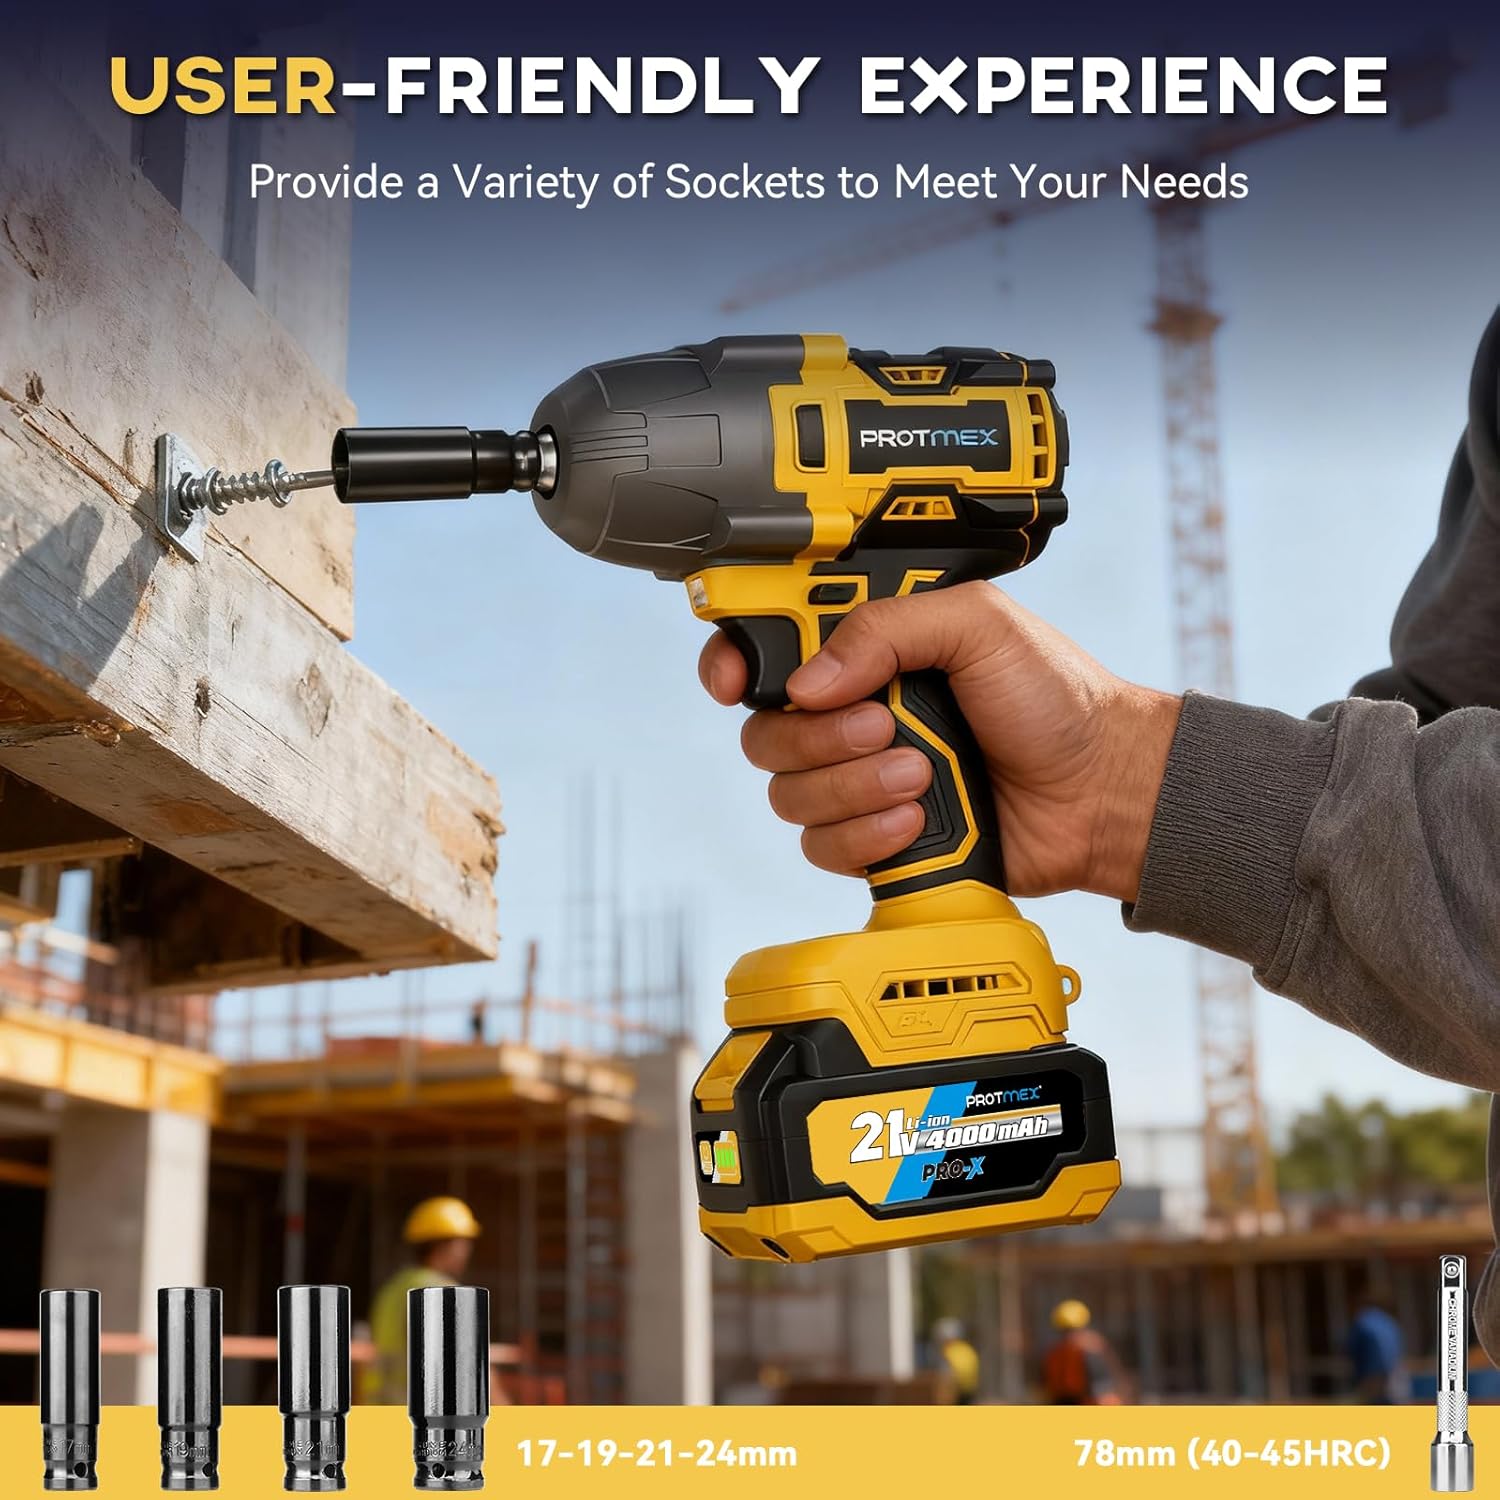
Figure 2.1: Included accessories with the Protmex C06302 Impact Wrench.
3. caractéristiques du produit
The Protmex C06302 Impact Wrench is designed for high performance and user convenience, featuring:
- Moteur sans balais efficace : Delivers up to 900 Ft-lbs (1200 N.m) of torque with three adjustable speed modes (0-2500 RPM, 0-2900 RPM, 0-3500 RPM). Brushless technology ensures longer tool life, quieter operation, and no sparks.
- Long-Lasting 4.0Ah Batteries: Equipped with two 21V 4.0Ah lithium-ion battery packs for extended operation and a fast charger for quick recharging (1-2 hours).
- Two-way Brake Stop: In reverse mode, the brake stop device activates once a nut or bolt is loose, reducing speed and torque to prevent fasteners from flying off.
- Lumière LED intégrée : Illuminates dim work areas, improving visibility for precise operation in tight or dark spaces.
- Entraînement carré 1/2" : Compatible with standard 1/2-inch impact sockets.
- Commutateur de vitesse variable : Permet un contrôle précis de la vitesse de l'outil.
- Soft Rubberized Handle: Provides a comfortable and secure grip, reducing user fatigue.

Figure 3.1: Brushless motor and speed settings display.

Figure 3.2: 4.0Ah battery pack design.

Figure 3.3: Two-way brake stop mechanism.

Figure 3.4: Integrated LED work light.
4. Installation
4.1 Chargement de la batterie
- Branchez le chargeur rapide à une prise de courant standard.
- Slide the 21V 4.0Ah battery pack onto the charger. The indicator light on the charger will show the charging status.
- A full charge typically takes 1 to 2 hours. Remove the battery once fully charged.
- To check battery status, press the button on the battery pack.
4.2 Attaching/Detaching Sockets
- Ensure the impact wrench is turned off and the battery is securely attached.
- Align the desired 1/2" impact socket with the square drive on the tool.
- Push the socket firmly onto the drive until it clicks into place.
- To detach, pull the socket firmly away from the drive while holding the tool.
5. Mode d'emploi
5.1 Mise sous/hors tension
L'outil s'active en appuyant sur la gâchette à vitesse variable. Relâchez la gâchette pour éteindre l'outil.
5.2 Sélection des modes de vitesse
The Protmex C06302 features three speed modes (Low, Medium, High) to match different application requirements. Use the mode switch button, typically located near the handle, to cycle through the speeds. The current speed setting will be indicated on the tool's display.
5.3 Fonctionnement en marche avant et en marche arrière
A forward/reverse switch is located above the trigger. Push the switch to the left for forward rotation (tightening) and to the right for reverse rotation (loosening). Ensure the switch is in the center position for locking the trigger and preventing accidental startup.

Figure 5.1: Forward and Reverse Switch.
5.4 Using the Two-way Brake Stop
When operating in reverse mode, the tool is equipped with a two-way brake stop function. Once a nut or bolt begins to loosen, the tool will automatically reduce its speed and torque. This feature helps prevent the fastener from completely detaching and falling, making it easier to retrieve.
5.5 Activating the LED Work Light
The built-in LED light automatically activates when the trigger is pressed, providing illumination for your work area. It remains on as long as the trigger is partially or fully depressed.
6. Entretien
6.1 Nettoyage
- Nettoyez régulièrement les orifices de ventilation de l'outil pour éviter toute surchauffe.
- Utilisez un chiffon doux et sec.amp Essuyez l'outil avec un chiffon. N'utilisez pas de produits chimiques agressifs ni de nettoyants abrasifs.
- Keep the handle clean and free of oil or grease for a secure grip.
6.2 Entretien de la batterie
- Ne pas entreposer les piles en plein soleil ou dans des endroits à températures élevées.
- Chargez complètement les batteries avant un stockage de longue durée.
- If storing for extended periods, recharge batteries every 3-6 months to maintain optimal performance.
- Mettez au rebut les piles usagées ou endommagées conformément à la réglementation locale.
7. Dépannage
| Problème | Cause possible | Solution |
|---|---|---|
| L'outil ne démarre pas | Batterie non chargée ou mal insérée. | Vérifiez que la batterie est complètement chargée et correctement insérée. |
| Tool lacks power/torque | Battery charge is low. Incorrect speed mode selected. | Rechargez la batterie. Sélectionnez un mode de vitesse supérieur. |
| La prise ne se fixe/détache pas facilement. | Présence de débris dans l'entraînement carré. Douille de taille incorrecte. | Clean the square drive. Use only 1/2" impact-rated sockets. |
| L'outil surchauffe | Ventilation obstruée. Utilisation intensive prolongée. | Débouchez les ouvertures de ventilation. Laissez l'outil refroidir. |
8. Spécifications
| Fonctionnalité | Spécification |
|---|---|
| Numéro de modèle | C06302 |
| Marque | Protmex |
| Taille du lecteur | Entraînement carré 1/2 pouce |
| Max Torque | 900 Foot Pounds (1200 N.m) |
| Voltage | 21 volts |
| Capacité de la batterie | 2 x 4.0 Ah Lithium-Ion |
| Modes de vitesse | 3 (0-2500 tr/min, 0-2900 tr/min, 0-3500 tr/min) |
| Type de moteur | Sans balais |
| Poids de l'article | 4.07 livres |
| Longueur de l'article | 8.66 pouces |
| Matériel | Acrylonitrile Butadiene Styrene, Alloy Steel, Carbon Steel, Metal |
9. Garantie et assistance
For warranty information or technical support, please refer to the documentation included with your product or contact Protmex customer service. Keep your purchase receipt as proof of purchase for warranty claims.
For further assistance, please visit the official Protmex webconsultez le site ou contactez leurs services d'assistance clientèle.