
VEVOR YS012
VEVOR Portable Digital Magnifier YS012 User Manual
Model: YS012 | Brand: VEVOR
1. Introduction
Thank you for choosing the VEVOR Portable Digital Magnifier. This device is designed to assist individuals with low vision by providing clear, magnified views of text and objects. Featuring a 5.0-inch HD screen, 2X-48X magnification, dual lenses, and multiple display modes, it offers a versatile and comfortable reading experience. Please read this manual thoroughly before use to ensure proper operation and maintenance.

Figure 1.1: VEVOR Portable Digital Magnifier Overview
2. caractéristiques du produit
- Full HD Magnification: 5.0-inch 800 x 480 LCD screen with 2X to 48X high-definition magnification.
- 13MP Near & Far Dual Lens: Dedicated lenses for reading (near) and viewing distant objects (far).
- Personnalisé Viewment: 26 color modes, 5-level LCD screen brightness, adjustable LED lighting, and large, easy-to-press buttons.
- Visibilité améliorée : AV and HDMI dual outputs for connecting to a TV.
- Des détails bien pensés : Supports TF cards up to 32GB (not included), built-in 2500mAh rechargeable battery, compact and lightweight with a foldable stand.

Figure 2.1 : Principales caractéristiques du produit
3. Contenu du colis
À l'ouverture du colis, veuillez vérifier que tous les éléments énumérés ci-dessous sont présents et en bon état :
- VEVOR Portable Digital Magnifier (Model YS012)
- Câble de chargement USB
- Câble HDMI
- Câble AV
- Chiffon de nettoyage
- Pochette de rangement
- Dragonne
- Manuel de l'utilisateur (ce document)

Figure 3.1 : Accessoires inclus
4. Schéma du produit
Familiarize yourself with the components and controls of your digital magnifier:

Figure 4.1 : Commandes et ports de l'appareil
- Far or Near View Changer
- Curtain & Setting Button
- Freeze and De-freeze Button
- Zoom In Button (+)
- Color Mode Button (*)
- Zoom Out Button (-)

Figure 4.2: Side Ports (HDMI, USB, TF Card, AV)
5. Installation
5.1 Chargement de l'appareil
Before first use, fully charge the magnifier. Connect the USB charging cable to the device's USB port and the other end to a standard USB power adapter (not included) or a computer's USB port. The charging indicator will show the charging status.
5.2 Insertion d'une carte TF (facultatif)
To save images, insert a TF card (up to 32GB, not included) into the designated TF card slot on the side of the device. Ensure the card is inserted correctly until it clicks into place.
6. Mode d'emploi
6.1 Mise sous/hors tension
- Mise sous tension : Maintenez le bouton Marche/Arrêt (généralement situé sur le côté ou sur le dessus) enfoncé jusqu'à ce que l'écran s'allume.
- Éteindre: Maintenez le bouton Marche/Arrêt enfoncé jusqu'à ce que l'écran s'éteigne.
6.2 Réglage du grossissement
Utilisez le Zoom In (+) et Zoom Out (-) buttons to adjust the magnification level from 2X to 48X. Place the magnifier over the text or object you wish to view.

Figure 6.1: Magnification in Use
6.3 Changement de mode de couleur
Appuyez sur le Color Mode (*) button to cycle through the 26 available color modes. These modes provide various contrast options to suit different visual needs and preferences.
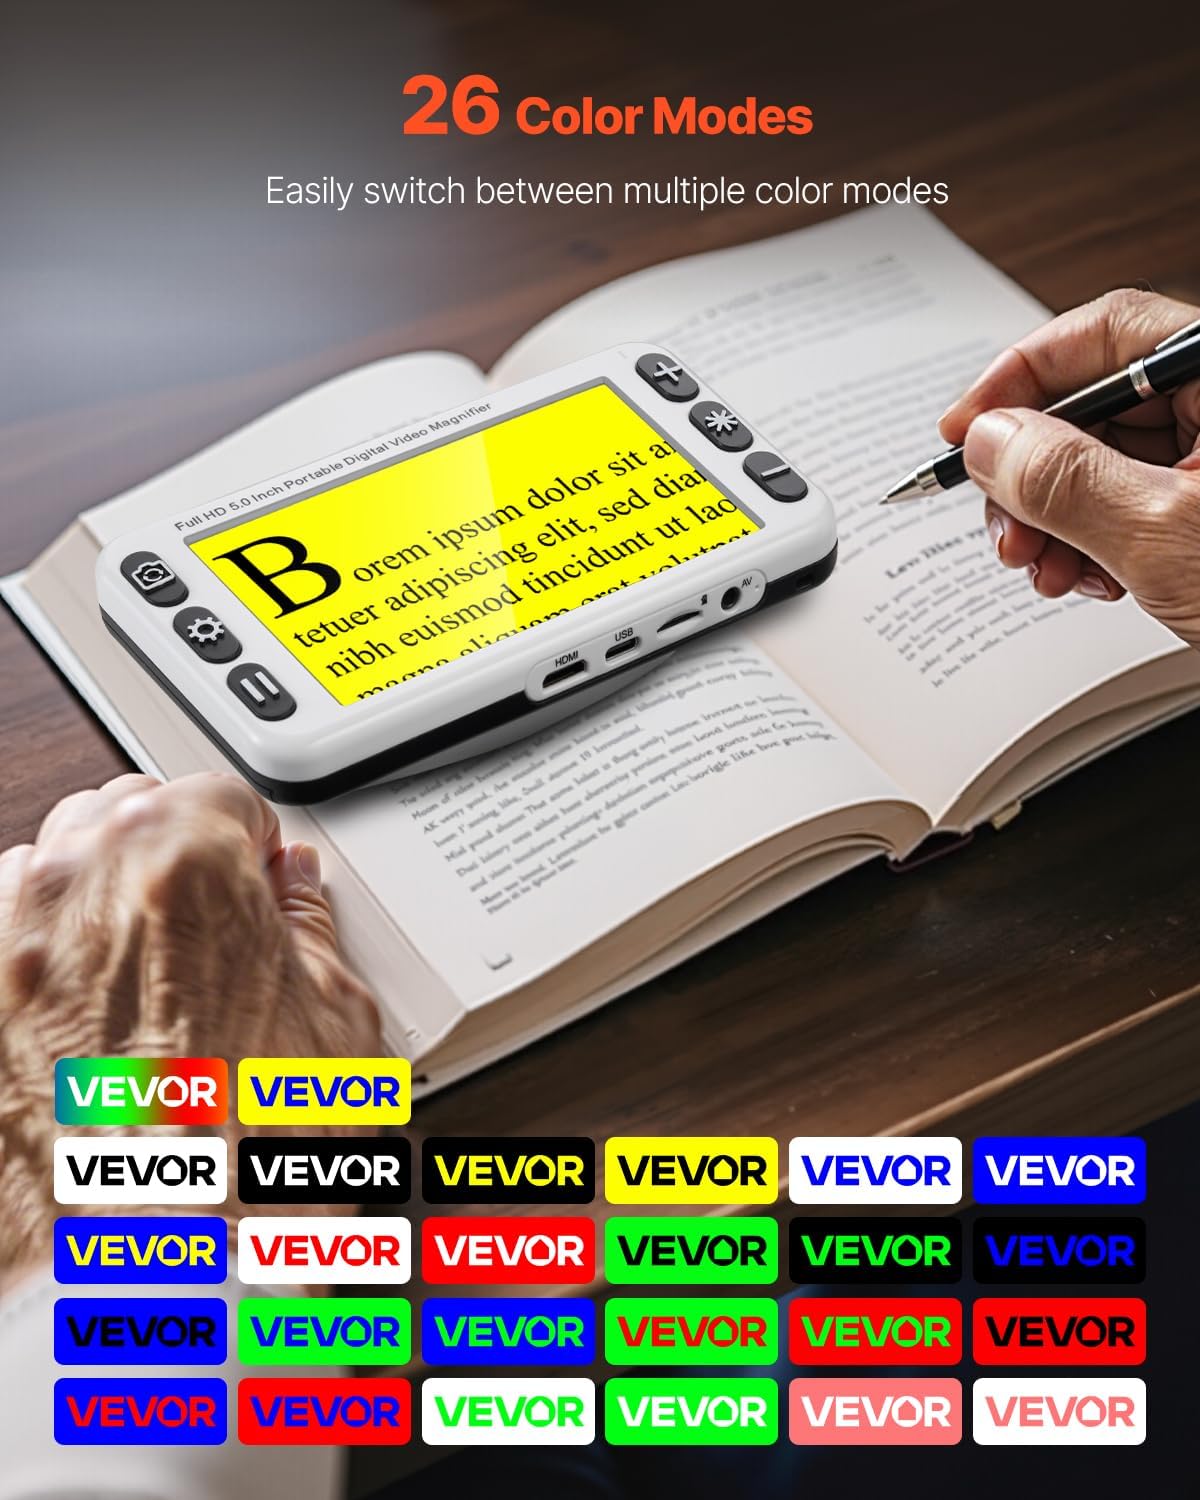
Figure 6.2 : Modes de couleur disponibles
6.4 Réglage de la luminosité de l'écran
The device features 5 levels of adjustable LCD screen brightness. Use the appropriate button (often combined with settings or a dedicated brightness button) to increase or decrease the screen's illumination for optimal viewconfort.

Figure 6.3 : Niveaux de luminosité réglables
6.5 Switching Between Near and Far Lenses
Appuyez sur le Far or Near View Changer button to toggle between the near lens (for reading close-up text like books and documents) and the far lens (for viewing distant objects like signs or whiteboards).
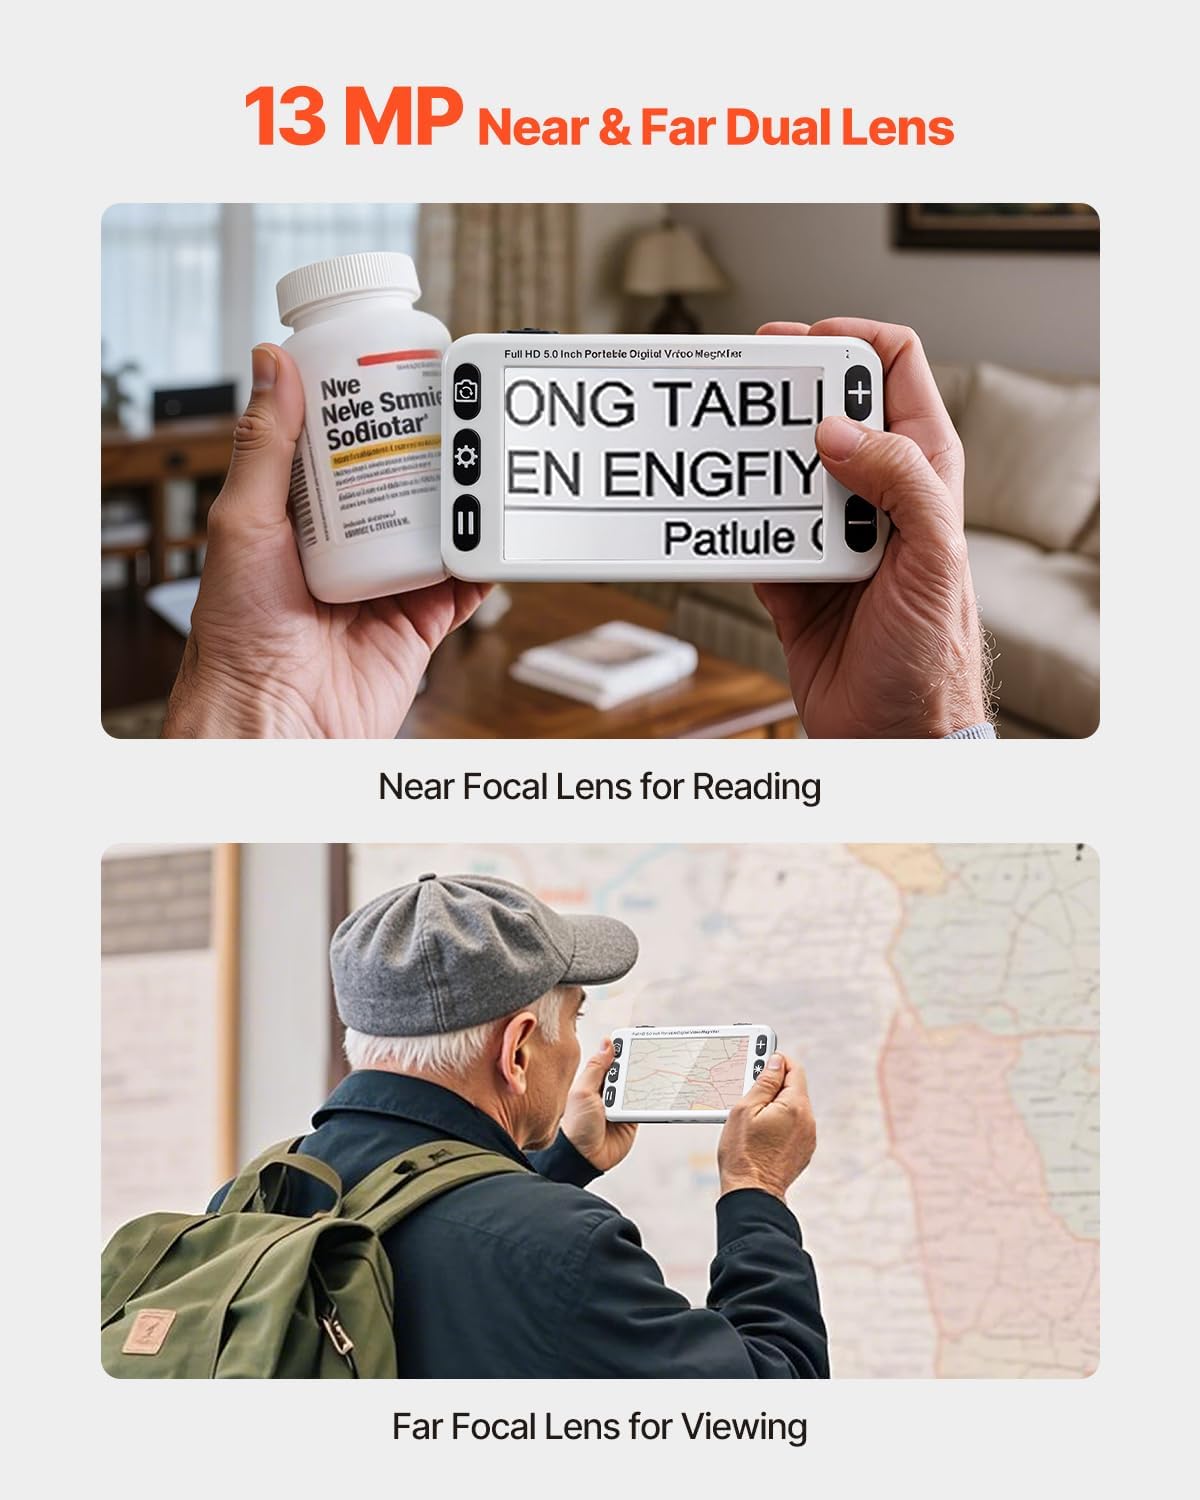
Figure 6.4: Near and Far Dual Lens Usage
6.6 Using Curtain Modes
The device offers horizontal and vertical curtain modes to help focus on specific lines of text and reduce visual clutter. Press the Curtain & Setting Button to activate and cycle through these modes.

Figure 6.5: Horizontal and Vertical Electronic Curtains
6.7 Connecting to a TV (AV/HDMI Output)
Pour une plus grande viewing experience, connect the magnifier to a television using the provided AV or HDMI cable. Select the corresponding input on your TV.

Figure 6.6: AV & HDMI Dual Ports Connection
6.8 Saving Images (Freeze Function)
Appuyez sur le Freeze and De-freeze button to capture and freeze the current image on the screen. If a TF card is inserted, the image will be saved to the card. Press the button again to unfreeze and resume live viewing.
7. Entretien
- Nettoyage: Use the provided cleaning cloth or a soft, lint-free cloth to gently wipe the screen and lens. Do not use liquid cleaners or abrasive materials.
- Stockage: When not in use, store the magnifier in its storage pouch in a cool, dry place, away from direct sunlight and extreme temperatures.
- Entretien de la batterie: Pour prolonger la durée de vie de la batterie, évitez de la décharger complètement et fréquemment. Rechargez l'appareil régulièrement, même si vous ne l'utilisez pas en permanence.
- Manutention: Manipulez l'appareil avec précaution afin d'éviter les chutes ou les chocs qui pourraient endommager les composants internes ou l'écran.
8. Dépannage
| Problème | Cause possible | Solution |
|---|---|---|
| L'appareil ne s'allume pas. | Batterie faible ou déchargée. | Chargez l'appareil pendant au moins 2 heure. |
| L'écran est flou ou illisible. | Lens is dirty; incorrect focus. | Clean the lens with a soft cloth. Adjust the distance from the object. |
| Cannot change magnification. | Buttons are stuck or device is frozen. | Restart the device. Ensure buttons are not obstructed. |
| No display on external TV. | Incorrect cable connection; wrong TV input. | Ensure cables are securely connected. Select the correct HDMI/AV input on your TV. |
| Images not saving to TF card. | TF card not inserted or full; card format issue. | Ensure TF card is properly inserted. Check available space. Format the card if necessary (this will erase all data). |
If you encounter issues not listed here or if the problem persists, please contact VEVOR customer support for assistance.
9. Spécifications
| Fonctionnalité | Détail |
|---|---|
| Numéro de modèle de l'article | YS012 |
| Type d'écran | Écran LCD |
| Taille de l'écran | 5.0 pouces |
| Résolution de l'écran | 800 x 480 |
| Nombre de lentilles | Near & Far Dual Lens |
| Résolution de la caméra | 13 MP |
| Plage de grossissement | 2X - 48X |
| Luminosité de l'écran | 5 niveaux réglables |
| Screen Color Modes | 26 |
| Capacité de la batterie | 2500mAh |
| Poids net | 0.88 lb / 0.40 kg |
| Dimensions du produit | 5.9 x 3.27 x 1.34 po / 150 x 83 x 34 mm |
10. Garantie et assistance
VEVOR products are designed for durability and performance. For warranty information and customer support, please refer to the warranty card included with your product or visit the official VEVOR webConsultez le site. Conservez votre reçu d'achat comme preuve d'achat pour toute réclamation au titre de la garantie.
For further assistance, you may also refer to the official user manual PDF available online: VEVOR Portable Digital Magnifier User Manual PDF
Ask a question about this manual
Ask about setup, troubleshooting, compatibility, parts, safety, or missing instructions. Manuals+ will review the question and use this page’s manual context to help answer it.