
1. Introduction
This manual provides instructions for the safe and efficient use of your Brother CP2160F Computerized Sewing Machine. Please read this manual thoroughly before operating the machine to ensure proper function and to prevent damage or injury. Keep this manual in a safe place for future reference.
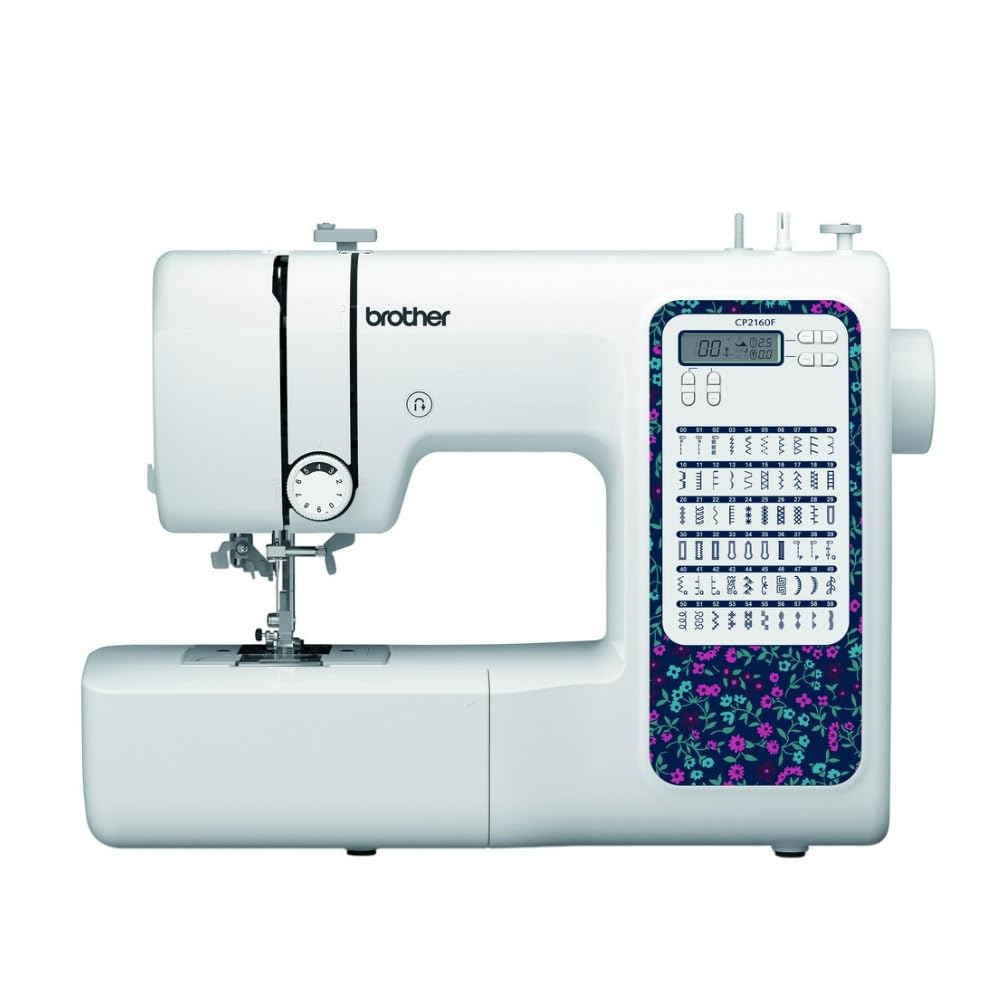
Figure 1: Brother CP2160F Computerized Sewing Machine. This image shows the overall view of the sewing machine, highlighting its compact design and the LCD screen for stitch selection.
2. Consignes de sécurité importantes
Lors de l'utilisation d'un appareil électrique, des précautions de sécurité de base doivent toujours être respectées, notamment les suivantes :
- Lisez toutes les instructions avant d'utiliser cette machine à coudre.
- Gardez les doigts éloignés de toutes les pièces mobiles. Une attention particulière est requise autour de l'aiguille de la machine à coudre.
- Utilisez toujours la plaque à aiguille appropriée. Une plaque inadaptée peut entraîner la rupture de l'aiguille.
- Éteignez la machine à coudre avant d'effectuer tout réglage au niveau de l'aiguille, comme enfiler l'aiguille, changer l'aiguille, enfiler la canette ou changer le pied-de-biche.
- Débranchez toujours la machine à coudre de la prise électrique lorsque vous retirez les couvercles, lubrifiez ou effectuez tout autre réglage d'entretien mentionné dans le manuel d'instructions.
- Ne laissez jamais tomber ni n’insérez aucun objet dans une ouverture.
- Ne pas utiliser à l'extérieur.
- Ne pas utiliser dans un endroit où des produits en aérosol (spray) sont utilisés ou où de l’oxygène est administré.
- Pour débrancher, mettez toutes les commandes en position d’arrêt, puis retirez la fiche de la prise.
3. Contenu du colis
Vérifiez que tous les composants sont présents dans le package :
- Brother CP2160F Computerized Sewing Machine
- Cordon d'alimentation
- Contrôleur au pied
- Accessory Bag (containing bobbins, needle set, twin needle, screwdriver, spool caps, extra spool pin, seam ripper, cleaning brush)
- 7 pieds-de-biche pour la couture : Buttonhole foot, Zipper foot, Blind stitch foot, Button sewing foot, Overcasting foot, Monogramming foot, Zigzag foot (on machine)
- Manuel d'instructions (ce document)
4. Installation
4.1 Connexion d'alimentation
- Placez la machine sur une surface stable et plane.
- Insert the machine plug into the jack on the right side of the machine.
- Insert the power supply plug into a standard electrical outlet.
- Turn on the main power switch, located on the right side of the machine. The LCD screen will illuminate.
4.2 Bobinage
- Placez une bobine de fil sur le porte-bobine.
- Guide the thread through the upper thread guide and around the pre-tension disc.
- Place an empty bobbin onto the bobbin winder shaft and push it to the right.
- Enroulez le fil plusieurs fois dans le sens des aiguilles d'une montre autour de la bobine.
- Press the foot controller (or Start/Stop button) to begin winding. The machine will stop automatically when the bobbin is full.
- Cut the thread, push the bobbin winder shaft to the left, and remove the wound bobbin.
4.3 Enfilage de la machine (filetage supérieur)
- Relevez le levier du pied-de-biche.
- Placez une bobine de fil sur le porte-bobine.
- Faites passer le fil à travers le guide-fil supérieur.
- Follow the numbered threading path indicated on the machine, ensuring the thread passes through the tension discs and takes up lever.
- Use the advanced needle threading system: Lower the presser foot, lower the needle, then push down the needle threader lever to engage it. Guide the thread through the hook and release the lever.
- Passez la boucle de fil dans le chas de l'aiguille.
4.4 Installation de l'aiguille
- Coupez l'alimentation de la machine.
- Desserrez l'aiguille clamp Visser en tournant dans le sens inverse des aiguilles d'une montre.
- Retirez l'ancienne aiguille.
- Insérez la nouvelle aiguille, la face plate tournée vers l'arrière de la machine, en la poussant vers le haut au maximum.
- Serrez le goujon de l'aiguilleamp visser solidement.
5. Fonctionnement
5.1 Sélection des points
The CP2160F features 60 built-in stitches. Use the stitch selector buttons (usually '+' and '-') to navigate through the stitch patterns displayed on the LCD screen. The recommended stitch length and width will be displayed automatically, but can be adjusted if desired.
5.2 Boutonnières automatiques
This machine includes 7 auto-size buttonhole styles. Attach the buttonhole foot. Place the button you wish to match into the buttonhole foot's holder. Select the desired buttonhole stitch. The machine will automatically sew a buttonhole to the correct size.
5.3 Free-Arm Sewing
To convert to free-arm sewing, slide off the accessory box located at the front of the machine. This exposes the free arm, ideal for sewing cylindrical items like cuffs, sleeves, and pant hems.
5.4 Sewing Thick Fabrics
The CP2160F's robust feed system and fixed needle bar are designed to handle thick materials such as denim and tweed. Ensure you use the correct needle type and size for the fabric thickness to prevent needle breakage and ensure smooth feeding.
5.5 Using Included Sewing Feet
The machine comes with seven specialized sewing feet. Refer to the specific stitch instructions for which foot to use. To change a presser foot:
- Relevez l'aiguille et le pied-de-biche.
- Appuyez sur le levier noir situé à l'arrière du porte-pied-de-biche pour libérer le pied actuellement en place.
- Align the new foot with the pin on the presser foot holder and lower the presser foot lever until it snaps into place.
6. Entretien
6.1 Nettoyage de la machine
Regular cleaning helps maintain optimal performance. Always unplug the machine before cleaning.
- Nourrir les chiens : Remove the needle plate and use the cleaning brush to remove lint and dust from the feed dogs and bobbin area.
- Hook Race: Carefully remove the bobbin case and clean the hook race area with the brush.
- Extérieur: Wipe the exterior surfaces with a soft, dry cloth. Do not use liquid cleaners or harsh chemicals.
Note: This machine does not require user lubrication.
7. Dépannage
Avant de contacter le service client, review Ces problèmes courants et leurs solutions :
| Problème | Cause possible | Solution |
|---|---|---|
| Aiguilles cassées | Incorrect needle size/type for fabric; bent needle; needle not fully inserted; pulling fabric while sewing. | Use correct needle; replace bent needle; re-insert needle correctly; guide fabric gently. |
| Points sautés | Needle bent or dull; incorrect needle insertion; improper threading; wrong needle for fabric. | Replace needle; re-insert needle; re-thread machine; use appropriate needle. |
| Thread jams | Improper threading; lint in bobbin case; bobbin wound unevenly. | Re-thread machine; clean bobbin area; re-wind bobbin evenly. |
| La machine ne s'allume pas | Power cord not connected; power switch off; electrical outlet issue. | Check power cord connections; ensure switch is ON; test outlet with another appliance. |
8. Spécifications
- Modèle: Brother CP2160F
- Nombre de points : 60 points intégrés
- Boutonnières : 7 One-step auto-size buttonholes
- Enfile-aiguille : Advanced Needle Threading System
- Afficher: Écran LCD
- Sewing Area: Free-arm capability
- Système d'alimentation : Exceptional feed for thick fabrics
- Included Feet: 7 (Buttonhole, Zipper, Blind Stitch, Button Sewing, Overcasting, Monogramming, Zigzag)
- Couleur: Blanc
- Matériel: Métal, plastique
- Dimensions du produit (P x L x H) : 6.65" x 12.2" x 16.26"
- Poids de l'article : 226 onces (environ 14.1 lb)
- Source d'alimentation : Électrique avec fil
- Code à barres : 196271536956
9. Assistance clientèle et garantie
For technical assistance, warranty information, or service inquiries, please contact Brother customer support. Refer to the official Brother webPour connaître les coordonnées et les conditions de garantie les plus récentes, veuillez consulter le site web ou la documentation fournie avec votre achat.
Support en ligne: www.brother-usa.com/support
Remarque : Les conditions de garantie peuvent varier selon la région et le détaillant. Conservez votre preuve d’achat pour toute réclamation au titre de la garantie.