
1. Introduction
This manual provides essential information for the safe and efficient use of your CANDY Smart Inverter Washer Dryer, model CSWS496TWMRRE/FR. Please read these instructions carefully before installing, operating, or performing maintenance on the appliance. Keep this manual for future reference.
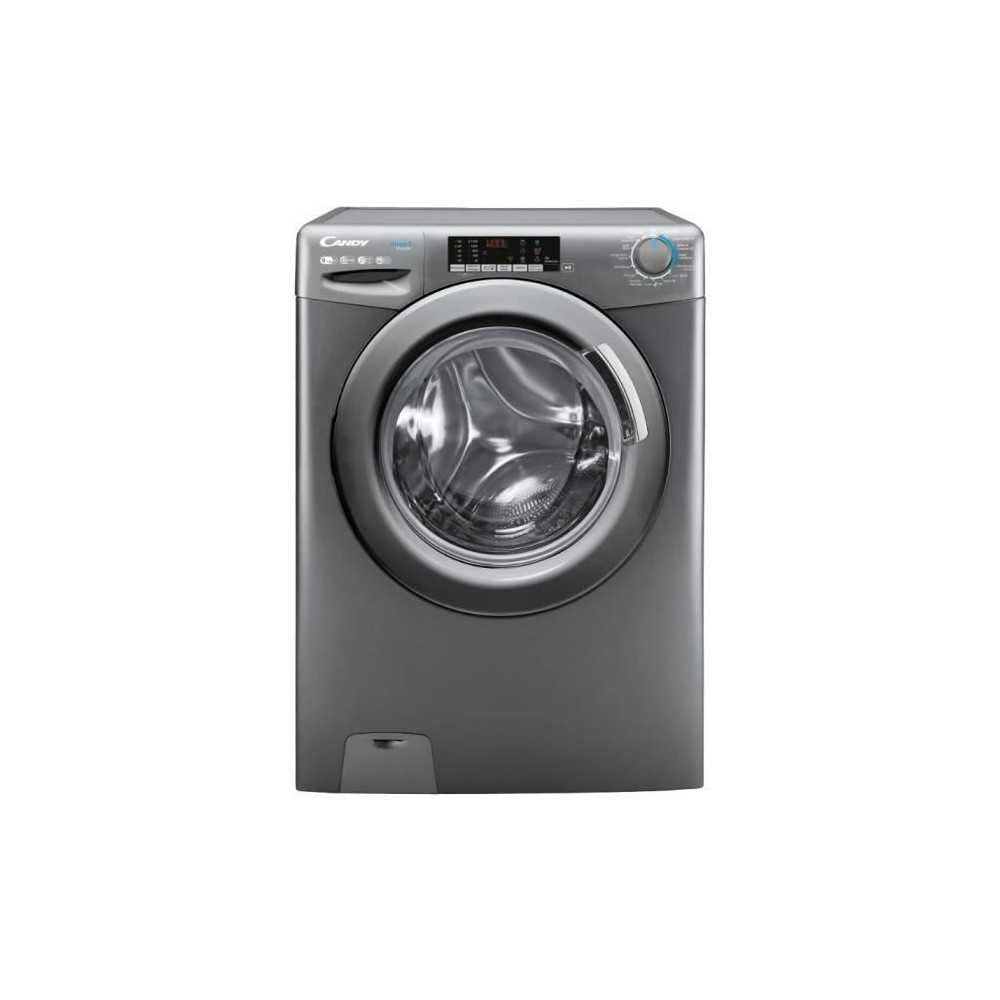
Illustration 1.1 : Avant view of the CANDY Smart Inverter Washer Dryer.
2. Consignes de sécurité
Respectez toujours les consignes de sécurité élémentaires lors de l'utilisation d'appareils électriques afin de réduire les risques d'incendie, d'électrocution et de blessures. Cet appareil est destiné à un usage domestique uniquement.
- Assurez-vous que l'appareil est correctement mis à la terre.
- Ne laissez pas les enfants jouer avec l'appareil ou l'utiliser.
- Ne touchez pas l’appareil avec les mains mouillées.
- Débranchez l'appareil avant de le nettoyer ou d'effectuer toute opération d'entretien.
- Ne pas laver ni sécher les articles qui ont été nettoyés, lavés, trempés ou tachés de substances combustibles ou explosives.
- Keep the area around the exhaust opening free from the accumulation of lint, dust, and dirt.
3. Produit terminéview
3.1. Composants
- Panneau de contrôle: Features a program selector dial, digital display, and touch buttons for various functions.
- Tiroir à détergent : Situé en haut à gauche, pour ajouter la lessive et l'adoucissant.
- Tambour: Stainless steel interior for washing and drying clothes.
- Porte: Front-loading door with a secure latch.
- Filtre: Located at the bottom front, for collecting lint and foreign objects.
3.2. Panneau de configuration

Image 3.1 : Détail view du panneau de commande.
The control panel allows you to select wash and dry programs, adjust settings, and monitor the cycle status. Key elements include:
- Molette de sélection du programme : Used to choose from 15 available wash and dry programs.
- Affichage numérique: Affiche le temps restant, les codes d'erreur et les options sélectionnées.
- Sélection de température: Régule la température de l'eau de lavage.
- Sélection de la vitesse d'essorage : Modifies the spin cycle speed up to 1400 rpm.
- Départ différé : Sets a delayed start time for the cycle (1-24 hours).
- Boutons d'options : Activates special functions like Steam, Mix Power System, and quick cycles.
3.3. Tiroir à détergent
The detergent drawer has compartments for pre-wash detergent, main wash detergent, and fabric softener. Refer to the markings on the drawer for correct placement.
3.4. Drum Interior

Image 3.2: Interior of the washer dryer drum.
The stainless steel drum is designed for effective washing and drying. Ensure no foreign objects are left inside before starting a cycle.
4. Installation
4.1. Déballage
- Retirez tous les matériaux d'emballage, y compris la base en polystyrène et tous les inserts présents dans le fût.
- Remove the transport bolts from the rear of the appliance. Keep these bolts for future transport.
4.2. Positionnement
- Placez l'appareil sur un sol ferme et plat.
- Adjust the feet to ensure the machine is stable and level.
- Veillez à laisser suffisamment d'espace autour de l'appareil pour la ventilation.

Image 4.1 : Example of washer dryer placement in a domestic environment.
4.3. Raccordements d'eau et d'électricité
- Raccordez le tuyau d'arrivée d'eau à un robinet d'eau froide.
- Placez le tuyau d'évacuation dans un tuyau vertical ou un évier, en veillant à ce qu'il soit bien fixé afin d'éviter tout déplacement pendant son fonctionnement.
- Branchez le cordon d'alimentation dans une prise électrique mise à la terre (230 volts).
5. Mode d'emploi
5.1. Avant la première utilisation
Run a short wash cycle without laundry and detergent to clean the drum and remove any manufacturing residues.
5.2. Chargement du linge
- Open the door and load laundry into the drum, ensuring not to overload (max 9 kg for wash, 6 kg for dry).
- Fermez bien la porte.
5.3. Ajout de détergent et d'adoucissant
Pull out the detergent drawer and add appropriate amounts of detergent and fabric softener to their respective compartments. Close the drawer.
5.4. Sélection du programme
- Turn the program selector dial to choose the desired wash or dry program. The appliance offers 15 programs, including 7 quick cycles.
- L'écran numérique affichera les paramètres par défaut du programme sélectionné.
5.5. Réglage des paramètres et des fonctions spéciales
- Température: Press the temperature button to adjust the wash temperature (e.g., 20°, 30°, 40°, 60°, 90°).
- Vitesse d'essorage: Press the spin speed button to select the desired spin speed (e.g., 400, 800, 1000, 1400 rpm).
- Départ différé : Press the delay start button repeatedly to set a delay from 1 to 24 hours.
- Fonction vapeur : Activates the steam option to reduce wrinkles and refresh clothes.
- Système d'alimentation mixte : Ensures thorough cleaning by pre-mixing water and detergent.
- Cycles rapides : Select one of the 7 rapid cycles, including a full load program in 59 minutes.
5.6. Démarrage du cycle
Appuyez sur le bouton Marche/Pause pour lancer le programme sélectionné. L'écran affichera le temps restant.
5.7. Fin du cycle
At the end of the cycle, the appliance will signal with an audible alert and/or a message on the display. Open the door and remove the laundry.
6. Entretien
6.1. Nettoyage du tiroir à lessive
Regularly clean the detergent drawer to prevent residue buildup. Remove the drawer, rinse it under running water, and clean any stubborn deposits with a brush. Reinsert the drawer.
6.2. Nettoyage du tambour
Use the dedicated 'Drum Cleaning' program (if available) or run an empty hot wash cycle with a descaling agent or white vinegar to maintain drum hygiene.
6.3. Nettoyage du filtre
Periodically clean the drain pump filter to ensure proper drainage. Place a shallow container under the filter cover, unscrew the filter, remove any lint or debris, and then securely replace it.
6.4. Nettoyage extérieur
Essuyez les surfaces extérieures de l'appareil avec un chiffon doux et sec.amp chiffon. N'utilisez pas de nettoyants abrasifs ou de solvants.
7. Dépannage
If you encounter issues with your appliance, consult the table below for common problems and solutions. If the problem persists, contact customer support.
| Problème | Cause possible | Solution |
|---|---|---|
| L'appareil ne démarre pas | Power cord unplugged; door not closed; program not selected; Start/Pause button not pressed. | Vérifiez le branchement électrique ; assurez-vous que la porte est bien verrouillée ; sélectionnez un programme ; appuyez sur Démarrer/Pause. |
| Pas de prise d'eau | Water tap closed; water inlet hose kinked; water filter blocked. | Ouvrir le robinet d'eau ; redresser le tuyau ; nettoyer le filtre d'arrivée d'eau. |
| L'eau ne s'écoule pas | Tuyau d'évacuation plié ou bouché ; filtre de la pompe d'évacuation bouché. | Redressez ou dégagez le tuyau d'évacuation ; nettoyez le filtre de la pompe d'évacuation. |
| Vibrations excessives | Appliance not level; transport bolts not removed; uneven load. | Ajuster les pieds de nivellement ; retirer les boulons de transport ; redistribuer le linge. |
| Les vêtements ne sèchent pas correctement | Overloaded; incorrect drying program; lint filter blocked. | Reduce load; select appropriate drying program; clean lint filter. |
8. Spécifications
| Fonctionnalité | Spécification |
|---|---|
| Nom du modèle | C SWS496TWMRRE/FR |
| Marque | BONBONS |
| Dimensions du produit (P x L x H) | 54 cm (P) x 60 cm (L) x 86 cm (H) |
| Capacité de lavage | 9 kilogrammes |
| Capacité sèche | 6 kilogrammes |
| Vitesse d'essorage maximale | 1400 tr/min |
| Nombre de programmes | 15 |
| Classe énergétique (lavage) | A |
| Niveau de bruit | 76 dB |
| Voltage | 230 volts |
| Matériau (tambour) | Acier inoxydable |
| Poids | 65 kilogrammes |
| Type d'installation | Freestanding |
| Type de contrôle | Touche |
9. Garantie et assistance
9.1. Informations sur la garantie
This CANDY appliance comes with a Garantie constructeur d'un anVeuillez conserver votre preuve d'achat pour toute réclamation au titre de la garantie. La garantie couvre les défauts de matériaux et de fabrication dans le cadre d'une utilisation domestique normale.
9.2. Assistance clientèle
For technical assistance, spare parts, or to schedule a service appointment, please contact CANDY customer support. Refer to the contact information provided in the separate warranty card or on the official CANDY website.
The user manual is included with the product for detailed instructions and further support.