
Gigabyte G6 MF-H2DE854KH
GIGABYTE G6 MF-H2DE854KH Gaming Laptop User Manual
Model: G6 MF-H2DE854KH | Brand: Gigabyte
1. Introduction
This manual provides essential information for the safe and efficient operation of your GIGABYTE G6 MF-H2DE854KH Gaming Laptop. Please read this manual thoroughly before using the device and keep it for future reference.
2. Consignes de sécurité
Observe the following safety precautions to prevent damage to the laptop and ensure personal safety:
- N’exposez pas l’ordinateur portable à des températures extrêmes, à l’humidité ou à la lumière directe du soleil.
- Évitez de placer des objets lourds sur l'ordinateur portable.
- Use only the original power adapter and accessories provided by Gigabyte.
- N’essayez pas de démonter ou de réparer l’ordinateur portable vous-même. Veuillez faire appel à un technicien qualifié.
- Tenez les liquides éloignés de l'ordinateur portable pour éviter tout choc électrique ou dommage.
3. Contenu du colis
Vérifiez que tous les éléments sont présents dans le colis :
- GIGABYTE G6 MF-H2DE854KH Gaming Laptop
- Adaptateur secteur et cordon d'alimentation
- Manuel de l'utilisateur (ce document)
- Carte de garantie (le cas échéant)
4. Produit terminéview
Familiarize yourself with the components of your GIGABYTE G6 Gaming Laptop.
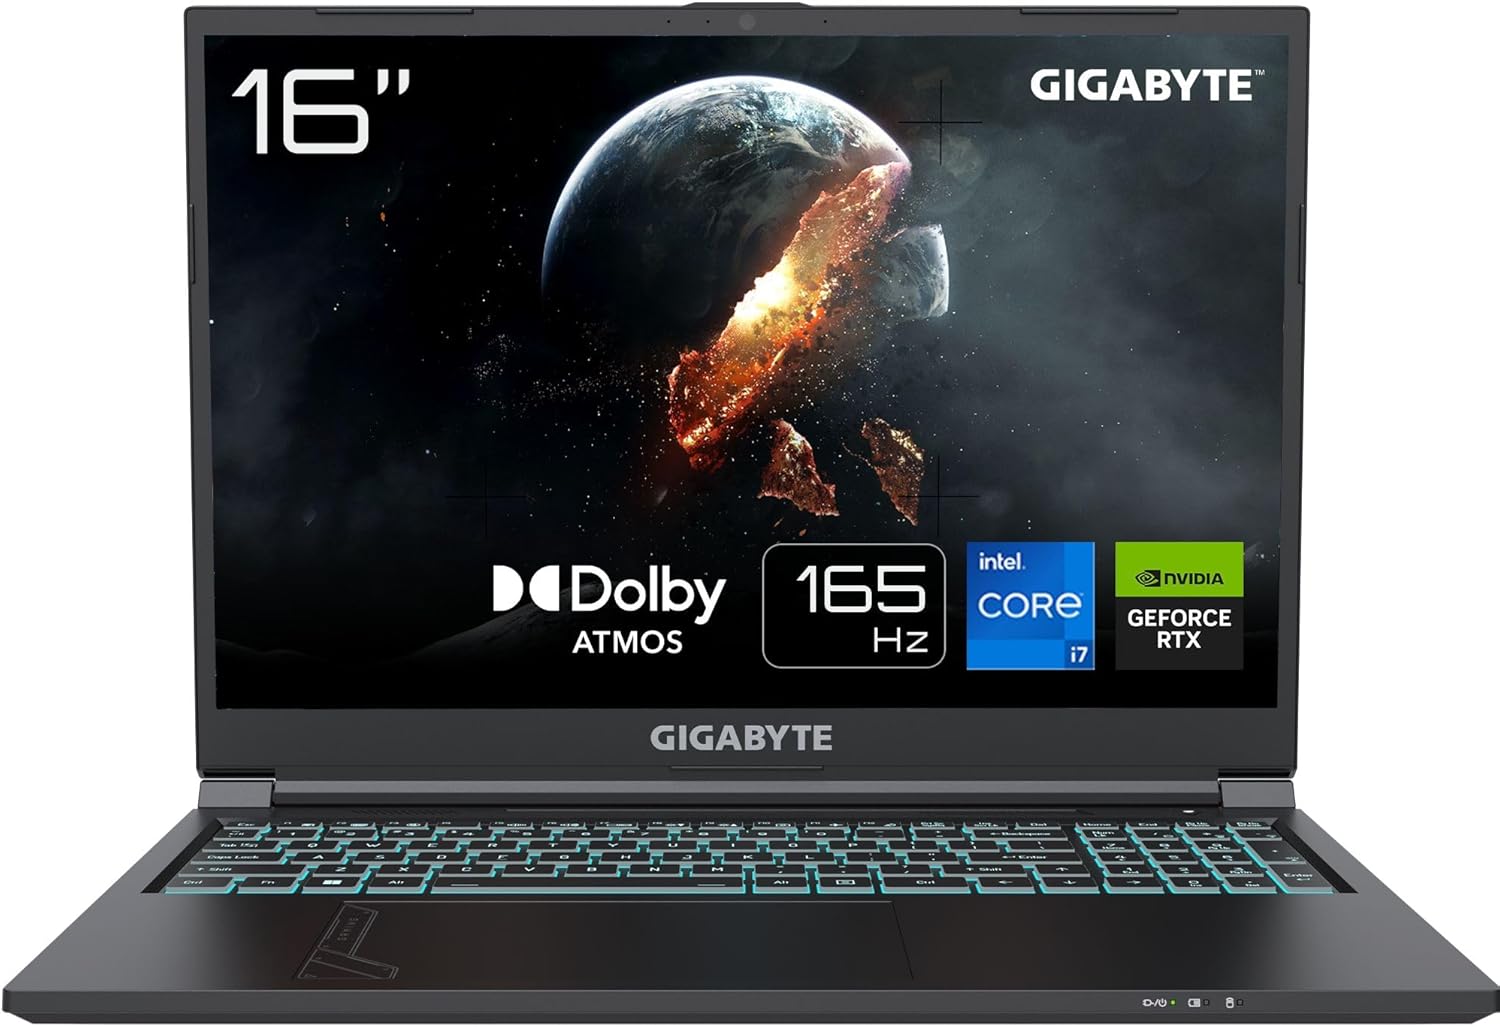
Figure 4.1 : Face avant view of the GIGABYTE G6 Gaming Laptop. This image shows the laptop open, revealing the 16-inch display, the illuminated keyboard, and the touchpad. The screen displays a dynamic graphic, highlighting the laptop's gaming capabilities. Branding for GIGABYTE, Dolby Atmos, 165Hz, Intel Core i7, and NVIDIA GeForce RTX are visible on the screen bezel.

Figure 4.2 : Angulaire view of the GIGABYTE G6 Gaming Laptop. This image presents the laptop from an elevated angle, with the lid open to reveal the keyboard and screen, and the closed lid of another identical laptop positioned behind it. This perspective highlights the sleek design and the texture of the laptop's casing.

Figure 4.3 : Vue de dessus view of the GIGABYTE G6 Gaming Laptop. This image provides an overhead shot of the laptop with its lid open, showcasing the full keyboard layout and touchpad. Below it, the closed lid of the laptop is shown, emphasizing the minimalist design and the GIGABYTE logo.

Figure 4.4: Side angled view of the GIGABYTE G6 Gaming Laptop. This image captures the laptop from a lower side angle, highlighting the thin profile when open, the illuminated keyboard, and the display. The perspective emphasizes the ergonomic design and the visual appeal of the screen content.

Figure 4.5 : Angle arrière view of the GIGABYTE G6 Gaming Laptop. This image shows the laptop from a rear-side angle with the lid closed, revealing the textured surface of the lid and some of the side ports. The "GAMING" text is subtly visible along the edge, indicating its purpose.

Figure 4.6 : Vue de dessus view of the GIGABYTE G6 Gaming Laptop keyboard and touchpad. This close-up overhead shot focuses on the keyboard, showcasing the illuminated keys and the layout, along with the large touchpad below it. The design elements on the palm rest are also visible.

Figure 4.7 : Côté profiles of the GIGABYTE G6 Gaming Laptop. This image displays three separate side views of the laptop, highlighting the various ports and ventilation grilles. The top profile shows USB ports, the middle shows HDMI and audio jacks, and the bottom shows additional ports and the power input.
4.1. Avant View
- Afficher: 16-inch screen for visual output.
- Webcame: Caméra intégrée pour la vidéoconférence.
- Microphone: Microphone intégré pour l'entrée audio.
- Clavier: Full-size keyboard with backlit keys.
- Pavé tactile : Multi-touch gesture supported pointing device.
4.2. Côté Views (Ports)
- Ports USB : Connect USB devices (e.g., mouse, external drive). The laptop features 2 USB 3.0 ports.
- Port HDMI: Se connecter à des écrans ou projecteurs externes.
- Prises audio : Ports pour casque et microphone.
- Puissance d'entrée : Connectez l'adaptateur secteur.
- Port Ethernet: Pour connexion réseau filaire.
5. Installation
5.1. Mise sous tension initiale
- Branchez l'adaptateur secteur au port d'entrée d'alimentation de l'ordinateur portable, puis branchez-le à une prise de courant.
- Ouvrez le couvercle de l'ordinateur portable.
- Appuyez sur le bouton d'alimentation, généralement situé au-dessus du clavier ou sur le côté.
- Follow the on-screen instructions to complete the initial Windows 11 Home setup, including language, region, and network settings.
5.2. Connexion à un réseau
Votre ordinateur portable prend en charge les connexions Wi-Fi et Ethernet filaires.
Connexion Wi-Fi :
- Cliquez sur l'icône Wi-Fi dans la barre d'état système (en bas à droite de l'écran).
- Sélectionnez le réseau Wi-Fi souhaité dans la liste.
- Saisissez la clé de sécurité réseau (mot de passe) si vous y êtes invité.
- Cliquez sur « Se connecter ».
Connexion filaire (Ethernet) :
- Connect one end of an Ethernet cable to the laptop's Ethernet port.
- Connectez l'autre extrémité du câble Ethernet à votre routeur ou modem.
- L'ordinateur portable devrait détecter et se connecter automatiquement au réseau câblé.
6. Fonctionnement
6.1. Opérations de base
- Marche/Arrêt : Appuyez sur le bouton marche/arrêt pour allumer l'appareil. Pour l'éteindre, cliquez sur Démarrer > Marche/Arrêt > Arrêter.
- Mode veille: Fermez le couvercle ou cliquez sur Démarrer > Marche/Arrêt > Veille pour passer en mode veille.
- Redémarrage: Click Start > Power > Restart to reboot the system.
6.2. Utilisation du clavier et du pavé tactile
- Rétroéclairage du clavier : Adjust backlight brightness using the dedicated function keys (Fn + Fx, refer to your keyboard for specific keys).
- Gestes du pavé tactile :
- Robinet: Single tap for left-click, two-finger tap for right-click.
- Rouleau: Two-finger drag up or down.
- Zoom: Pincez vers l'intérieur ou vers l'extérieur avec deux doigts.
6.3. Connexion de périphériques externes
Connect USB devices, external monitors, and audio devices to the appropriate ports as described in Section 4.2.
7. Entretien
7.1. Nettoyage de l'ordinateur portable
- Écran: Utilisez un chiffon doux et non pelucheux légèrement dampTerminer avec de l'eau ou un nettoyant pour écran. Ne pas vaporiser le nettoyant directement sur l'écran.
- Clavier et châssis : Utilisez un chiffon doux et sec. Pour les taches tenaces, un chiffon légèrement plus sec peut être utile.amp On peut utiliser un chiffon pour éviter que du liquide ne pénètre dans les ouvertures.
- Ventilation: Regularly clean dust from the ventilation grilles using compressed air to ensure proper airflow and prevent overheating.
7.2. Entretien de la batterie
- Évitez de décharger complètement la batterie fréquemment.
- N'exposez pas la batterie à des températures élevées.
- Si vous devez ranger votre ordinateur portable pendant une période prolongée, chargez la batterie à environ 50-60 % avant de le ranger.
7.3. Mises à jour logicielles
Regularly check for and install operating system updates (Windows Update) and driver updates from the Gigabyte official website pour assurer des performances et une sécurité optimales.
8. Dépannage
| Problème | Cause possible | Solution |
|---|---|---|
| L'ordinateur portable ne s'allume pas. | Pas d'alimentation, batterie déchargée, problème d'adaptateur secteur. | Vérifiez que l'adaptateur secteur est bien branché. Chargez la batterie pendant au moins 30 minutes. Essayez une autre prise de courant. |
| L'écran est vide ou noir. | Sleep mode, display driver issue, hardware problem. | Press any key or move the mouse to wake from sleep. Connect to an external monitor to check if the display works. Reinstall or update display drivers. |
| Problèmes de connexion Wi-Fi. | Mot de passe incorrect, problème de routeur, problème de pilote. | Verify Wi-Fi password. Restart your router. Update Wi-Fi drivers. Ensure Wi-Fi is enabled in Windows settings. |
| L'ordinateur portable fonctionne lentement. | Too many background applications, low disk space, malware. | Close unnecessary applications. Free up disk space. Run a malware scan. Check for system updates. |
9. Spécifications
| Fonctionnalité | Détail |
|---|---|
| Marque | Gigaoctet |
| Numéro de modèle | G6 MF-H2DE854KH |
| Série | G6 |
| Couleur | Dark Grey/Aurora Grey |
| Système opérateur | Windows 11 Famille |
| Marque du processeur | Intel |
| Type de processeur | Intel Core i7 |
| Vitesse du processeur | 2.4 GHz |
| Nombre de cœurs | 1 (Note: This value is as provided in source data, typical i7 processors have more cores.) |
| Mémoire maximale prise en charge | 64 Go |
| RAM Size Installed | 16 Go |
| Technologie des disques durs | Disque SSD |
| Taille de l'écran | 16 pouces |
| Marque du chipset graphique | NVIDIA |
| Description de la carte graphique | Dédié |
| GPU | NVIDIA GeForce RTX 4050 |
| Mémoire vive de la carte graphique | 6 Go |
| Type de RAM graphique | GDDR6 |
| Compatible Bluetooth | Oui |
| Nombre de ports USB 3.0 | 2 |
| Dimensions de l'article (L x l x H) | 49.7 x 11.9 x 25.9 cm |
| Poids du produit | 2.3 kilogrammes |
| Piles | 1 D - included |
10. Garantie et assistance
For warranty information and technical support, please refer to the warranty card included with your product or visit the official Gigabyte support webConsultez le site. Conservez votre reçu d'achat comme preuve d'achat pour toute réclamation au titre de la garantie.
Gigabyte Official Website: www.gigabyte.com
Ask a question about this manual
Ask about setup, troubleshooting, compatibility, parts, safety, or missing instructions. Manuals+ will review the question and use this page’s manual context to help answer it.