
1. Introduction
This manual provides detailed instructions for the setup, operation, and maintenance of your JoFomp 17.3" Large Digital Wall Clock. Please read this manual thoroughly before use to ensure proper functionality and longevity of the product.
2. Consignes de sécurité
- Ensure the clock is connected to a stable power source (5V/2A adapter included).
- N’exposez pas l’appareil à des températures extrêmes, à la lumière directe du soleil ou à une forte humidité.
- Tenir hors de portée des enfants.
- N'essayez pas de démonter ou de réparer l'appareil vous-même. Contactez le service client pour obtenir de l’aide.
- La télécommande nécessite 2 piles AAA (non incluses).
- A 1 AAA battery (not included) is required for the memory function to retain settings during power outaget.
3. Contenu du colis
Vérifiez que tous les éléments sont présents dans le colis :
- JoFomp 17.3" Digital Wall Clock
- Télécommande
- Adaptateur d'alimentation CC 5 V/1 A
- Cordon d'alimentation
- Mounting Hooks (2)
- Mounting Template Ruler
- Manuel de l'utilisateur (ce document)

Figure 3.1 : Accessoires inclus et unité principale.
4. Produit terminéview
The JoFomp 17.3" Large Digital Wall Clock features a clear LED display and multiple functions for convenience.

Figure 4.1: Front display of the digital wall clock.
4.1 Fonctions d'affichage
- Affichage de l'heure : Large 17.3" LED digits.
- Affichage des dates : Month and Day.
- Jour de la semaine: Indicated by illuminated text (Mon-Sun).
- Température: Displays in Celsius or Fahrenheit.
- Humidité: Displays relative humidity percentage.
- Double alarme : Deux réglages d'alarme indépendants.
- Indicateur DST : Daylight Saving Time status.

Figure 4.2: Labeled display functions.
4.2 Back Panel and Buttons
The back of the clock houses control buttons and connection ports.

Figure 4.3: Back panel with labeled components.
- Boutons de réglage : Five buttons for manual adjustments (Light, SET, +, -, Alarm).
- Memory Battery Compartment: For 1 AAA battery (not included) to retain settings.
- Port d'alimentation: Pour connecter l'adaptateur secteur.
- Trous de montage: Pour une installation murale.
5. Installation
5.1 Connexion d'alimentation
- Connect the power cord to the clock's power port.
- Plug the 5V/2A power adapter into a standard electrical outlet. The clock will power on and display.
Note: The clock requires continuous power to operate. It is not battery-powered for primary display.
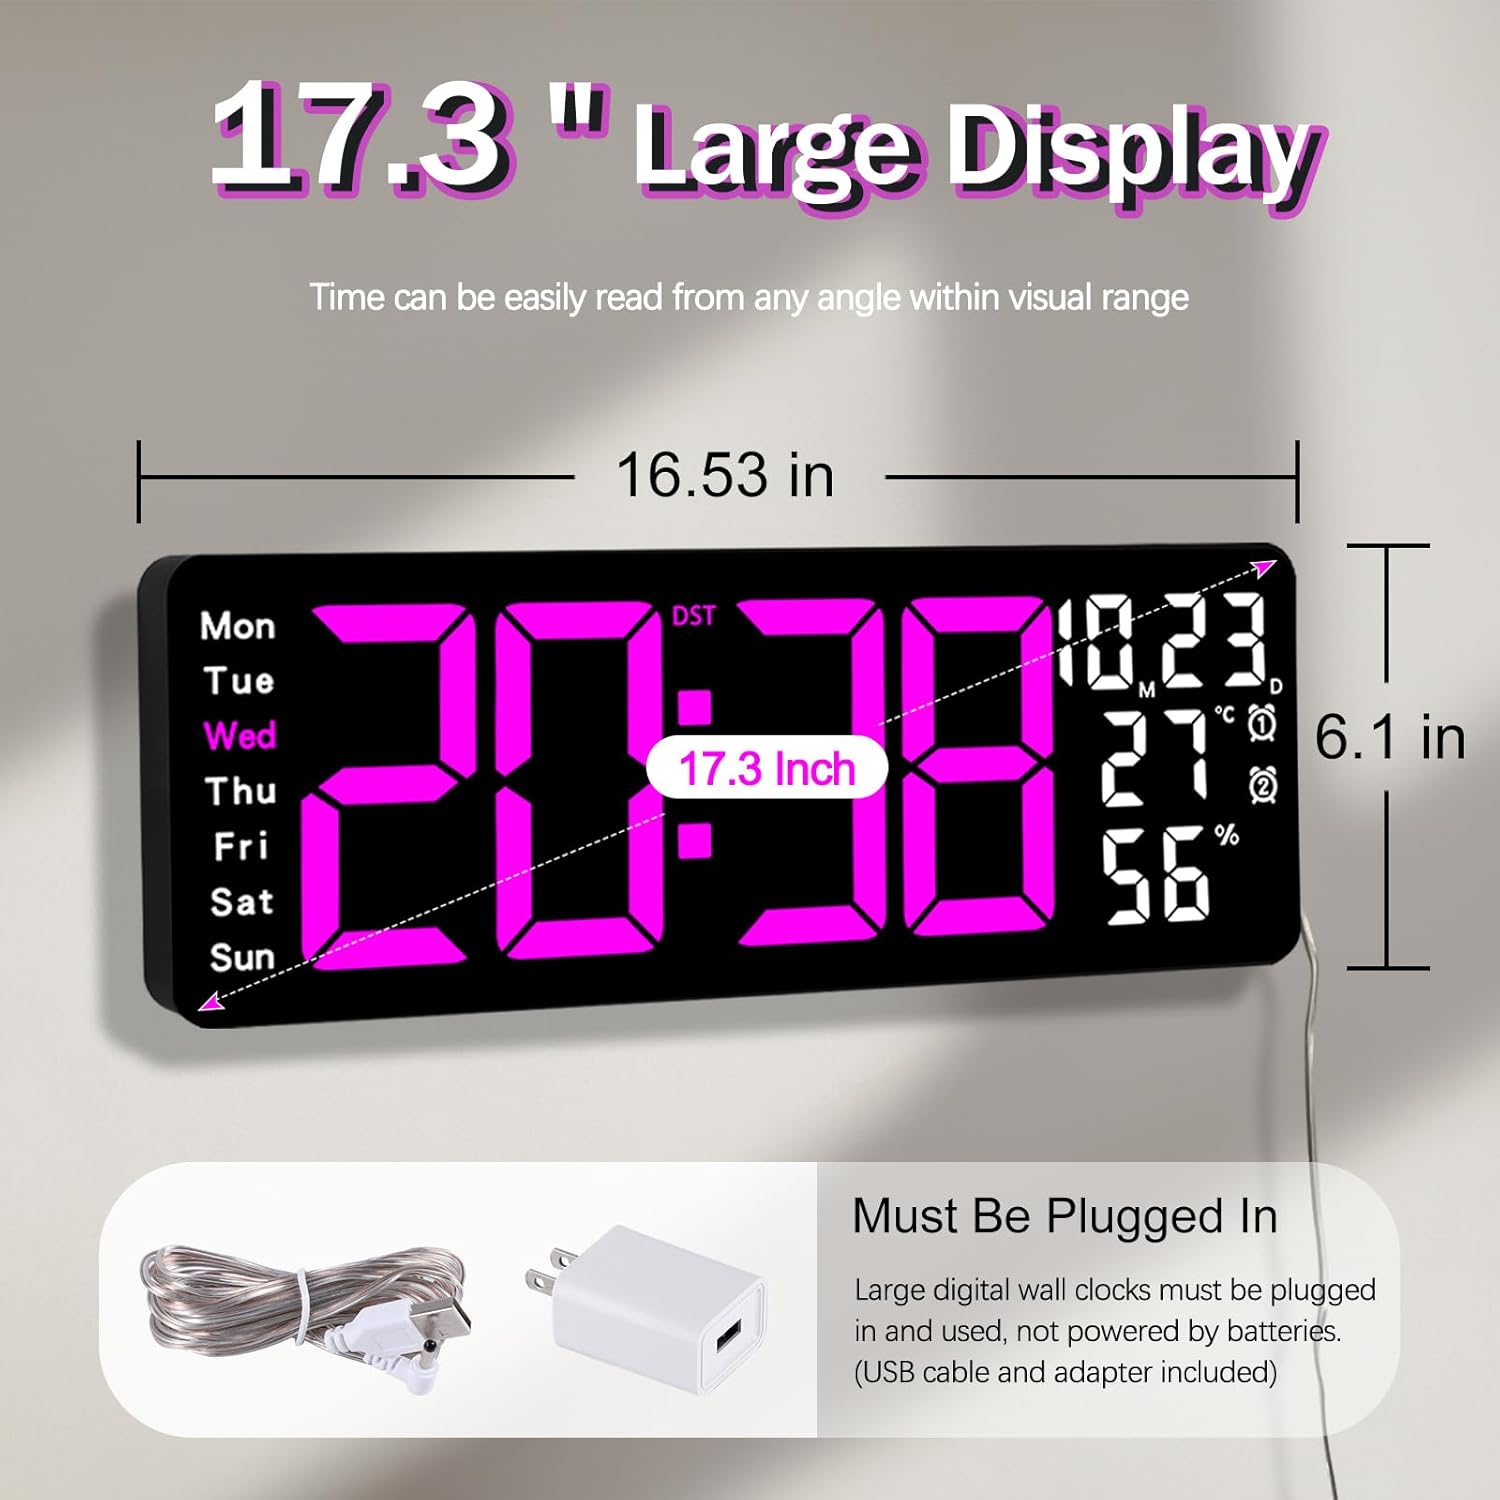
Figure 5.1: Power connection and dimensions.
5.2 Memory Battery Installation (Optional)
To retain time and settings during a power outage, install a 1 AAA battery (not included) into the memory battery compartment on the back of the clock.
- Locate the memory battery compartment on the back of the clock.
- Ouvrez le couvercle du compartiment.
- Insérez une pile AAA de 1.5 V en veillant à respecter la polarité (+/-).
- Fermez bien le couvercle du compartiment.
5.3 Montage mural
Use the included mounting template ruler and hooks for easy wall installation.
- Determine the desired location for your clock.
- Place the mounting template ruler on the wall at the desired height.
- Mark the positions for the mounting hooks according to the ruler's indications.
- Install the mounting hooks into the wall at the marked positions.
- Carefully hang the clock onto the installed hooks, ensuring it is level and secure.
6. Mode d'emploi
The clock can be operated using either the remote control or the buttons on the back.
6.1 Réglage de l'heure et de la date
Use the remote control or the "SET" button on the back of the clock.
- Appuyez sur le ENSEMBLE button (on remote or back of clock) to enter setting mode.
- Utilisez le + et - boutons pour régler la valeur clignotante (par exemple, heure, minute, année, mois, jour).
- Presse ENSEMBLE again to confirm the current setting and move to the next parameter.
- Répétez l'opération jusqu'à ce que tous les paramètres soient configurés.
6.2 12/24 Hour Format Conversion
Pour basculer entre les formats d'heure 12 heures et 24 heures :
- Appuyez sur le bouton dédié 12/24H bouton de la télécommande.
- Alternatively, during time setting, the format option will appear.

Figure 6.1: 12/24H format conversion.
6.3 Conversion d'unités de température (°C/°F)
Pour basculer entre les unités de température Celsius et Fahrenheit :
- Appuyez sur le ° C / ° F bouton de la télécommande.
6.4 Réglage de l'alarme (double alarme)
L'horloge prend en charge deux alarmes indépendantes.
- Appuyez sur le ALARME bouton sur la télécommande ou à l'arrière de l'horloge.
- Utiliser + et - pour régler l’heure de l’alarme souhaitée.
- Presse ALARME again to confirm and move to the next alarm or exit.
- To activate/deactivate an alarm, press the corresponding alarm button (e.g., AL1 or AL2) sur la télécommande.
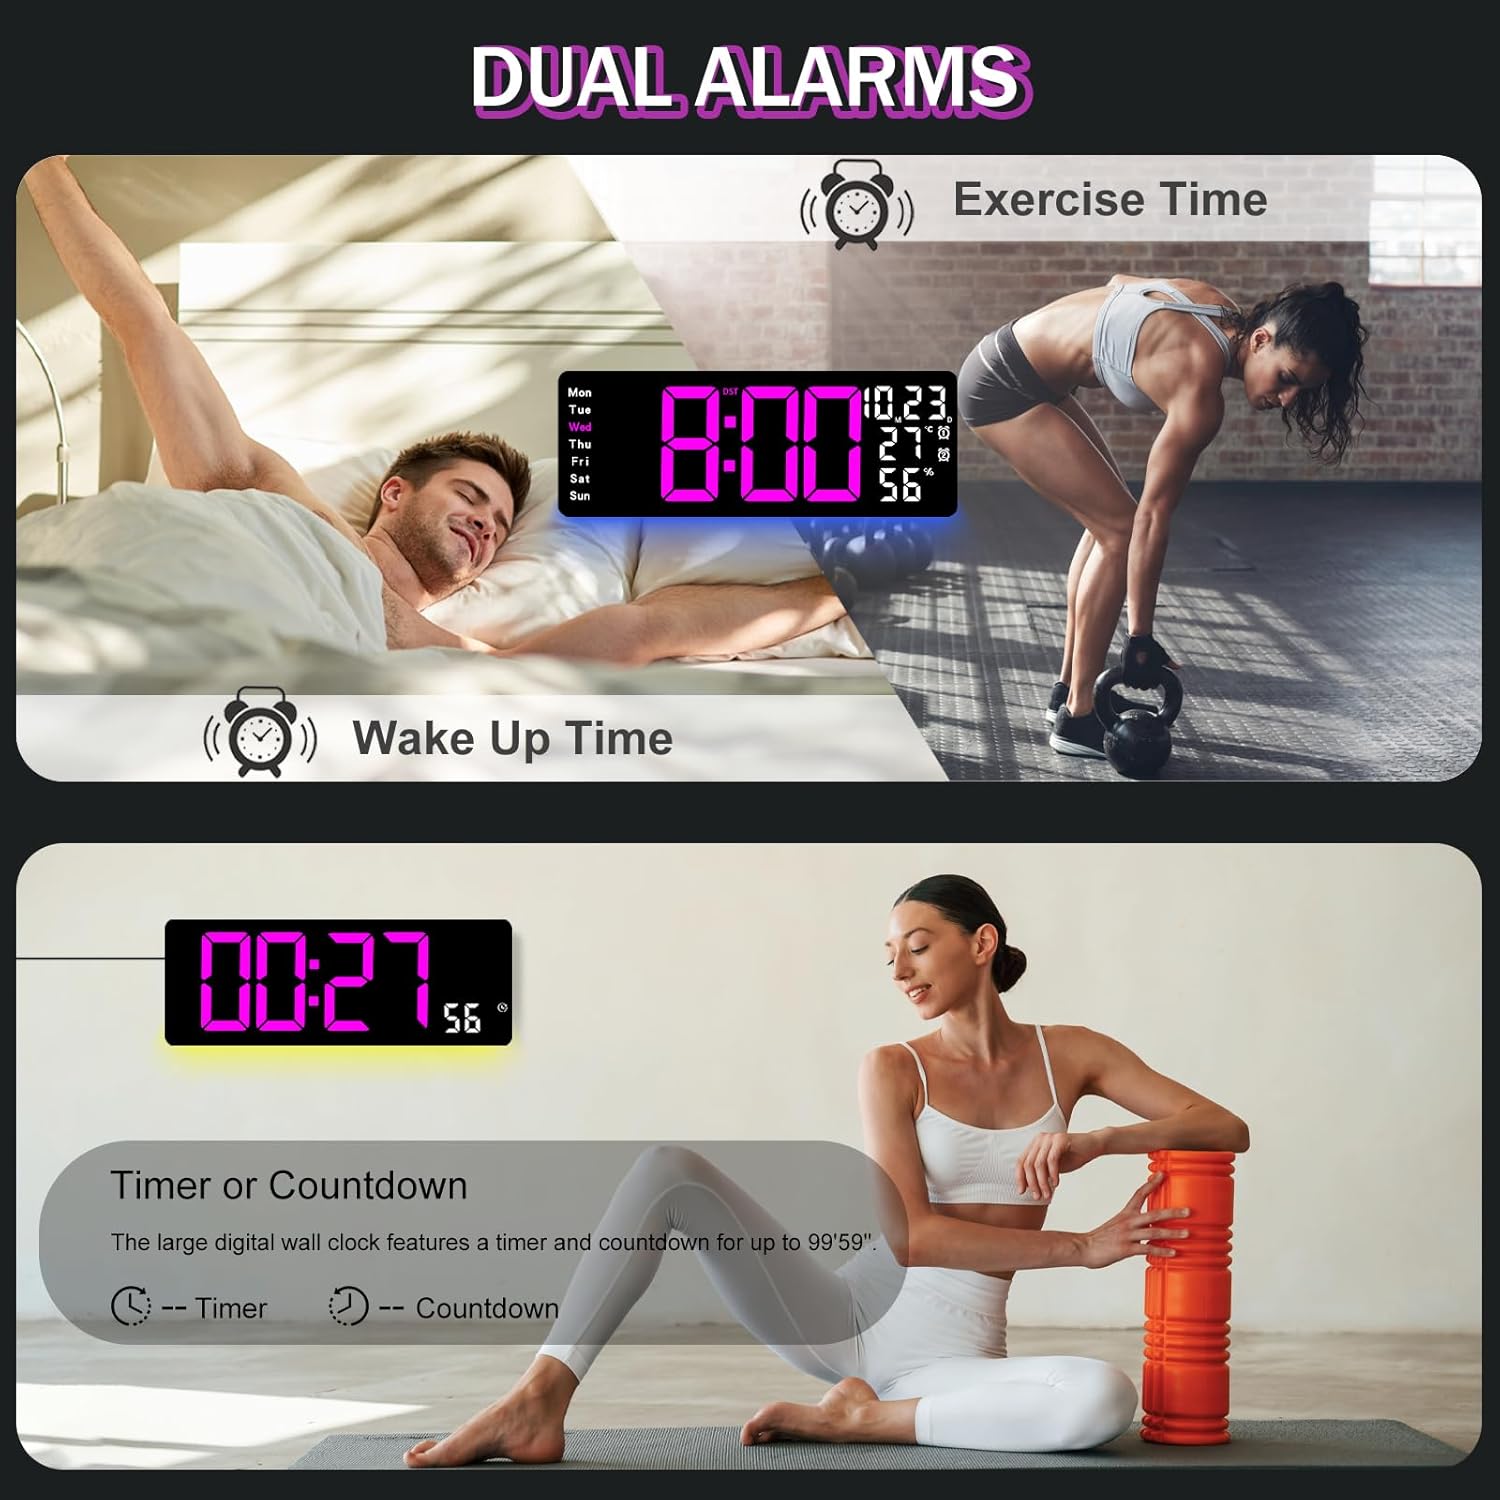
Figure 6.2: Dual alarm and timer functions.
6.5 Réglage de la luminosité
The clock offers 10 levels of brightness, adjustable manually or automatically.
- Luminosité automatique : The built-in light sensor adjusts brightness based on ambient light. Activate this mode by pressing the AUTO bouton sur la télécommande.
- Luminosité manuelle : Appuyez sur le LUMINOSITÉ button on the remote, then use + et - to select one of the 10 levels.

Figure 6.3: Custom and auto-brightness settings.

Figure 6.4: Brightness regulator illustration.
6.6 Fonctionnalités d'éclairage ambiant
The clock includes a night light feature at the bottom with multiple color options.
- Appuyez sur le LUMIÈRE button on the remote control or the back of the clock to cycle through 8 fixed colors and 1 multi-color mode.
- In multi-color mode, the colors automatically convert. Press OK to fix a favorite color.
- Adjust the brightness of the ambient light using the + et - buttons when the ambient light is active.

Figure 6.5: Multiple ambient night light options.

Figure 6.6: 9 color ambient light options.
6.7 Fonction minuterie et compte à rebours
The clock features a timer (count-up) and countdown function up to 99 minutes and 59 seconds.
- Appuyez sur le MINUTEUR bouton de la télécommande.
- Utiliser + et - to set the desired time for countdown.
- Presse DÉMARRER/ARRÊTER to begin or pause the timer/countdown.
- Presse RÉINITIALISER pour effacer la minuterie.

Figure 6.7: Timing function (count-up/countdown).
Video 6.1: Demonstration of multi-functional features including night light change, brightness control, count-up, and countdown. This video also shows the time, date, day, alarm clock, temperature, and humidity displayed on the same screen, along with 12/24 hour conversion, Celsius/Fahrenheit conversion, and DST enablement. The back design and buttons are also briefly shown.
6.8 Heure d'été (DST)
If DST is observed in your region, you can enable or disable it.
- Appuyez longuement sur le - button on the remote control to enable or disable DST. The DST indicator will appear/disappear on the display.

Figure 6.8: Enabling and disabling Daylight Saving Time.

Figure 6.9: Daylight Saving Time (DST) functionality.
6.9 Utilisation de la télécommande
The remote control provides convenient access to all clock functions without needing to reach the clock directly.

Figure 6.10: Remote control and its functions.

Figure 6.11 : Télécommande en cours d'utilisation.
- Ensure the remote control has 2 AAA batteries installed (not included).
- Point the remote control directly at the clock for optimal response.
- Each button on the remote corresponds to a specific function as described in this manual.
7. Entretien
- Clean the clock's display and body with a soft, dry cloth. Avoid abrasive cleaners or solvents.
- Ensure the power adapter and cord are free from damage.
- Replace the memory battery annually to ensure settings are retained during power interruptions.
8. Dépannage
| Problème | Cause possible | Solution |
|---|---|---|
| L'affichage de l'horloge est éteint. | Pas d'alimentation électrique. | Check if the power adapter is securely plugged into the clock and the outlet. Ensure the outlet is functional. |
| La télécommande ne fonctionne pas. | Low or dead batteries in remote; obstruction; remote out of range. | Replace remote batteries (2 AAA). Ensure no obstructions between remote and clock. Point directly at the clock within effective range. |
| Paramètres perdus après une coupure de couranttage. | No memory battery or dead memory battery. | Install a fresh 1.5V AAA battery in the memory compartment. |
| Lecture de température/humidité incorrecte. | Sensor interference or placement. | Ensure the clock is not placed near heat sources, direct sunlight, or in areas with extreme drafts. Allow time for the sensor to stabilize. |
| Ambient light not changing colors. | Stuck in fixed color mode. | Press the LIGHT button on the remote to cycle through modes. If stuck on a fixed color, press the OK button to release it from fixed mode. |
9. Spécifications
| Fonctionnalité | Détail |
|---|---|
| Marque | JoFomp |
| Numéro de modèle | 6669 |
| Type d'affichage | LED numérique |
| Taille de l'écran | 17.3 pouces |
| Dimensions du produit | 16.5 po L x 6.7 po H |
| Source d'énergie | Alimentation filaire (adaptateur 5V/2A inclus) |
| Batterie mémoire | 1 x AAA (non inclus) |
| Niveaux de luminosité | 10 (Auto/Manual) |
| Couleurs de la lumière ambiante | 8 Fixed + 1 Multi-color |
| Caractéristiques spéciales | Large Display, Adjustable Brightness, Temperature Display, Humidity Display, Dual Alarms, Timer, Countdown, DST, Remote Control |
| Type de montage | Support mural |
| Poids de l'article | 1.95 livres |
10. Garantie et assistance
JoFomp products are designed for reliability and performance. For warranty information or technical support, please refer to the contact details provided with your purchase or visit the official JoFomp webConsultez le site. Conservez votre reçu d'achat comme preuve d'achat.