1. Introduction
This manual provides detailed instructions for the assembly, installation, and maintenance of your NEWWAY NW1 PC Case. Designed for versatility and aesthetics, the NW1 supports ATX, Micro-ATX, and ITX motherboards, features a distinctive wooden front panel, and includes efficient cooling solutions. Please read this manual thoroughly before beginning installation to ensure proper setup and optimal performance.

Image 1.1 : Vue de face en biais view of the NEWWAY NW1 PC Case, showcasing the wooden front panel and tempered glass side panel.
2. Principales caractéristiques
- Compatibilité de la carte mère : Supports ATX, Micro-ATX, and ITX form factors.
- Design élégant : Features a genuine wooden front panel and a tempered glass side panel.
- Refroidissement avancé : Compatible with watercooling systems up to 360mm. Includes three 140mm PWM fans for enhanced airflow.
- Dégagement des composants : Accommodates CPU coolers up to 181mm in height and graphics cards up to 410mm in length.
- Stockage flexible : Offers three dedicated slots for 3.5" HDDs or 2.5" SSDs.
- Ports d'E/S avant : Equipped with USB Type-C, USB 3.0, and audio ports for convenient connectivity.
- Dimensions: L430mm x W235mm x H430mm.
- Poids: 6.8 kg.
3. Configuration et installation des composants
Before installing any components, ensure the PC case is placed on a stable, flat surface.
3.1. Préparation du dossier
- Carefully remove the tempered glass side panel by unscrewing the thumb screws at the rear of the case and sliding the panel off.
- Remove the rear panel if necessary for cable management access.
3.2. Installation de la carte mère
The NW1 case supports ATX, Micro-ATX, and ITX motherboards.
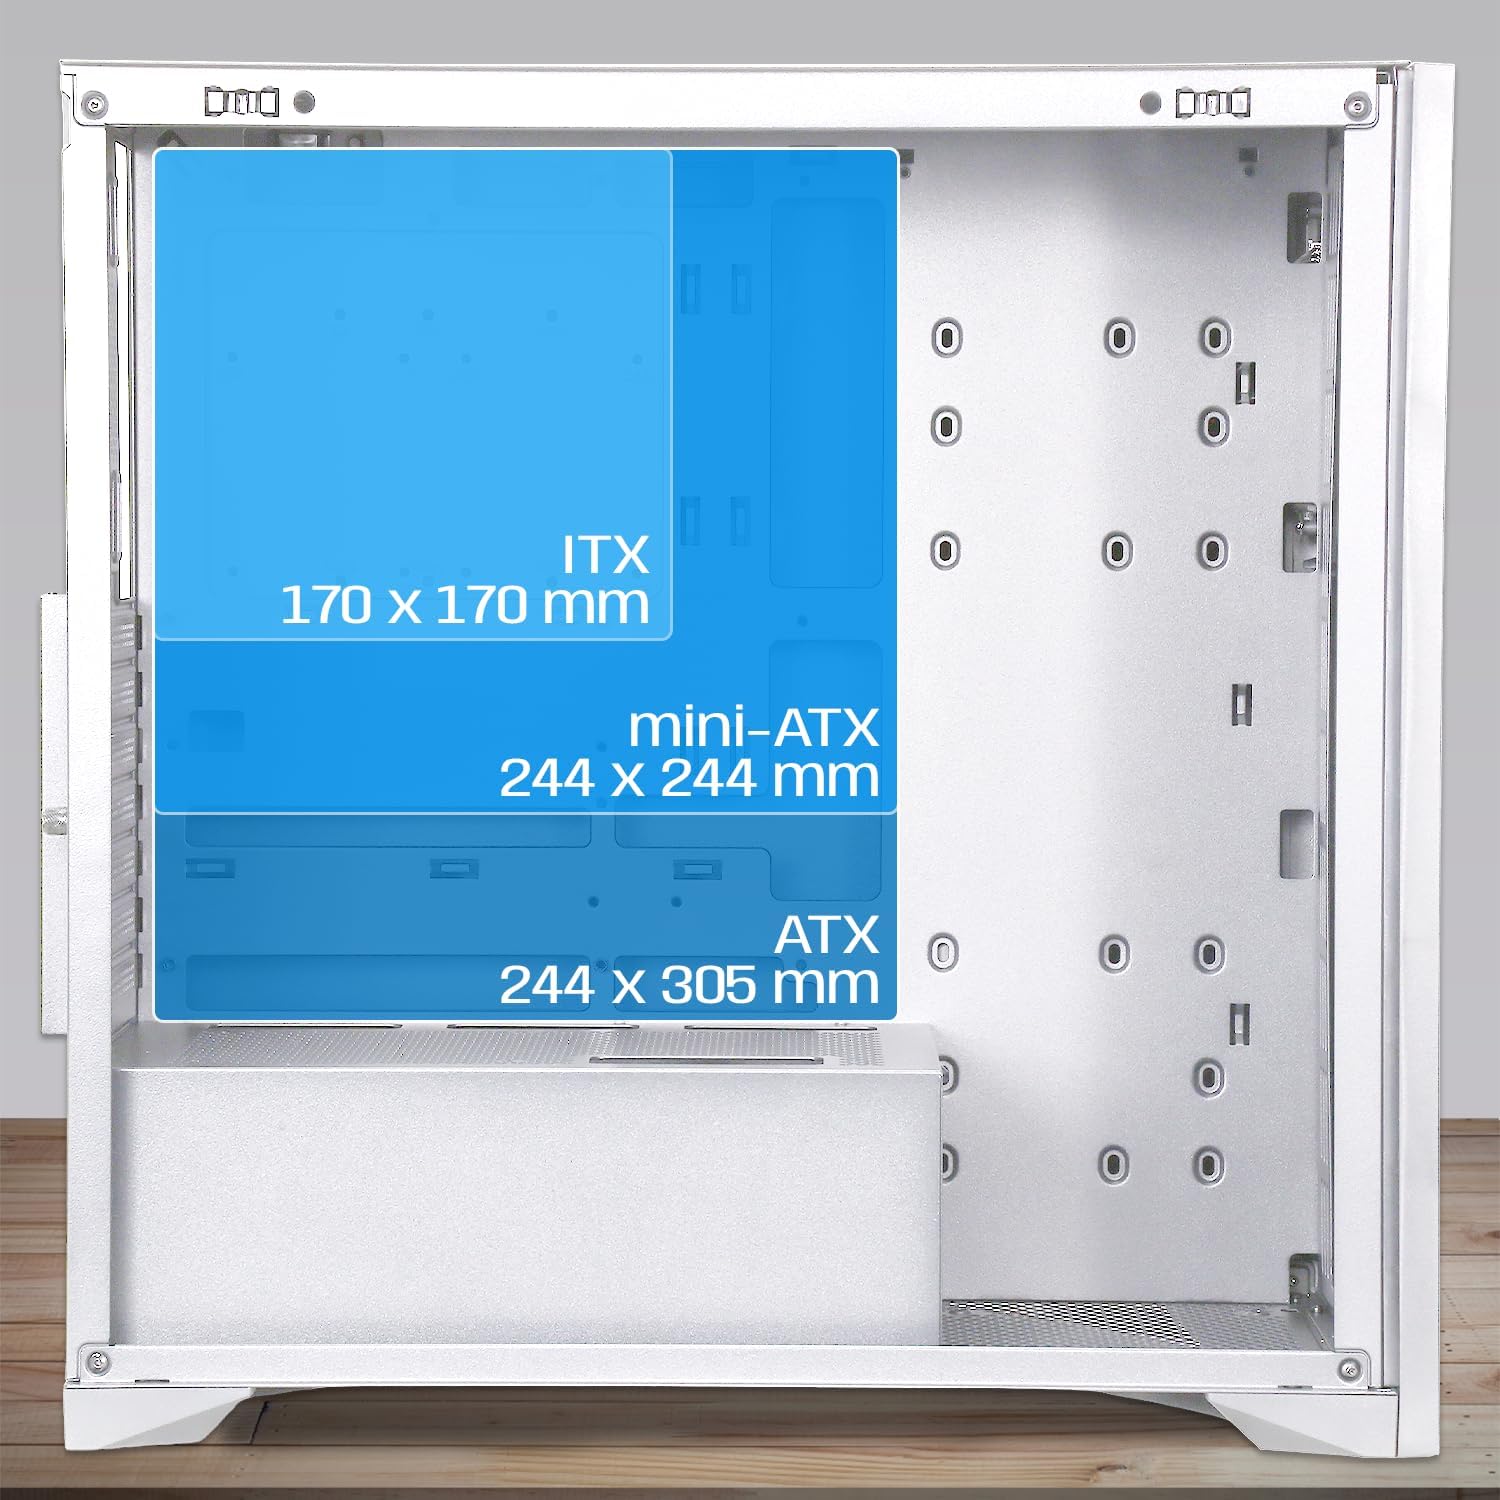
Image 3.1: Diagram illustrating motherboard compatibility and maximum dimensions for ATX, Micro-ATX, and ITX form factors within the case.
- Installez la plaque d'E/S dans l'emplacement prévu à cet effet à l'arrière du boîtier.
- Align your motherboard with the pre-installed standoffs. Ensure the standoffs match your motherboard's form factor.
- Fixez la carte mère à l'aide des vis fournies.
3.3. CPU Cooler and Graphics Card Installation
L'affaire fournit ampl'espace pour les composants de grande taille.
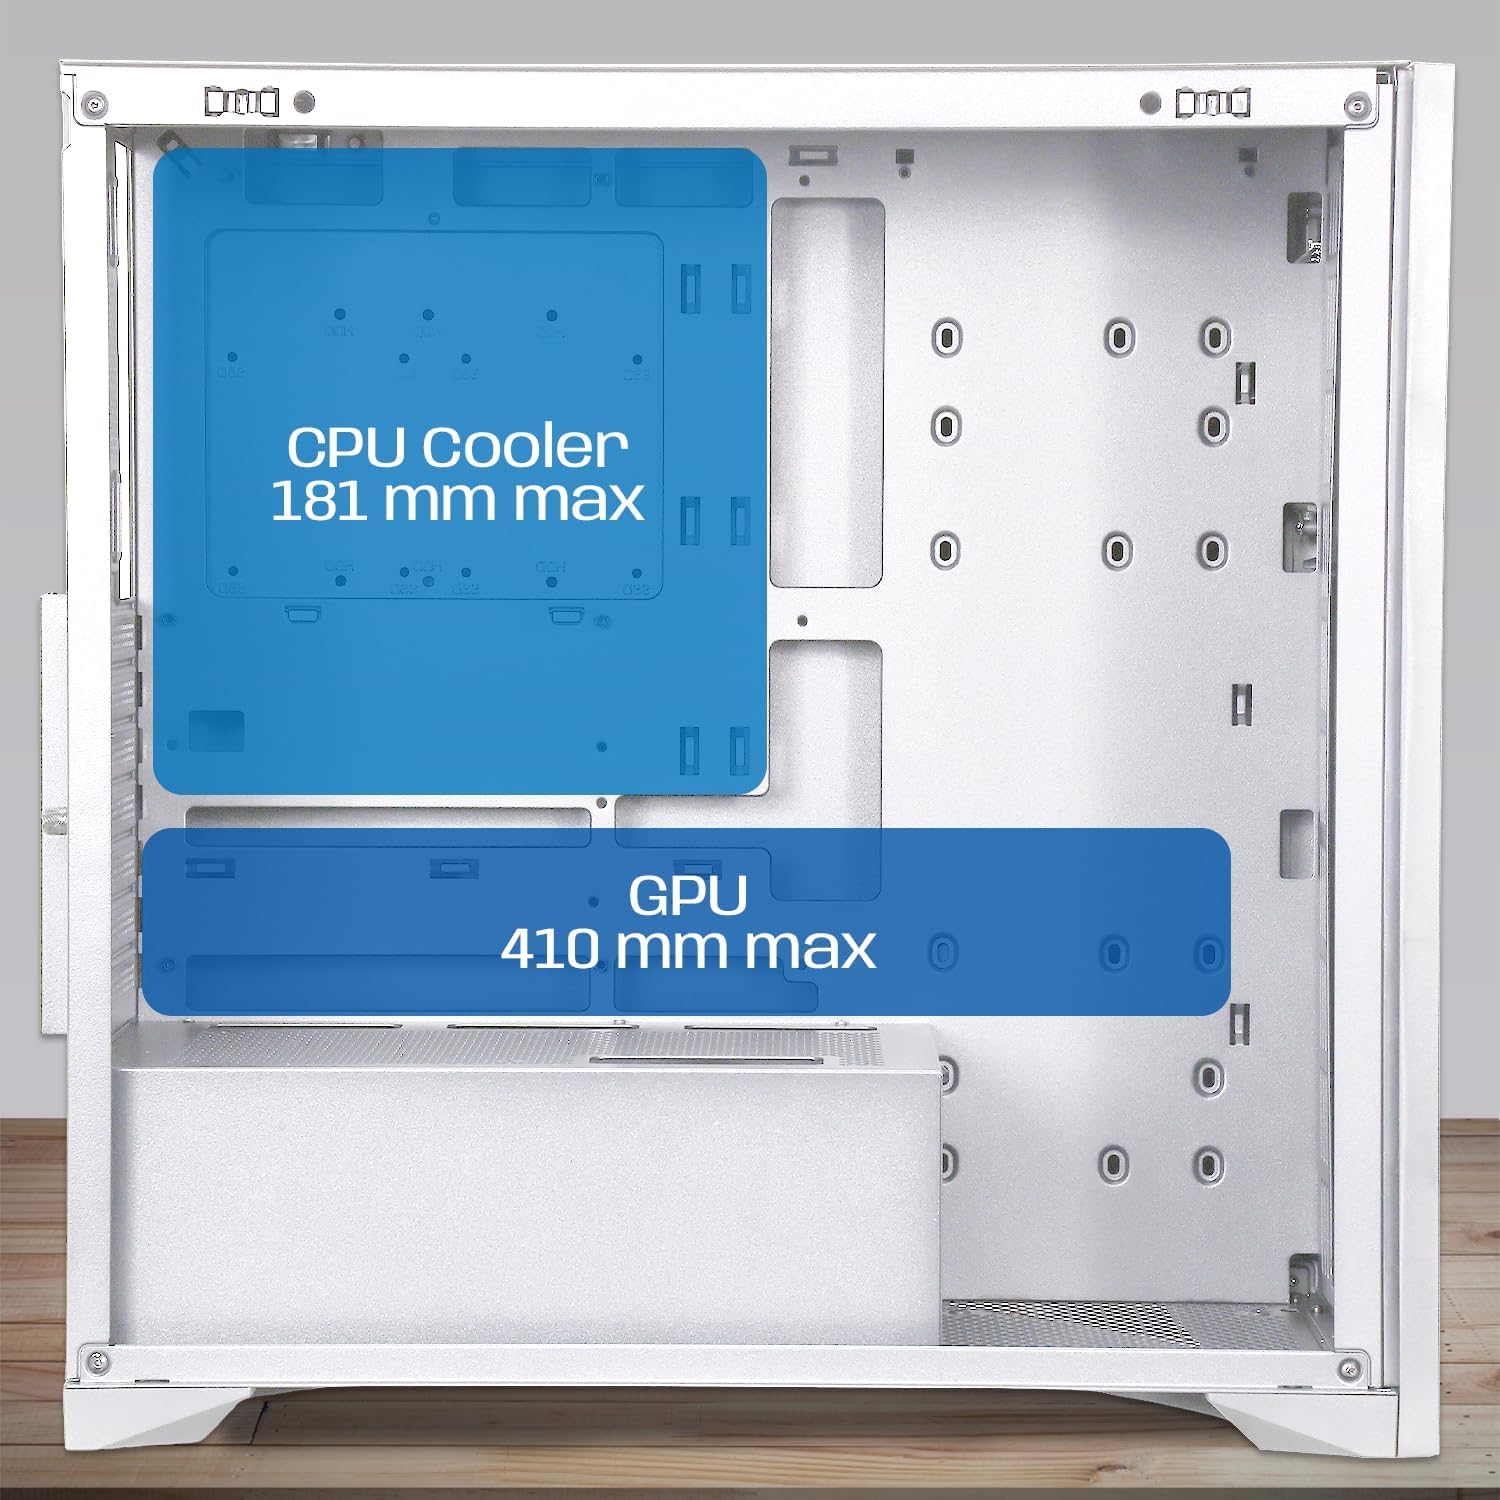
Image 3.2: Diagram showing maximum clearance for CPU coolers (181mm) and graphics cards (410mm) inside the NEWWAY NW1 case.
- Refroidisseur de processeur : Install your CPU cooler according to its manufacturer's instructions. The case supports coolers up to 181mm in height.
- Carte graphique (GPU) : Remove the necessary expansion slot covers at the rear. Insert your graphics card into the PCIe slot on your motherboard and secure it with screws. The case supports GPUs up to 410mm in length.
3.4. Installation du périphérique de stockage
The NW1 offers multiple storage options.

Image 3.3: Diagram illustrating the various mounting points for 2.5" SSDs and 3.5" HDDs within the case.
- Locate the 3.5" HDD/2.5" SSD drive bays.
- Installez vos disques à l'aide des vis fournies.
3.5. Installation du bloc d'alimentation (PSU)
Le bloc d'alimentation se monte en bas du boîtier.
- Glissez le bloc d'alimentation dans son compartiment prévu à cet effet, situé à l'arrière, en bas du boîtier.
- Fixez le bloc d'alimentation à l'aide de vis situées à l'arrière du boîtier.
3.6. Installation du ventilateur et du radiateur
The case comes with three 140mm PWM fans pre-installed. Additional cooling can be added.

Image 3.4: Diagram indicating potential fan mounting locations, including the pre-installed front fans and a rear exhaust fan.
- Connect the pre-installed 140mm PWM fans to your motherboard's fan headers.
- For watercooling, install radiators up to 360mm in the designated mounting points (e.g., front or top, depending on size).
3.7. Connexion des E/S du panneau avant
Connect the front panel cables to the corresponding headers on your motherboard.
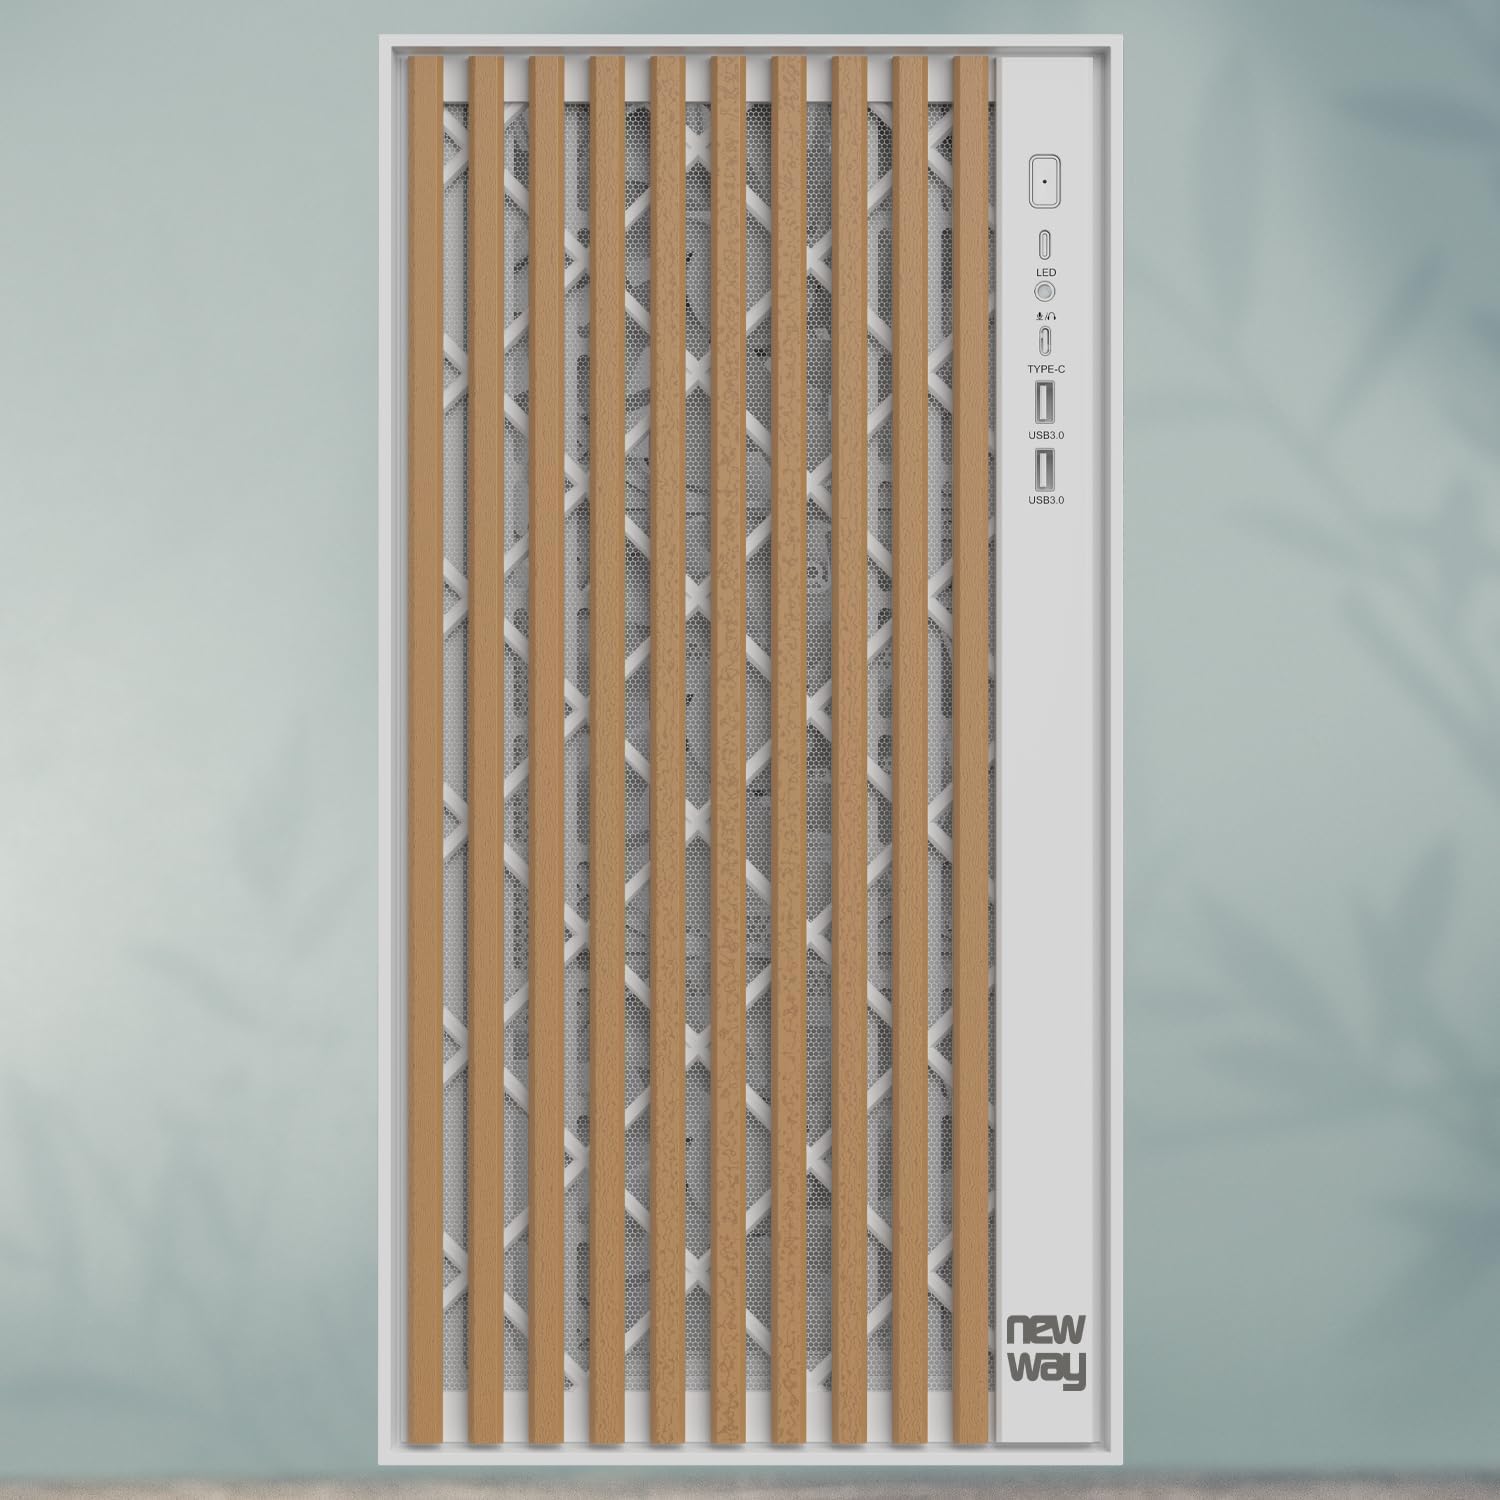
Image 3.5 : Gros plan view of the front panel I/O, showing the LED indicator, USB Type-C port, and USB 3.0 ports.
- Connect the USB Type-C cable to the motherboard's Type-C header.
- Connect the USB 3.0 cables to the motherboard's USB 3.0 headers.
- Connectez le câble audio HD au connecteur audio de la carte mère.
- Connect the Power SW, Reset SW, HDD LED, and Power LED cables to the motherboard's front panel headers, ensuring correct polarity for LEDs.
3.8. Gestion des câbles
Utilisez les ouvertures et les points de fixation prévus à l'arrière du plateau de la carte mère pour un câblage propre. Cela améliore la circulation de l'air et l'esthétique.
3.9. Assemblage final
- Once all components are installed and cables are managed, reattach the rear panel (if removed).
- Remettez soigneusement en place le panneau latéral en verre trempé et fixez-le avec les vis moletées.
4. Mode d'emploi
After completing the assembly, connect your peripherals (monitor, keyboard, mouse, power cable) to your system.
- Assurez-vous que tous les câbles sont correctement connectés.
- Appuyez sur le bouton d'alimentation situé sur le panneau avant pour allumer votre ordinateur.
- The LED indicator on the front panel will illuminate when the system is powered on.
- To restart the system, press the reset button on the front panel.
5. Entretien
Un entretien régulier contribue à garantir des performances optimales et une longue durée de vie aux composants de votre PC.
- Filtres à poussière : The NW1 case is equipped with dust filters. Regularly clean these filters to maintain good airflow and prevent dust buildup inside the case. Gently remove the filters and clean them with compressed air or by rinsing with water (ensure they are completely dry before reinstallation).
- Nettoyage extérieur : Wipe the exterior surfaces, including the wooden front panel and tempered glass, with a soft, damp Chiffon. Évitez les nettoyants abrasifs ou les solvants.
- Nettoyage intérieur: Periodically open the case and use compressed air to remove dust from internal components and fans.
6. Dépannage
En cas de problème, reportez-vous aux étapes de dépannage courantes suivantes :
- Le système ne s'allume pas :
- Check if the power supply unit (PSU) is switched on at the back.
- Ensure all power cables (24-pin ATX, 8-pin CPU, PCIe for GPU) are securely connected to the motherboard and components.
- Vérifiez que le câble de l'interrupteur d'alimentation du panneau avant est correctement connecté au connecteur de la carte mère.
- Ventilateurs non fonctionnels :
- Ensure fan cables are properly connected to the motherboard fan headers.
- Vérifiez les paramètres du BIOS/UEFI pour le contrôle du ventilateur.
- Aucune sortie d'affichage :
- Confirm your monitor cable is connected to the graphics card (not the motherboard, unless using integrated graphics).
- Réinsérez la carte graphique dans son emplacement PCIe.
- Check if the graphics card requires additional power cables from the PSU.
- Les ports USB ne fonctionnent pas :
- Ensure the front panel USB cables are correctly connected to the motherboard's USB headers.
- Vérifiez les pilotes de la carte mère.
For further assistance, please contact NEWWAY customer support.
7. Spécifications techniques
| Nom du modèle | NW1 |
| Numéro de produit | ON-CA-2403 |
| Type de cas | Tour intermédiaire |
| Compatibilité de la carte mère | ATX, Micro ATX, ITX |
| Matériel | Tempered Glass, Metal, Wood |
| Couleur | Blanc |
| Dimensions (L x l x H) | 430 mm x 235 mm x 430 mm |
| Poids | 6.8 kg |
| Dégagement du refroidisseur de processeur | Jusqu'à 181 mm |
| Dégagement de longueur du GPU | Jusqu'à 410 mm |
| Watercooling Support | Radiateurs jusqu'à 360 mm |
| Ventilateurs inclus | 3 x 140mm PWM fans |
| Baies de stockage | 3 x 3.5" HDD / 2.5" SSD |
| Ports d'E / S avant | USB Type-C, USB 3.0, Audio |
| Montage du bloc d'alimentation | Montage par le bas |
8. Garantie et assistance
The NEWWAY NW1 PC Case comes with a Garantie constructeur d'un anCette garantie couvre les défauts de matériaux et de fabrication dans des conditions normales d'utilisation.
For warranty claims, technical support, or any inquiries, please contact NEWWAY customer service through their official website ou le détaillant où le produit a été acheté.
Fabricant: VOIE OPTIMALE
Pays d'origine : Chine