1. Introduction
Welcome to the user manual for your Emerson CKSS7071 Sunrise Smartset Alarm Clock Radio. This device is designed to enhance your daily routine with its unique features, including a sunrise simulation, soothing sound options, Bluetooth connectivity, and an 8-color dimmable LED display. Please read this manual thoroughly to understand the full functionality and ensure proper use and care of your new alarm clock radio.
Vidéo 1: Surview of the Emerson CKSS7071 Sunrise Smartset Alarm Clock Radio. This video demonstrates the key features and design of the product.
2. Informations importantes sur la sécurité
- Lisez toutes les instructions avant d'utiliser l'appareil.
- Conservez ces instructions pour référence ultérieure.
- N’utilisez pas cet appareil à proximité de l’eau.
- Nettoyer uniquement avec un chiffon sec.
- Ne pas obstruer les ouvertures de ventilation. Procéder à l'installation conformément aux instructions du fabricant.
- Ne pas installer à proximité de sources de chaleur telles que radiateurs, bouches de chauffage, poêles ou autres appareils (y compris amp(échangeurs thermiques) qui produisent de la chaleur.
- Protégez le cordon d’alimentation pour éviter qu’il ne soit piétiné ou pincé, en particulier au niveau des fiches, des prises de courant et du point de sortie de l’appareil.
- Utilisez uniquement les accessoires spécifiés par le fabricant.
- Débranchez cet appareil en cas d’orage ou lorsqu’il n’est pas utilisé pendant de longues périodes.
- Confiez toute réparation à un technicien qualifié. Une réparation est nécessaire lorsque l'appareil a été endommagé de quelque façon que ce soit, par exemple si le cordon d'alimentation ou la prise sont endommagés, si du liquide a été renversé ou si des objets sont tombés à l'intérieur de l'appareil, si l'appareil a été exposé à la pluie ou à l'humidité, s'il ne fonctionne pas normalement ou s'il est tombé.
3. Contenu du colis
Vérifiez que tous les articles sont présents à l'ouverture du colis :
- Emerson CKSS7071 Sunrise Smartset Alarm Clock Radio
- Adaptateur secteur
- Manuel d'utilisation
4. Produit terminéview
4.1 avant View

Image 1: Devant view of the alarm clock, featuring the digital time display and the sunrise simulation light panel.
The front of the unit features the main 1.2-inch LED time display and the large circular light panel for sunrise simulation and ambient lighting. Indicators for AM/PM, Alarm 1/2, and Bluetooth status are also visible.
4.2 Côté View (Contrôles)
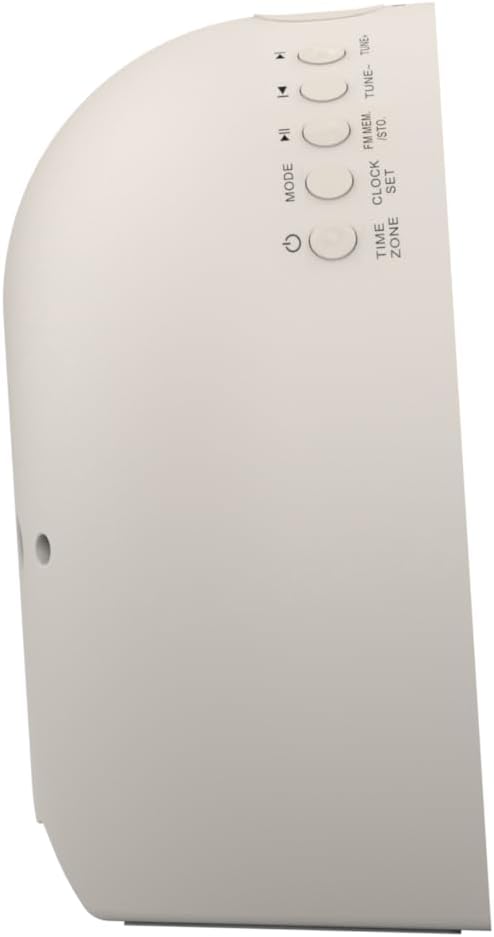
Image 2: Côté view du réveil, en mettant en évidence les boutons de commande des différentes fonctions.
The side panel houses the primary control buttons, including Power, Mode, Clock Set, Time Zone, Tune/Skip, and Volume controls. These buttons are used for setting time, alarms, and navigating audio functions.
4.3 Arrière View

Image 3: Arrière view of the alarm clock, showing the speaker grille and power connection port.
The rear of the unit features the main speaker grille and the power input port for connecting the AC adapter.
5. Installation
5.1 Connexion d'alimentation
- Plug the AC power adapter into the DC IN jack located on the back of the unit.
- Plug the other end of the adapter into a standard wall outlet (AC 100-240V, 50/60Hz).
- L'appareil s'allumera automatiquement.
5.2 SmartSet Automatic Time Setting
The SmartSet system automatically sets the correct time and date as soon as you plug in the unit. It also maintains time and alarm settings during power disruptions or outages, provided the button cell battery is installed.
5.3 Installation de la batterie de secours
A button cell battery (CR2032, included) is required for battery backup. This ensures that time and alarm settings are retained during a power outage.
- Repérez le compartiment à piles sur la partie inférieure de l'appareil.
- Ouvrez le couvercle du compartiment à piles.
- Insert one CR2032 button cell battery, ensuring the correct polarity (+/-).
- Fermez soigneusement le couvercle du compartiment à piles.
6. Mode d'emploi
6.1 Réglage manuel de l'horloge
- Appuyez et maintenez enfoncé le RÉGLAGE DE L'HORLOGE bouton. Les chiffres des heures clignoteront.
- Utilisez le RÉGLAGE -/+ boutons pour régler l'heure. Appuyez sur RÉGLAGE DE L'HORLOGE pour confirmer.
- Les chiffres des minutes clignoteront. Utilisez le RÉGLAGE -/+ boutons pour régler les minutes. Appuyez sur RÉGLAGE DE L'HORLOGE pour confirmer.
- Poursuivez cette procédure pour définir l'année, le mois et le jour.
- Presse RÉGLAGE DE L'HORLOGE pour quitter le mode de réglage de l'heure.
6.2 Réglage des alarmes (Alarme 1 et Alarme 2)
The unit features dual alarms. Follow these steps for each alarm:
- Appuyez et maintenez enfoncé le ALARME 1 or ALARME 2 bouton. Les chiffres de l'heure de l'alarme clignoteront.
- Utilisez le RÉGLAGE -/+ Appuyez sur les boutons correspondants pour régler l'heure de l'alarme. ALARME bouton pour confirmer.
- Les chiffres des minutes de l'alarme clignoteront. Utilisez le RÉGLAGE -/+ Appuyez sur les boutons correspondants pour régler les minutes de l'alarme. ALARME bouton pour confirmer.
- Select the alarm source (Buzzer, FM Radio, or Soothing Sound). Press the respective ALARME bouton pour confirmer.
- Réglez le volume de l'alarme à l'aide du VOL-/+ buttons. Press the respective ALARME bouton pour confirmer.
- The alarm is now set. The alarm indicator (AL1 or AL2) will appear on the display.
6.3 Simulation du lever du soleil
The sunrise simulation feature gradually brightens the light panel before your set alarm time, mimicking a natural sunrise to gently wake you.
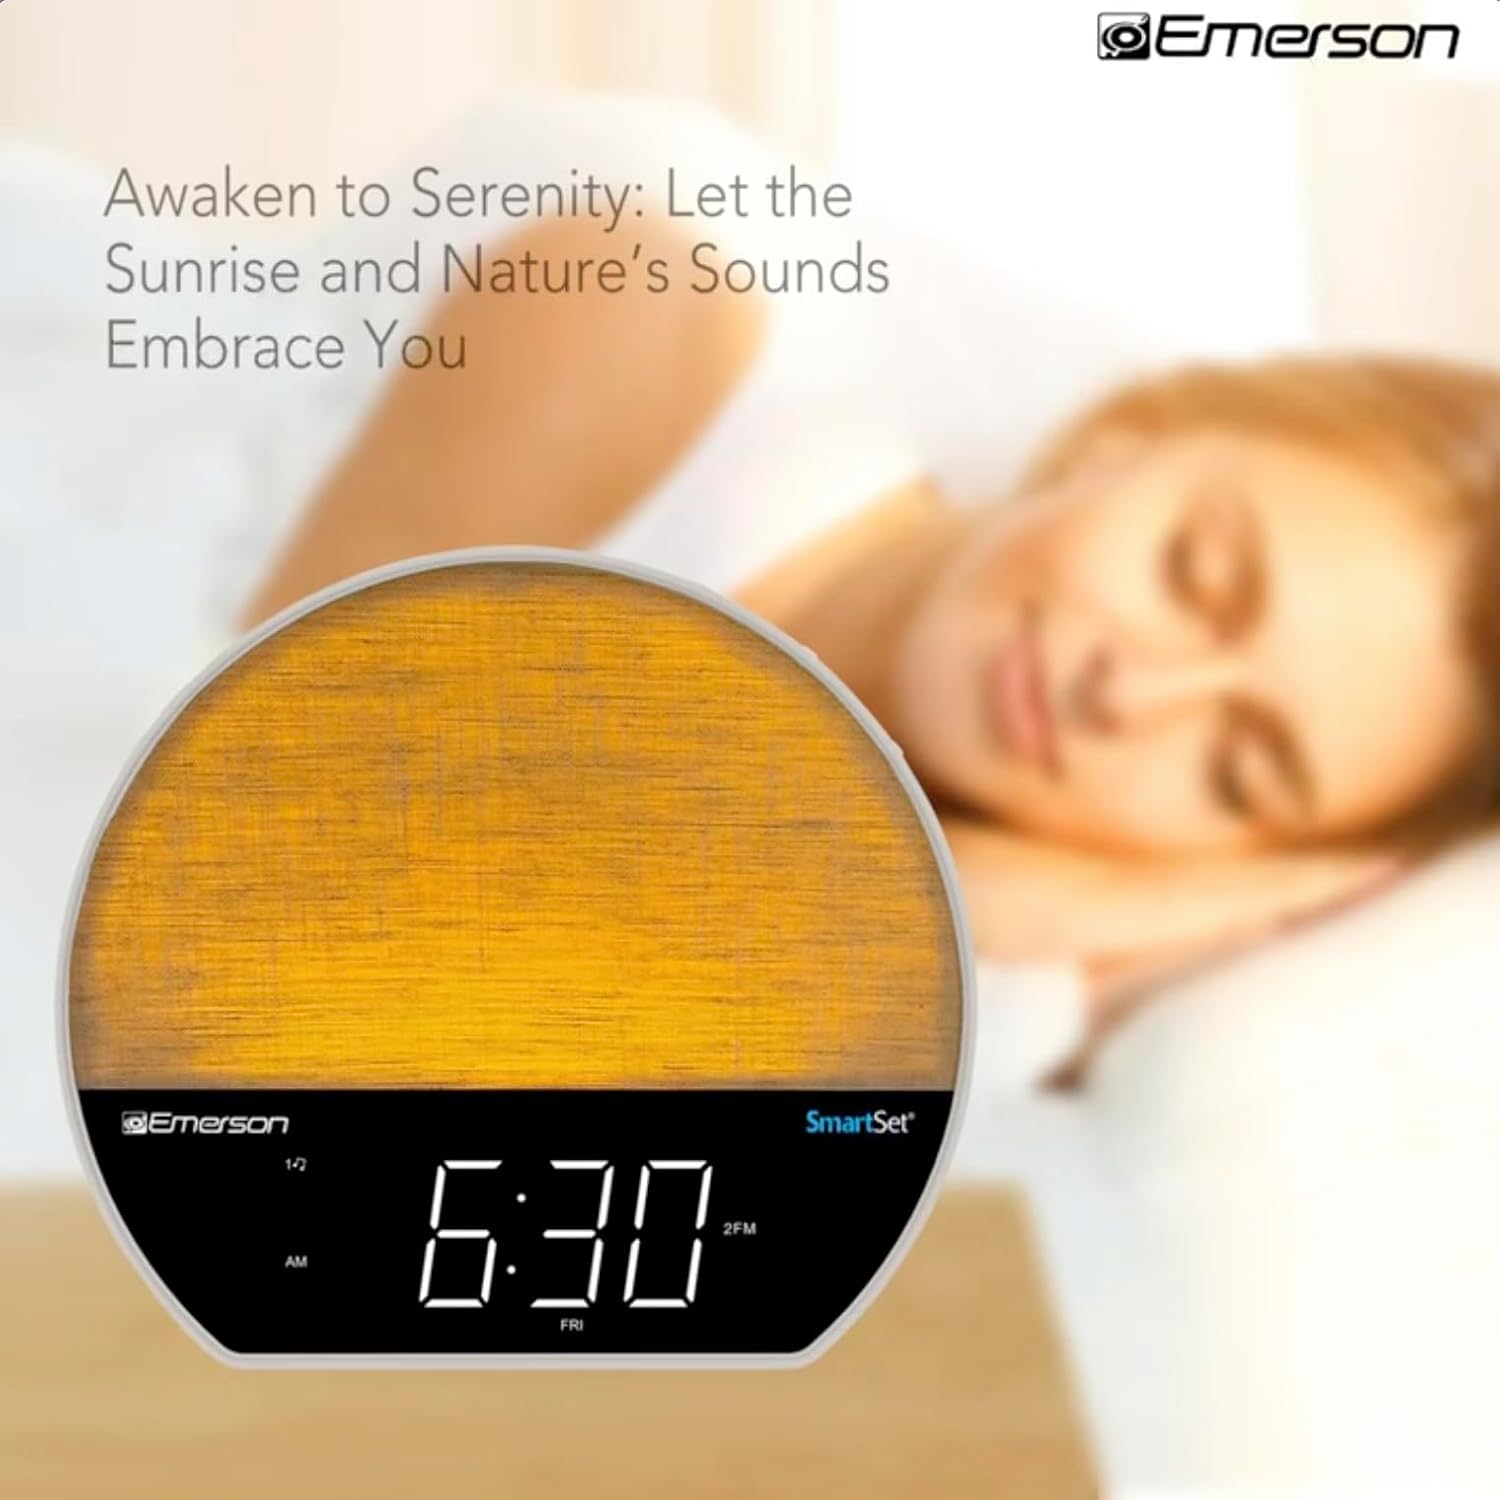
Image 4: The alarm clock simulating a sunrise with a warm, increasinintensité lumineuse g.
To activate, ensure the sunrise option is selected during alarm setup. The light will begin to brighten 30 minutes before the alarm sounds.
6.4 Soothing Sounds and White Noise
The unit includes 6 soothing sounds and white noise to help with relaxation or waking up.
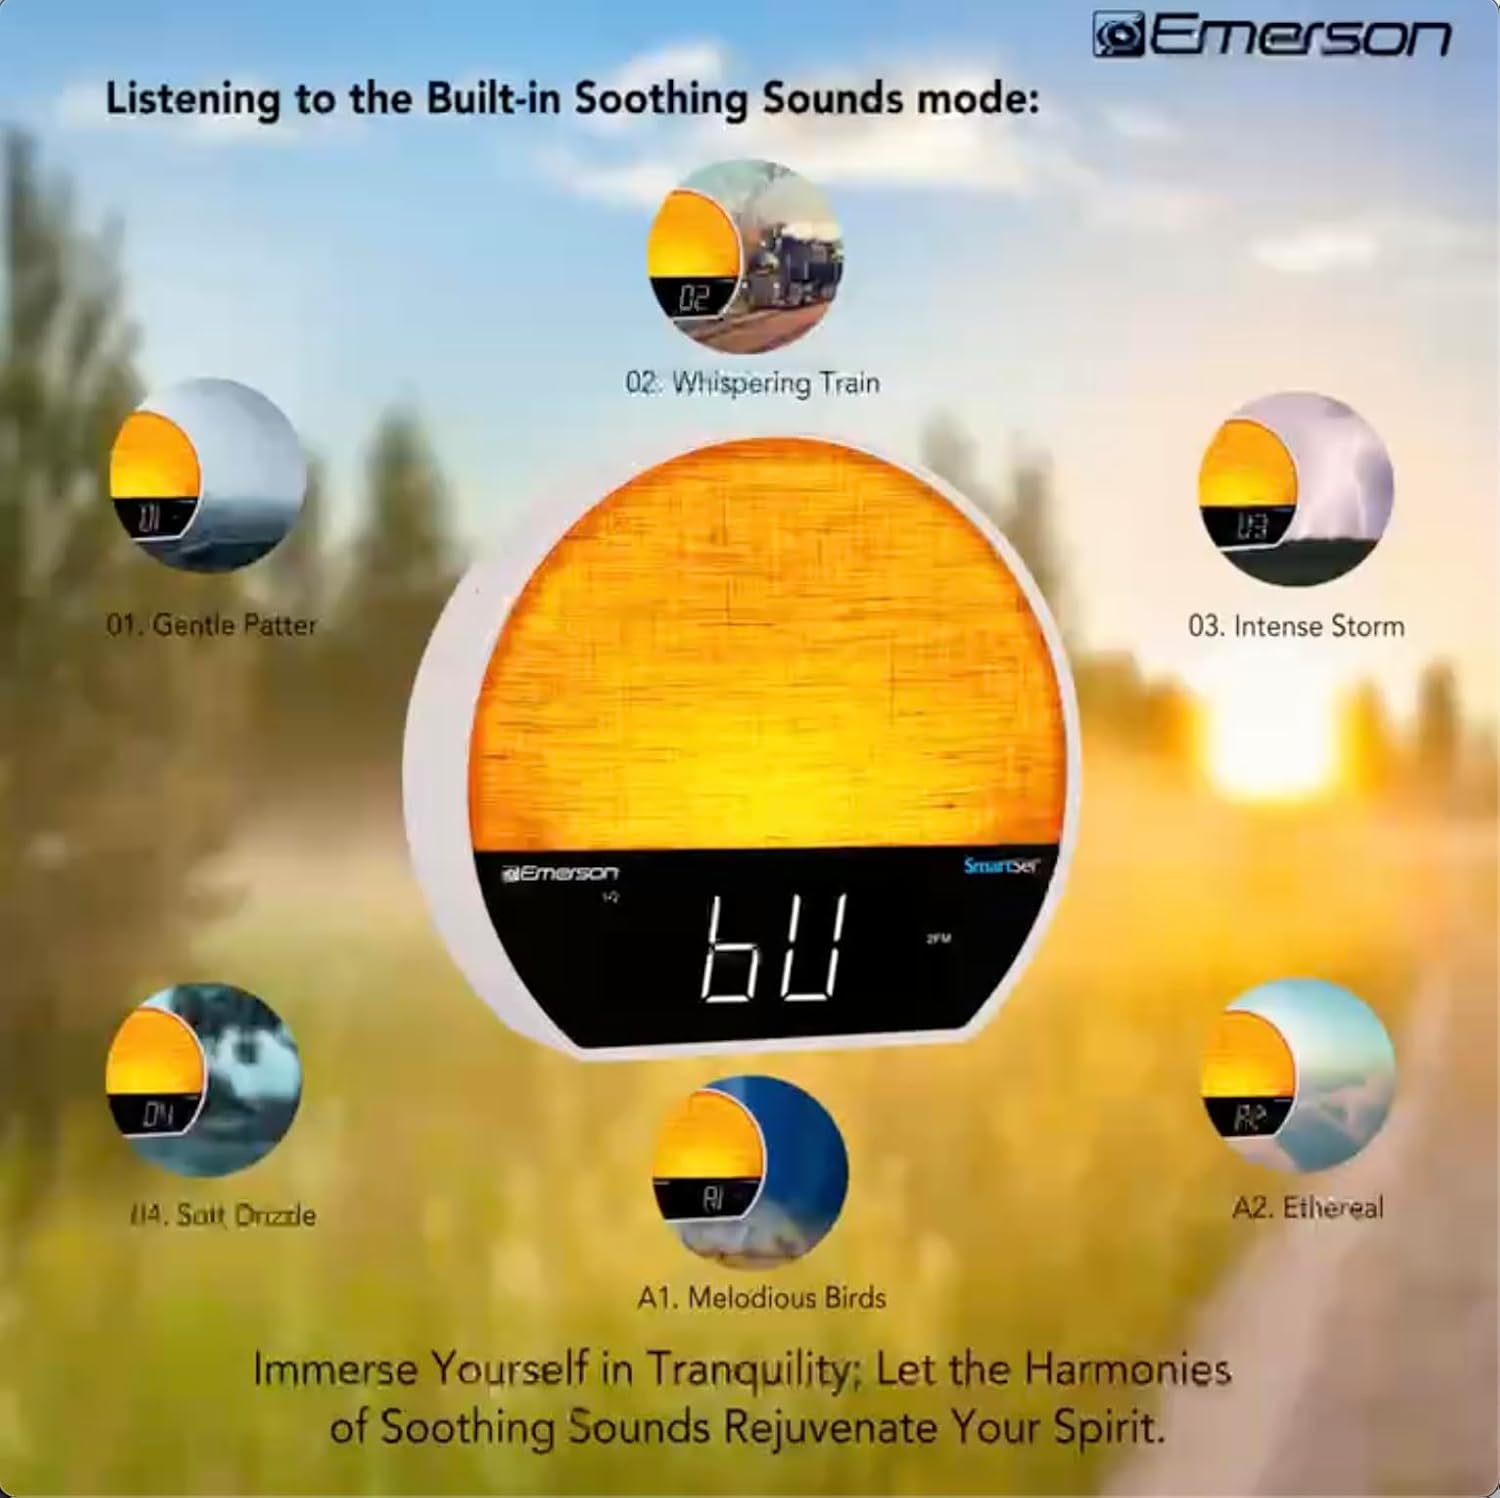
Image 5: Visual representation of the six soothing sound modes available on the alarm clock.
- Appuyez sur le MODE button repeatedly until the Soothing Sound mode is selected.
- Utilisez le RÉGLAGE -/+ buttons to cycle through the available sounds (e.g., Gentle Patter, Whispering Train, Intense Storm, Soft Drizzle, Melodious Birds, Ethereal, White Noise).
- Réglez le volume à l'aide de la VOL-/+ boutons.
Fonction haut-parleur Bluetooth 6.5
Connectez votre smartphone ou tout autre appareil compatible Bluetooth pour diffuser de l'audio sans fil.

Image 6: The alarm clock in Bluetooth mode, paired with a mobile device for audio streaming.
- Appuyez sur le MODE button until 'BT' appears on the display, indicating Bluetooth mode.
- On your device, enable Bluetooth and search for 'Emerson CKSS7071'.
- Select the device to pair. A confirmation tone will sound upon successful pairing.
- Vous pouvez désormais diffuser du contenu audio depuis votre appareil via le haut-parleur du réveil.
Fonctionnement de la radio FM 6.6
Écoutez vos stations de radio FM préférées.
- Appuyez sur le MODE appuyez sur le bouton jusqu'à ce que « FM » apparaisse à l'écran.
- Appuyez sur le RÉGLAGE -/+ buttons briefly to manually tune to a station.
- Appuyez et maintenez enfoncé le RÉGLAGE -/+ boutons pour rechercher automatiquement la prochaine station disponible.
- Pour enregistrer une station, appuyez longuement sur le bouton. MEM FM Appuyez sur le bouton jusqu'à ce que le numéro prédéfini clignote. Utilisez RÉGLAGE -/+ pour sélectionner un numéro prédéfini, puis appuyez sur MEM FM à nouveau pour sauver.
6.7 LED Decor and Dimmer Control
Customize the ambient light with 8 different colors and adjust the brightness.

Image 7: The alarm clock demonstrating its 8-color dimmable LED decor options.
- Appuyez sur le LUMIÈRE button to cycle through the 8 available colors or turn the light off.
- To adjust the brightness of the LED decor light, press and hold the LUMIÈRE button. The brightness will cycle through 5 levels. Release the button at your desired brightness.
6.8 Commande de gradation de l'écran
Adjust the brightness of the 1.2-inch LED time display.

Image 8: The alarm clock illustrating the five distinct levels of display luminescence.
Appuyez sur le VARIATEUR button (often combined with another function, refer to button labels) to cycle through 4 levels of display brightness (Bright, Moderate, Dim, Faint).
6.9 Minuterie de veille
Set a timer for the audio to automatically turn off after a specified duration.

Image 9: The alarm clock set for a sunset sleep timer, providing a harmonious end to the day.
- While audio is playing (FM or Soothing Sound), press the DORMIR bouton.
- Appuyez plusieurs fois sur la touche DORMIR button to cycle through available sleep timer durations (e.g., 15, 30, 60, 90 minutes, or OFF).
- The audio will automatically turn off after the selected time.
6.10 Fonction de répétition
Lorsqu'une alarme retentit, appuyez sur le ROUPILLON button (usually a large button on top) to temporarily silence the alarm for a few minutes. The alarm will sound again after the snooze period.
7. Entretien
7.1 Nettoyage
- Débranchez toujours l'appareil de la prise de courant avant de le nettoyer.
- Utilisez un chiffon doux et sec pour nettoyer les surfaces extérieures.
- N’utilisez pas de nettoyants liquides, de nettoyants abrasifs ni de sprays chimiques, car ils pourraient endommager la finition.
7.2 Remplacement de la batterie
Si les réglages de l'heure et de l'alarme ne sont pas conservés lors d'une coupure de couranttage, the button cell backup battery may need to be replaced. Follow the instructions in section 5.3 to replace the CR2032 battery.
8. Dépannage
| Problème | Cause possible | Solution |
|---|---|---|
| L'unité ne s'allume pas. | Adaptateur secteur non connecté ou défectueux. | Assurez-vous que l'adaptateur secteur est correctement branché à l'appareil et à une prise murale fonctionnelle. |
| Les réglages de l'heure et de l'alarme sont perdus après une coupure de courant.tage. | La batterie de secours est déchargée ou n'est pas installée. | Install or replace the CR2032 button cell battery (see section 5.3). |
| L'alarme ne sonne pas. | L'alarme n'est pas activée ou le volume est trop faible. | Ensure the alarm is set and activated (AL1/AL2 indicator on). Increase alarm volume. |
| L'appareil Bluetooth ne peut pas être apparié. | Unit not in Bluetooth mode or device too far. | Ensure the unit is in Bluetooth mode ('BT' displayed). Move your device closer to the unit. Try unpairing and re-pairing. |
| Mauvaise réception radio FM. | Antenne non déployée ou interférences. | Extend the FM wire antenna fully and reposition it for better reception. Avoid placing near other electronic devices. |
| L'écran est trop lumineux/sombre. | Le réglage de la luminosité de l'écran nécessite un ajustement. | Appuyez sur le VARIATEUR button to cycle through brightness levels (see section 6.8). |
9. Spécifications
| Fonctionnalité | Détail |
|---|---|
| Numéro de modèle | CKSS7071 |
| Source d'énergie | AC 100-240V, 50/60Hz (via AC adapter) |
| Batterie de secours | 1 x CR2032 Button Cell Battery (included) |
| Type d'affichage | Écran LED de 1.2 pouces |
| Version Bluetooth | V5.4 |
| Sons apaisants | 6 Nature Sounds + White Noise |
| LED Decor Colors | 8 Dimmable Colors |
| Dimensions du produit (L x P x H) | 7.09" x 3.15" x 6.37" |
| Poids | Non spécifié |
10. Informations sur la garantie
Emerson products are manufactured to the highest quality standards. This product is covered by a limited warranty against defects in materials and workmanship for a period of one (1) year from the original date of purchase. This warranty does not cover damage caused by misuse, accident, unauthorized modification, or normal wear and tear. Proof of purchase is required for all warranty claims. Please retain your receipt.
11. Assistance clientèle
If you have any questions, require assistance, or experience issues with your Emerson CKSS7071 Sunrise Smartset Alarm Clock Radio, please contact our customer support team.
- Website: Visit the official Emerson webSite de FAQ et de ressources d'assistance.
- E-mail: Veuillez vous référer à l'emballage de votre produit ou au site officiel. website pour contacter le service client par e-mail.
- Téléphone: Veuillez vous référer à l'emballage de votre produit ou au site officiel. webSite répertoriant les numéros de téléphone du service client.
Please have your model number (CKSS7071) and proof of purchase ready when contacting support.