
Introduction
Thank you for choosing the Cuifati Mini Body Camera. This manual provides detailed instructions for the proper use, setup, and maintenance of your device. Please read this manual thoroughly before operating the camera to ensure optimal performance and longevity.
Contenu du colis
- 1 x Wearable Camera
- 1 x sac de transport
- 1 x Manuel d'utilisation
- 1 x cordon
- 1 x Back Shell Bracket
- 1 x trépied
- 1 x câble USB
- 1 x chiffon de nettoyage

Figure 1: Cuifati Mini Body Camera and included accessories.

Figure 2: Multi-scenario application examples for the body camera.
Produit terminéview
Familiarize yourself with the components and controls of your Cuifati Mini Body Camera.
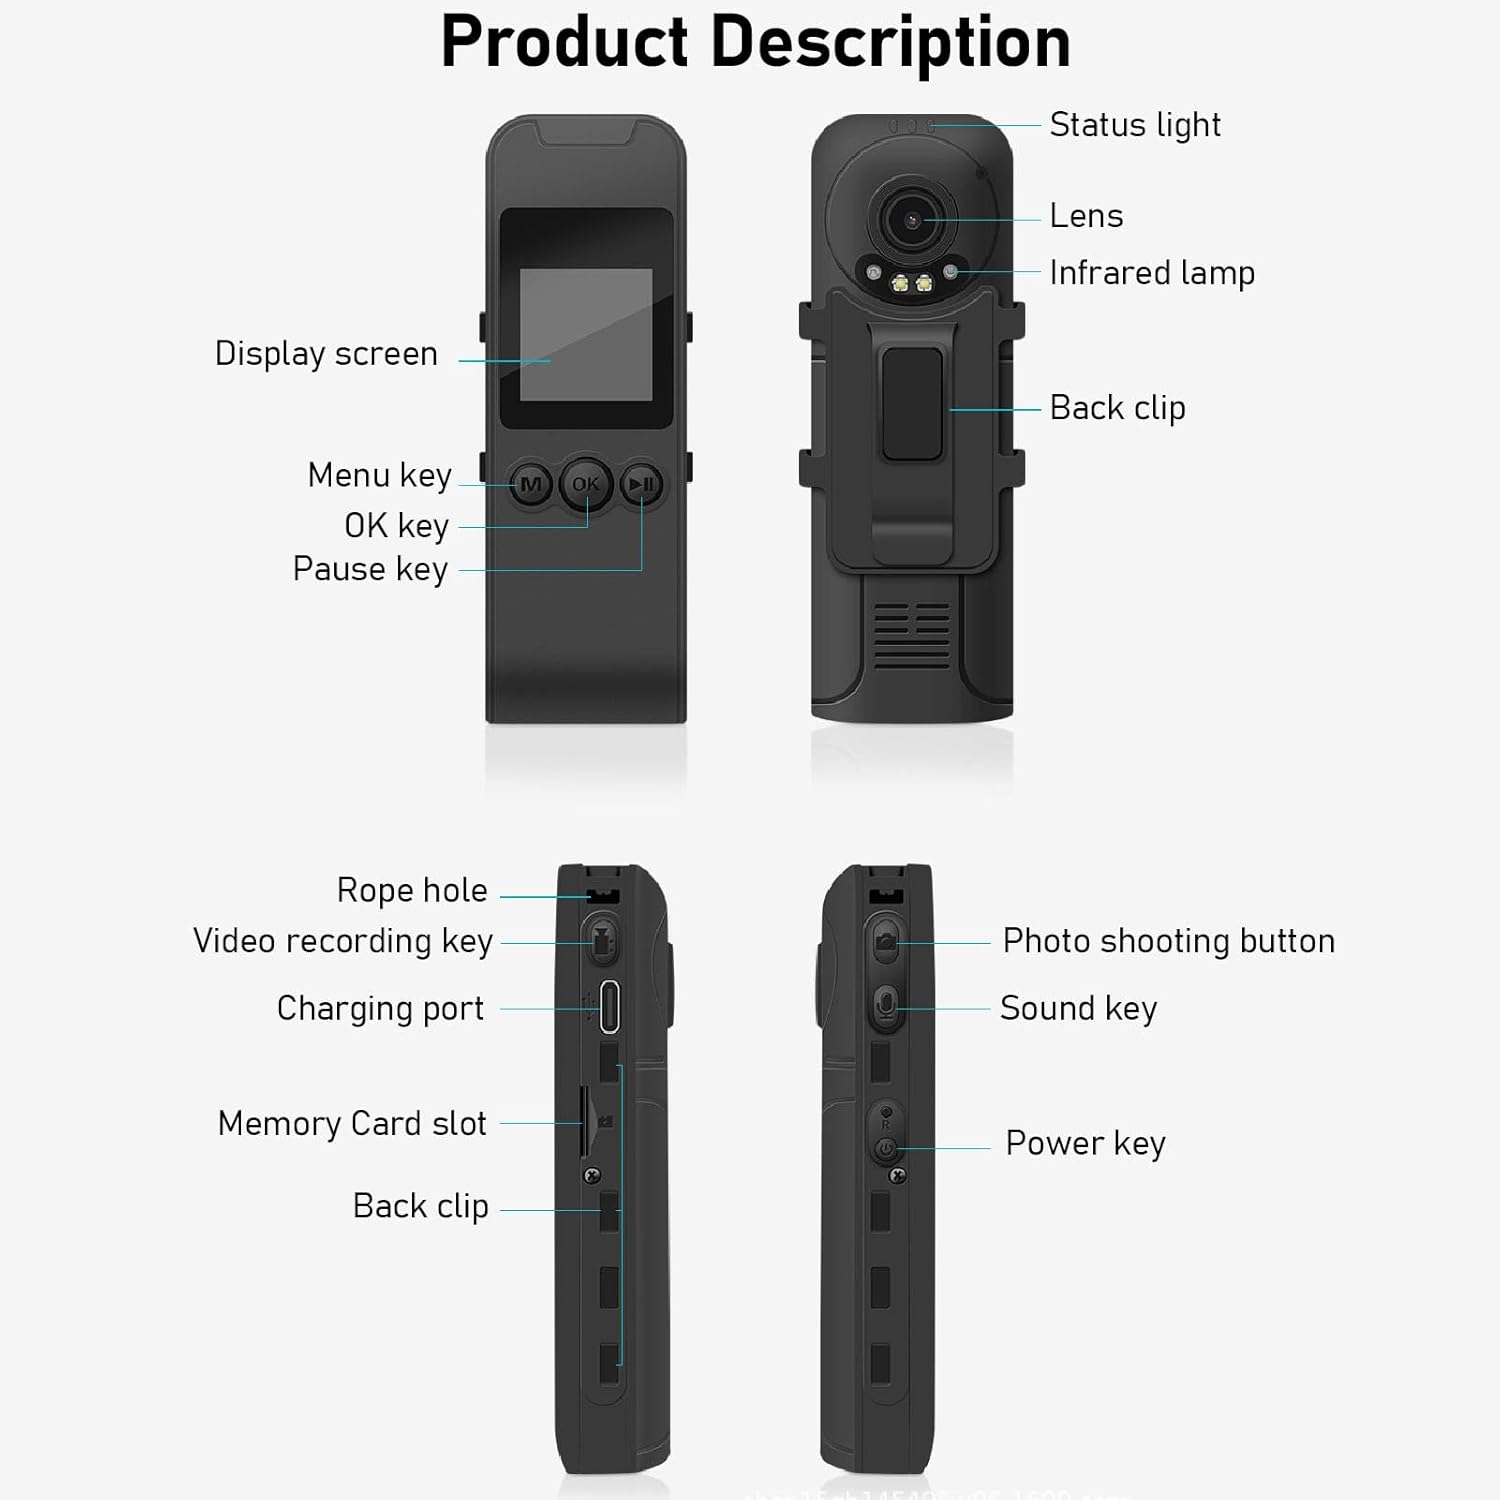
Figure 3: Labeled components of the Cuifati Mini Body Camera.
- Voyant d'état : Indique l'état de l'appareil (par exemple, enregistrement, charge).
- Lentille: Objectif principal de la caméra pour la capture vidéo et photo.
- Infrarouge lamp: Fournit un éclairage pour la vision nocturne.
- Clip arrière : Pour fixer la caméra sur les vêtements ou d'autres surfaces.
- Écran d'affichage : Écran LCD de 1.3 pouces pour l'affichage en direct view, la lecture et la navigation dans les menus.
- Touche Menu (M) : Accède aux paramètres de l'appareil.
- Touche OK : Confirms selections or starts/stops functions.
- Touche Pause : Pauses playback or recording.
- Trou pour corde : Point d'attache pour la lanière.
- Video Recording Key: Lance et arrête l'enregistrement vidéo.
- Port de chargement (Type-C) : Pour recharger l'appareil et le connecter à un ordinateur.
- Fente pour carte mémoire : Insérez une carte microSD pour le stockage.
- Photo Shooting Button: Capture des images fixes.
- Sound Key: Controls audio recording.
- Clé d'alimentation : Allume ou éteint l'appareil.
Installation
1. Chargement de la batterie
Before first use, fully charge the camera's built-in lithium-ion battery. Connect the camera to a power source using the provided Type-C USB cable. The status light will indicate charging status. A full charge provides approximately 20 hours of work time and 10 hours of video recording.
Figure 4: Built-in 1200mAh battery for extended use.
2. Insertion d'une carte mémoire
The camera supports up to a 256GB memory card (not included). Locate the memory card slot on the side of the camera. Gently insert the microSD card with the gold contacts facing down until it clicks into place. To remove, push the card in slightly until it springs out.

Figure 5: Memory card slot for storage expansion.
Mode d'emploi
1. Mise sous/hors tension
- Pour allumer : Press and hold the Power Key until the display screen illuminates.
- Pour éteindre : Press and hold the Power Key until the device shuts down.
2. Enregistrement vidéo
The camera records in 1440P HD at 30 frames per second with a 120° wide-angle lens and infrared night vision.
- Pour démarrer l'enregistrement : Press the Video Recording Key. The status light will change, and a recording indicator will appear on the screen.
- Pour arrêter l'enregistrement : Press the Video Recording Key again.
- Enregistrement en boucle : La caméra prend en charge l'enregistrement en boucle, écrasant automatiquement la plus ancienne vidéo. files lorsque la carte mémoire est pleine.
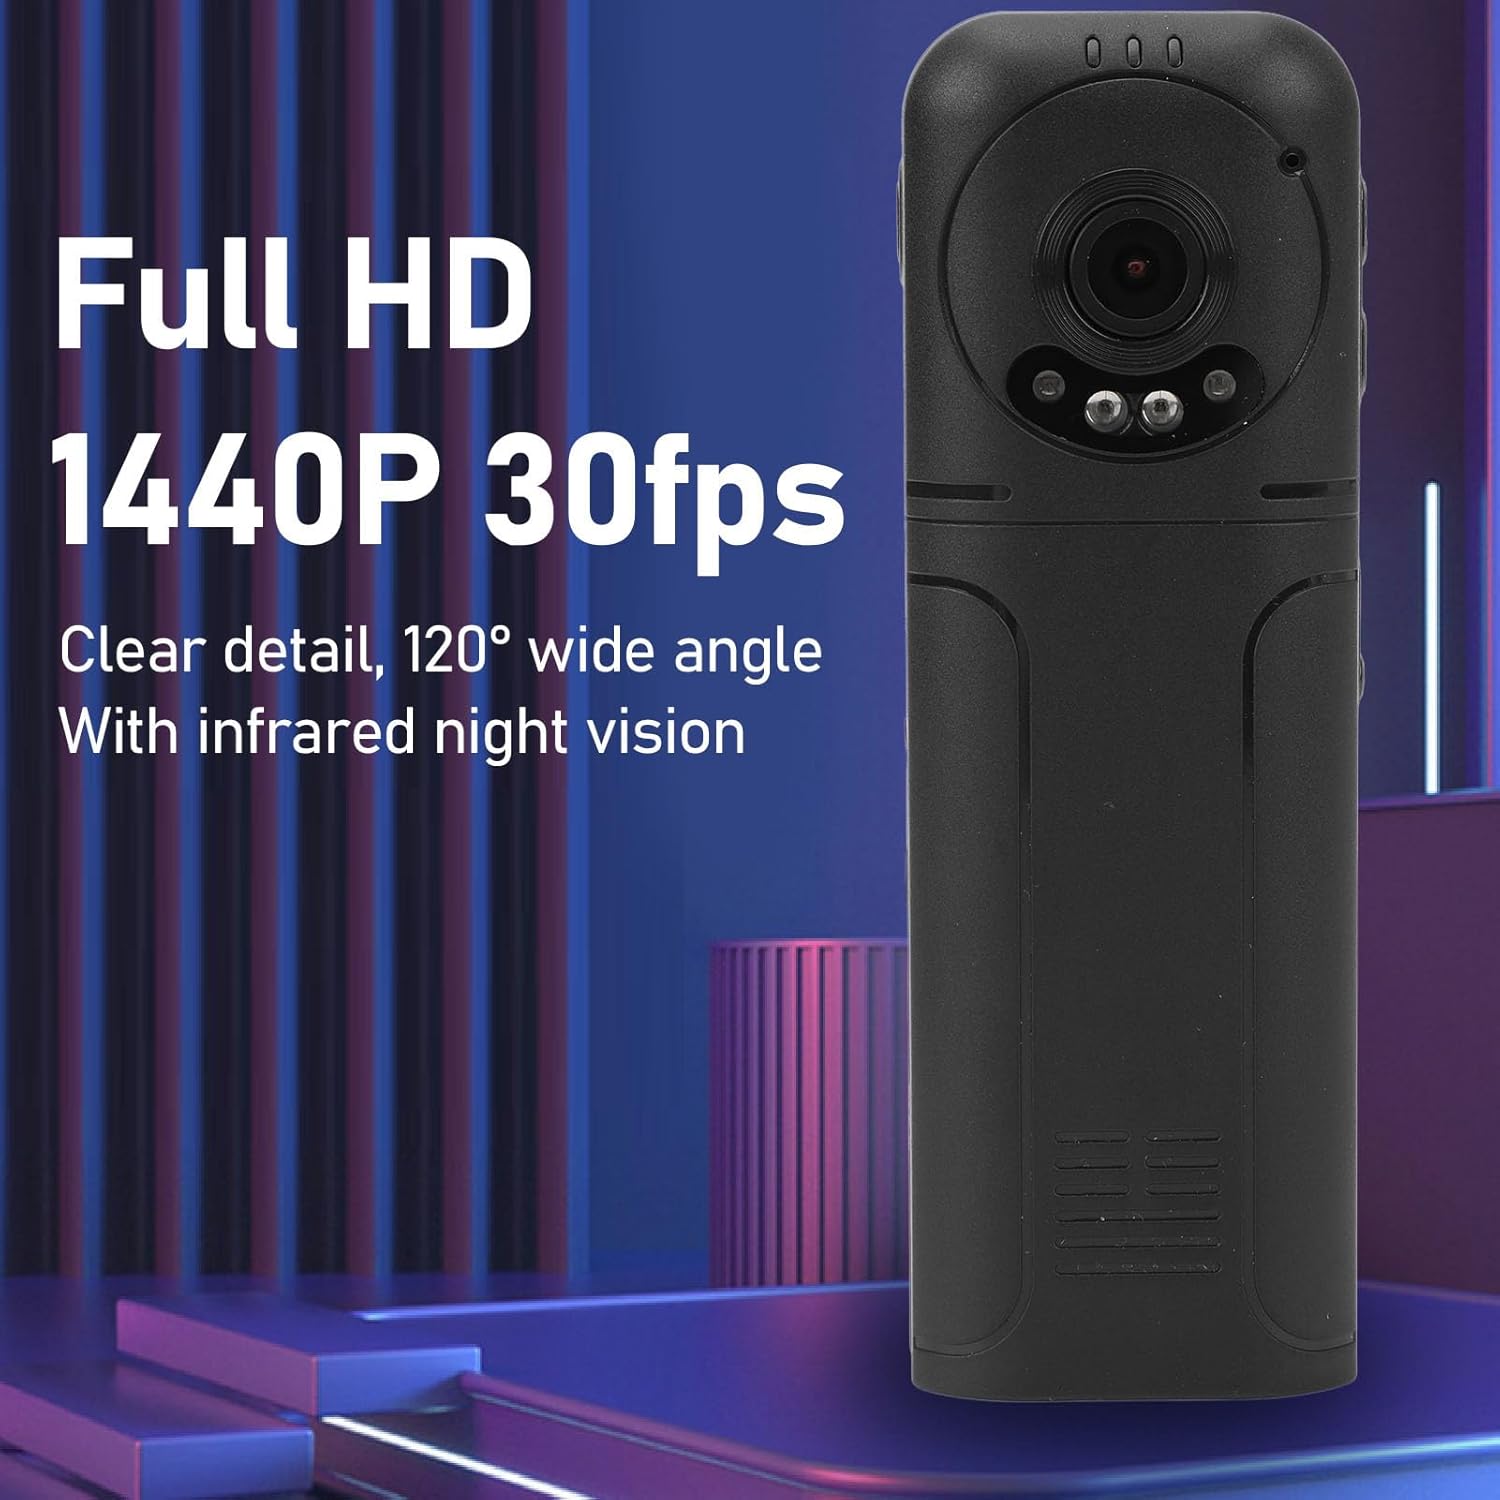
Figure 6: 1440P HD video recording with night vision.
3. La prise de photo
- Prendre une photo: In standby mode, press the Photo Shooting Button.
4. Enregistrement audio
- To Start Audio Recording: Press the Sound Key.
- To Stop Audio Recording: Press the Sound Key again.

Figure 7: Audio recording functionality.
5. Lecture et File Gestion
The 1.3-inch LCD screen supports live playback, browsing, and pausing of videos, photos, and recordings directly on the device.

Figure 8: 1.3-inch color screen for on-device playback.
- Lecture sur l'appareil : Use the Menu, OK, and Pause keys to navigate and play files sur l'écran.
- Connexion à un ordinateur : Connect the camera to a computer via the Type-C USB cable to transfer, view, or delete files.
- Fonction OTG : If your mobile phone supports OTG, you can connect the camera directly to your phone for playback and file gestion.
Entretien
1. Nettoyage
- Use the provided cleaning cloth or a soft, dry cloth to wipe the camera body and lens.
- N’utilisez pas de nettoyants liquides ni de solvants, car ils pourraient endommager l’appareil.
2. Stockage
- Rangez l'appareil photo dans un endroit frais et sec, à l'abri de la lumière directe du soleil et des températures extrêmes.
- Retirez la carte mémoire si vous prévoyez de la conserver pendant une période prolongée.
Dépannage
Si vous rencontrez des problèmes avec votre appareil photo, consultez les problèmes courants et leurs solutions ci-dessous :
| Problème | Solution |
|---|---|
| La caméra ne s'allume pas. | Assurez-vous que la batterie est chargée. Branchez-la à une source d'alimentation et réessayez. |
| Cannot record video/photo. | Check if a memory card is inserted correctly and has sufficient free space. Format the memory card if necessary (this will erase all data). |
| Carte mémoire non reconnue. | Ensure the memory card is inserted correctly. Try a different compatible memory card. Format the card using the camera's menu or a computer. |
| Qualité vidéo/audio médiocre. | Assurez-vous que la lentille est propre. Vérifiez les conditions d'éclairage. Pour l'audio, assurez-vous que le microphone n'est pas obstrué. |
| L'appareil se bloque ou ne répond plus. | Press and hold the Power Key for 10-15 seconds to force a restart. |
Caractéristiques
Below are the technical specifications for the Cuifati Mini Body Camera (Model CUIFATI2vg0ri8moa):
- Type d'article : Wearable Camera
- Matériel: ABS
- Vision nocturne : 2pcs Night Vision Light Beads
- Résolution vidéo : 1440P (Maximum)
- Fréquence d'images : 30 images par seconde
- Type de batterie : Batterie lithium-ion
- Capacité de la batterie : 1200 mAh (intégrée)
- Support de stockage: Carte mémoire de 256 Go maximum (non incluse)
- Port de charge : Type C
- Nom de l'application : For RoadCam (if applicable for advanced features)
- Nom du modèle : CUIFATI2vg0ri8moa
- Fabricant: CUIFATI
Garantie et assistance
For warranty information or technical support, please refer to the documentation provided at the time of purchase or contact Cuifati customer service directly. Keep your purchase receipt as proof of purchase.