1. Introduction
Thank you for choosing the LYNCAST Smart Vision Beam Projector. This manual provides essential information for setting up, operating, and maintaining your projector. Please read it thoroughly before use to ensure optimal performance and safety.
2. Consignes de sécurité
Suivez toujours ces précautions de sécurité de base afin de réduire les risques d'incendie, d'électrocution ou de blessure :
- Ne bloquez pas les ouvertures de ventilation.
- N’exposez pas le projecteur à la pluie ou à l’humidité.
- N'ouvrez pas le projecteur casing; confier toute intervention à un personnel qualifié.
- Évitez de regarder directement dans l'objectif du projecteur lorsque le lamp est allumé.
- Utilisez uniquement l'adaptateur secteur fourni avec le projecteur.
- Placez le projecteur sur une surface stable et plane.
3. Contenu du colis
Vérifiez que tous les éléments sont présents dans votre colis :
- LYNCAST Smart Vision Beam Projector
- Télécommande
- Adaptateur secteur
- Manuel d'utilisation
4. Produit terminéview
Familiarisez-vous avec les composants et les interfaces du projecteur.
4.1 avant View

Image : Avant view of the projector, highlighting the projection lens and front ventilation grille.
4.2 Arrière View et interfaces

Image : Arrière view of the projector, detailing the HDMI interface, USB interface, and audio interface. The power input is also visible.
- Interface HDMI : Connects to devices like laptops, game consoles (e.g., PS4), or TV boxes.
- Interface USB : Pour connecter des clés USB ou d'autres périphériques USB.
- Interface audio: Pour connecter des haut-parleurs externes ou des écouteurs.
- Puissance d'entrée : Branchez ici l'adaptateur secteur fourni.
4.3 Support réglable

Image: The projector shown with its 180-degree adjustable stand, allowing for flexible projection angles including ceiling projection.
The integrated stand allows for 180-degree rotation, enabling projection onto walls, screens, or ceilings.
5. Installation
- Connexion électrique : Branchez l'adaptateur secteur à l'entrée d'alimentation du projecteur, puis à une prise de courant.
- Placement: Place the projector on a stable surface. Adjust the 180-degree stand to direct the projection onto your desired surface (wall, screen, or ceiling).
- Mise sous tension initiale : Appuyez sur le bouton d'alimentation du projecteur ou de la télécommande pour l'allumer.
- Connexion réseau:
- Navigate to "Settings" on the home screen.
- Select "Network & Internet" and connect to your Wi-Fi network.
- Bluetooth Pairing (for remote control):
Video: Instructions on how to pair the Bluetooth remote control with the projector. This video demonstrates opening Bluetooth settings, pressing and holding specific buttons on the remote to enter pairing mode, and confirming connection.
- Go to "Settings" -> "Bluetooth Setting".
- On the remote, press and hold the "OK" and "Volume Down" buttons simultaneously until the indicator light flashes, entering pairing mode.
- Select "Bluetooth remote" from the available devices on the projector screen to pair.
- Réglage de la mise au point : Use the manual focus wheel near the lens to achieve a clear image.
- Correction trapézoïdale : The projector features automatic vertical keystone correction. For manual adjustments, navigate to "Settings" -> "Projection Setting" -> "Keystone".
6. Mode d'emploi
6.1 Système d'exploitation Android 11 et applications

Image: The projector's home screen displaying the Android 11 operating system with various pre-installed applications such as Netflix, YouTube, and Google Play Store.
The projector runs on Android 11, providing access to a wide range of applications. You can download additional apps from the integrated App Store or Google Play Store.
- Use the remote control to navigate the interface.
- Select an app to launch it.
6.2 Screen Mirroring (Wi-Fi & Bluetooth)

Image: The projector wirelessly connected to various devices (iOS, Android, Windows) via 2.4G/5G Wi-Fi and Bluetooth for screen mirroring, displaying a racing game.
The projector supports 2.4G/5G Wi-Fi and Bluetooth for seamless screen mirroring from your iOS, Android, or Windows devices. Ensure your device and the projector are connected to the same Wi-Fi network for optimal performance.
6.3 Connexion de périphériques externes
Image : Arrière view of the projector, detailing the HDMI interface, USB interface, and audio interface. The power input is also visible.
- HDMI: Connect gaming consoles (PS4), laptops, or TV boxes using an HDMI cable. Select the HDMI input from the projector's source menu.
- USB: Insérez une clé USB pour lire des fichiers multimédias. files directly. Navigate to the "Files" app to browse content.
- Sortie audio: Branchez des haut-parleurs externes ou un casque à la prise audio 3.5 mm pour un son amélioré.
6.4 Réglage de la taille et de la qualité de la projection
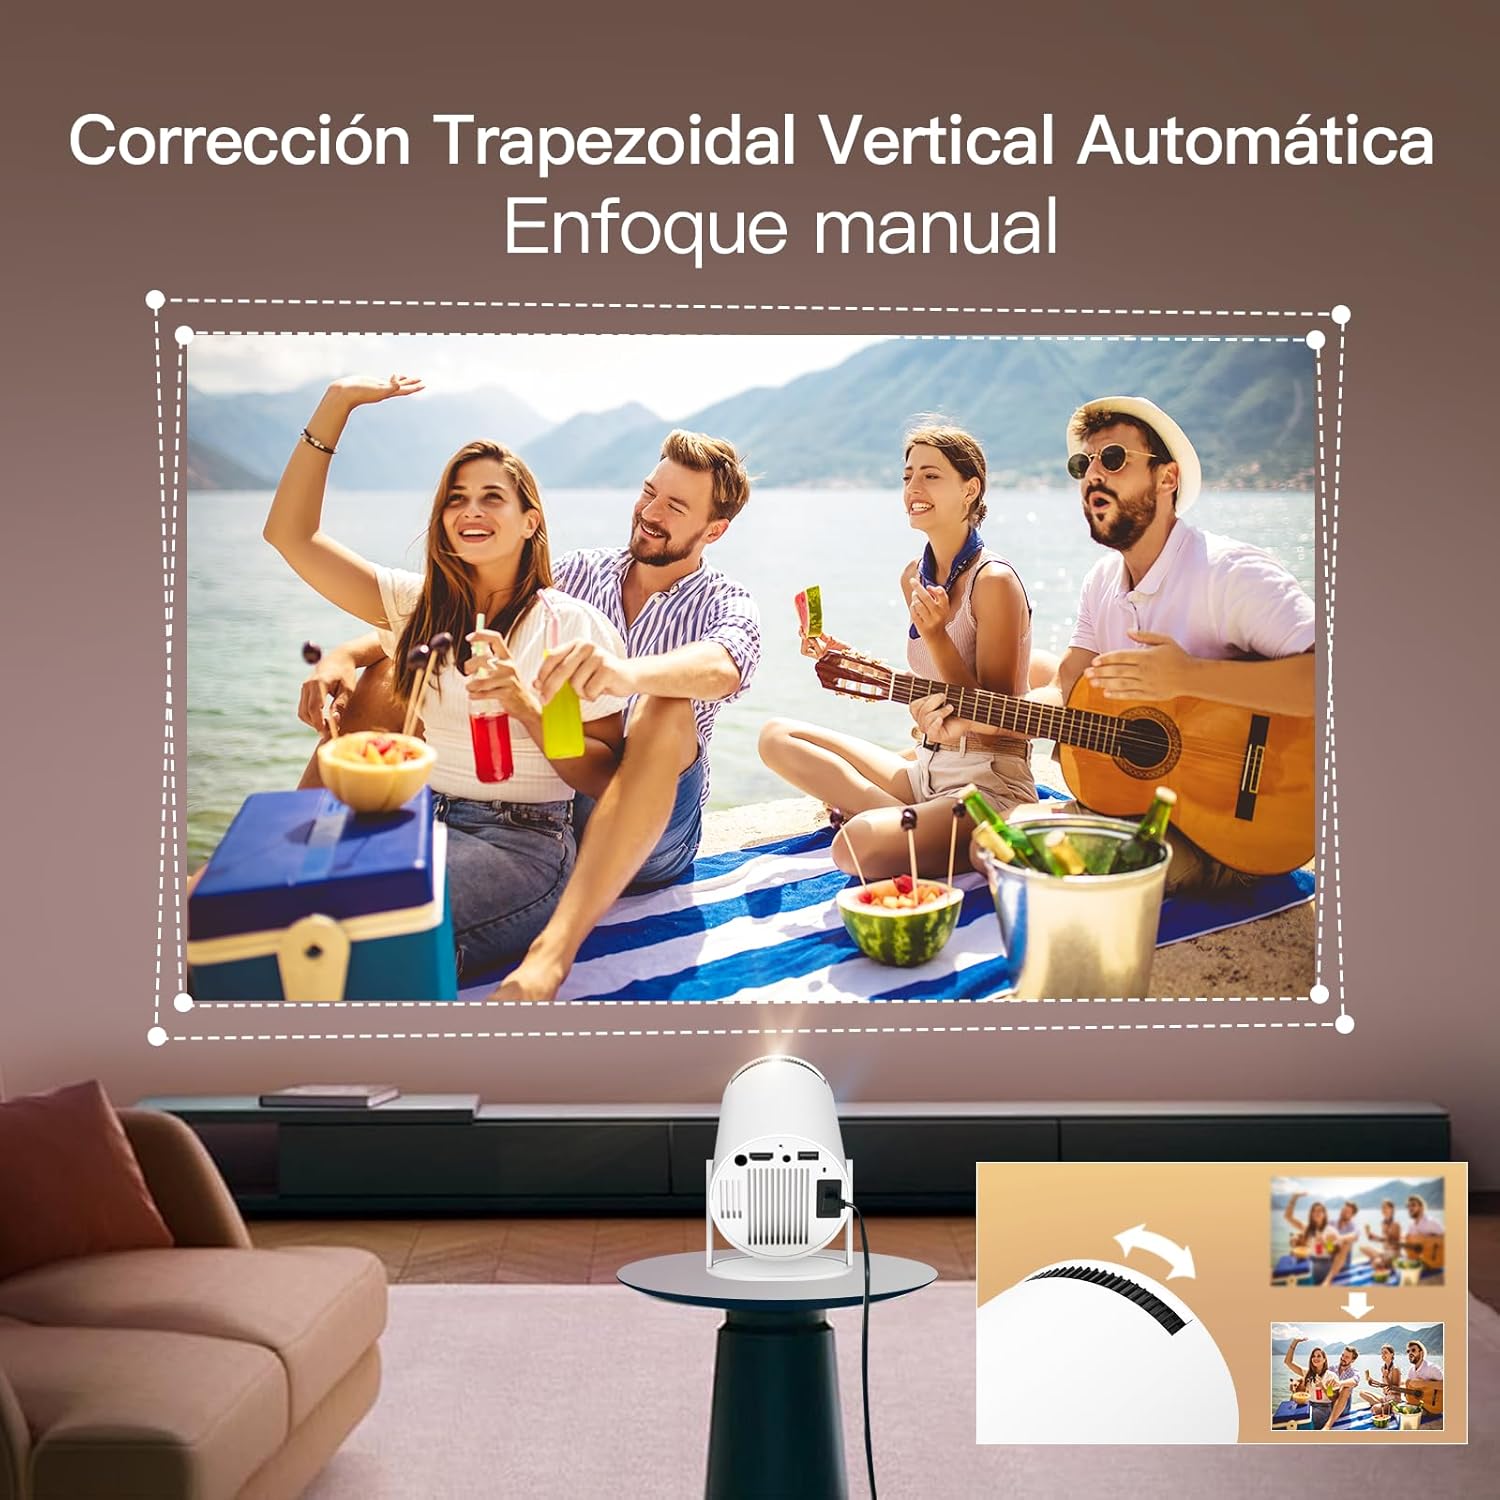
Image: The projector demonstrating flexible screen size options, from 80 inches at 1.6 meters to 130 inches at 2.6 meters, allowing users to choose their preferred viewexpérience de travail.
- Fonction de zoom: Use the remote control to adjust the projection size from 80% to 100% without moving the projector.
- Distance: The projection size varies with distance. For example, 1.6m for 80 inches, 2m for 100 inches, and 2.6m for 130 inches.
- Paramètres de l'image : Access "Settings" -> "Picture" to adjust brightness, contrast, color, sharpness, and color temperature.
7. Entretien
Un entretien régulier garantit la longévité et les performances de votre projecteur :
- Nettoyage de la lentille : Utilisez un chiffon doux non pelucheux spécialement conçu pour les lentilles optiques. N’utilisez pas de nettoyants abrasifs ni de solvants.
- Nettoyage du Casing: Essuyez l'extérieur du projecteur avec un chiffon doux et sec. Pour les taches tenaces, utilisez un chiffon légèrement plus sec.amp chiffon puis séchez soigneusement.
- Ventilation: Veillez à ce que les ouvertures de ventilation soient dégagées de poussière et d'obstructions afin d'éviter toute surchauffe.
- Stockage: Lorsqu'il n'est pas utilisé pendant une période prolongée, rangez le projecteur dans un endroit frais et sec, à l'abri de la lumière directe du soleil et des températures extrêmes.
8. Dépannage
| Problème | Cause possible | Solution |
|---|---|---|
| Aucune image projetée | Power cable disconnected, projector off, input source incorrect. | Check power connection, turn on projector, select correct input source (HDMI/USB). |
| Image floue | Incorrect focus, projector too close/far, keystone not adjusted. | Adjust focus wheel, reposition projector, use auto or manual keystone correction. |
| Pas de son | Volume too low, external speakers not connected properly, audio settings incorrect. | Augmentez le volume, vérifiez la connexion du haut-parleur externe, vérifiez les paramètres de sortie audio. |
| Problèmes de connexion Wi-Fi/Bluetooth | Mot de passe incorrect, hors de portée, interférence. | Re-enter password, move closer to router/device, reduce interference. |
| La télécommande ne fonctionne pas | Batteries low/dead, not paired, obstruction. | Replace batteries, re-pair remote via Bluetooth settings, ensure no obstructions. |
9. Spécifications
| Fonctionnalité | Détail |
|---|---|
| Marque | LYNCAST |
| Nom du modèle | Projecteur Smart Vision Beam |
| Dimensions du produit | 10 x 10 x 17 cm |
| Poids de l'article | 820 grammes |
| Interface matérielle | Bluetooth, HDMI, USB |
| Technologie d'affichage | Écran LCD |
| Rapport de contraste d'image | 10000:1 à 50000:1 |
| Résolution native | 1920 x 1080 (Full HD) |
| Résolution d'affichage maximale | 1920 x 1080 (Prise en charge de l'entrée 4K) |
| Technologie de connectivité | Bluetooth, Wi-Fi |
| Facteur de forme | Portable |
| Type de montage | Dessus de table |
| Luminosité | 3000 lumens (Note: ANSI lumens are typically lower than marketing lumens) |
| Type de contrôleur | Télécommande |
| Système opérateur | Android 11 |
10. Garantie et assistance
LYNCAST offers comprehensive support for its products. For specific warranty details, please refer to the warranty card included in your package or contact LYNCAST customer service.
- Service client: For technical assistance, troubleshooting, or warranty claims, please contact LYNCAST support through their official website ou les coordonnées fournies dans la documentation de votre produit.
- Ressources en ligne : Visit the LYNCAST webSite regroupant les FAQ, les manuels mis à jour et les téléchargements de logiciels.

Image: LYNCAST's commitment to customer satisfaction, including a 2-year warranty, 30-day no-reason return policy, 24-hour response time, and lifetime technical support.