1. Introduction
This manual provides detailed instructions for the setup, operation, and maintenance of your DANFI AUDIO DF TE-103 Vinyl Record Player. This versatile audio system features a 3-speed turntable, Bluetooth input, USB/SD card playback and recording, FM radio, and auxiliary input/output options. Please read this manual thoroughly before use to ensure proper function and longevity of your device.
2. Consignes de sécurité
- N'exposez pas l'appareil à la pluie ou à l'humidité.
- Ne bloquez aucune ouverture de ventilation.
- Assurez-vous que le cordon d’alimentation n’est pas pincé ou piétiné.
- Débranchez l'appareil pendant les orages ou lorsqu'il n'est pas utilisé pendant de longues périodes.
- Confiez toute intervention d'entretien à un personnel qualifié.
- Tenez l'appareil à l'écart de la lumière directe du soleil, des sources de chaleur et des champs magnétiques puissants.
3. Contenu du colis
Vérifiez que tous les éléments énumérés ci-dessous sont inclus dans votre colis :
- DANFI AUDIO DF TE-103 Vinyl Record Player
- Unité de puissance
- Adaptateur 45 tr / min
- Slipmat
- Backup Needle
4. Produit terminéview
Familiarize yourself with the main components and controls of your record player.

Figure 4.1 : Face avant view of the DANFI AUDIO DF TE-103 Vinyl Record Player.
4.1 Commandes et connexions du panneau avant

Figure 4.2 : Détaillé view of the front panel with USB, AUX IN, LED Display, and Mode Switch key.
- Affichage LED: Affiche le mode actuel, les informations de piste ou la fréquence FM.
- Touche de changement de mode : Toggles between Turntable, Bluetooth, USB/SD, FM Radio, and AUX modes.
- Port USB : For USB flash drives for playback and recording.
- AUX IN: Entrée jack 3.5 mm pour connecter des périphériques audio externes.
- Contrôle du volume : Règle le volume de sortie.
- Bouton EQ : Selects sound equalizer presets (Jazz, Pop, Classical, Rock, Vocal).
4.2 Connexions du panneau arrière

Figure 4.3: Rear panel with RCA Line Out connections.
- Sortie ligne RCA : Se connecte à un périphérique externe amplifiers ou haut-parleurs amplifiés.
- Puissance d'entrée : Se connecte à l'adaptateur secteur fourni.
5. Installation
- Déballage: Carefully remove the record player and all accessories from the packaging. Retain packaging for future transport or storage.
- Placement: Placez l'appareil sur une surface stable et plane, à l'abri de la lumière directe du soleil, des sources de chaleur et de la poussière excessive.
- Cache-poussière : Fixez le couvercle anti-poussière aux charnières situées à l'arrière de l'appareil.
- Connexion électrique : Connect the power unit to the DC input on the rear of the record player, then plug the power adapter into a wall outlet.
- Mise sous tension initiale : Press the power button to turn on the unit. The LED display will illuminate.
6. Mode d'emploi
6.1 Lecture de disques vinyle

Figure 6.1: The turntable supports 3 speeds for various record types.
- Assurez-vous que l'unité est sous tension.
- Soulevez le cache-poussière.
- Place a vinyl record on the platter. If playing a 45 RPM single, use the included 45 RPM adaptor.
- Sélectionnez la vitesse appropriée (33, 45 ou 78 tr/min) à l'aide du sélecteur de vitesse.
- Gently move the tonearm to the desired position on the record. The platter will begin to spin automatically.
- Réglez le volume selon vos préférences.
- The AUTO STOP function will automatically stop the turntable when the record finishes playing.
6.2 Bluetooth Connection (Input Only)
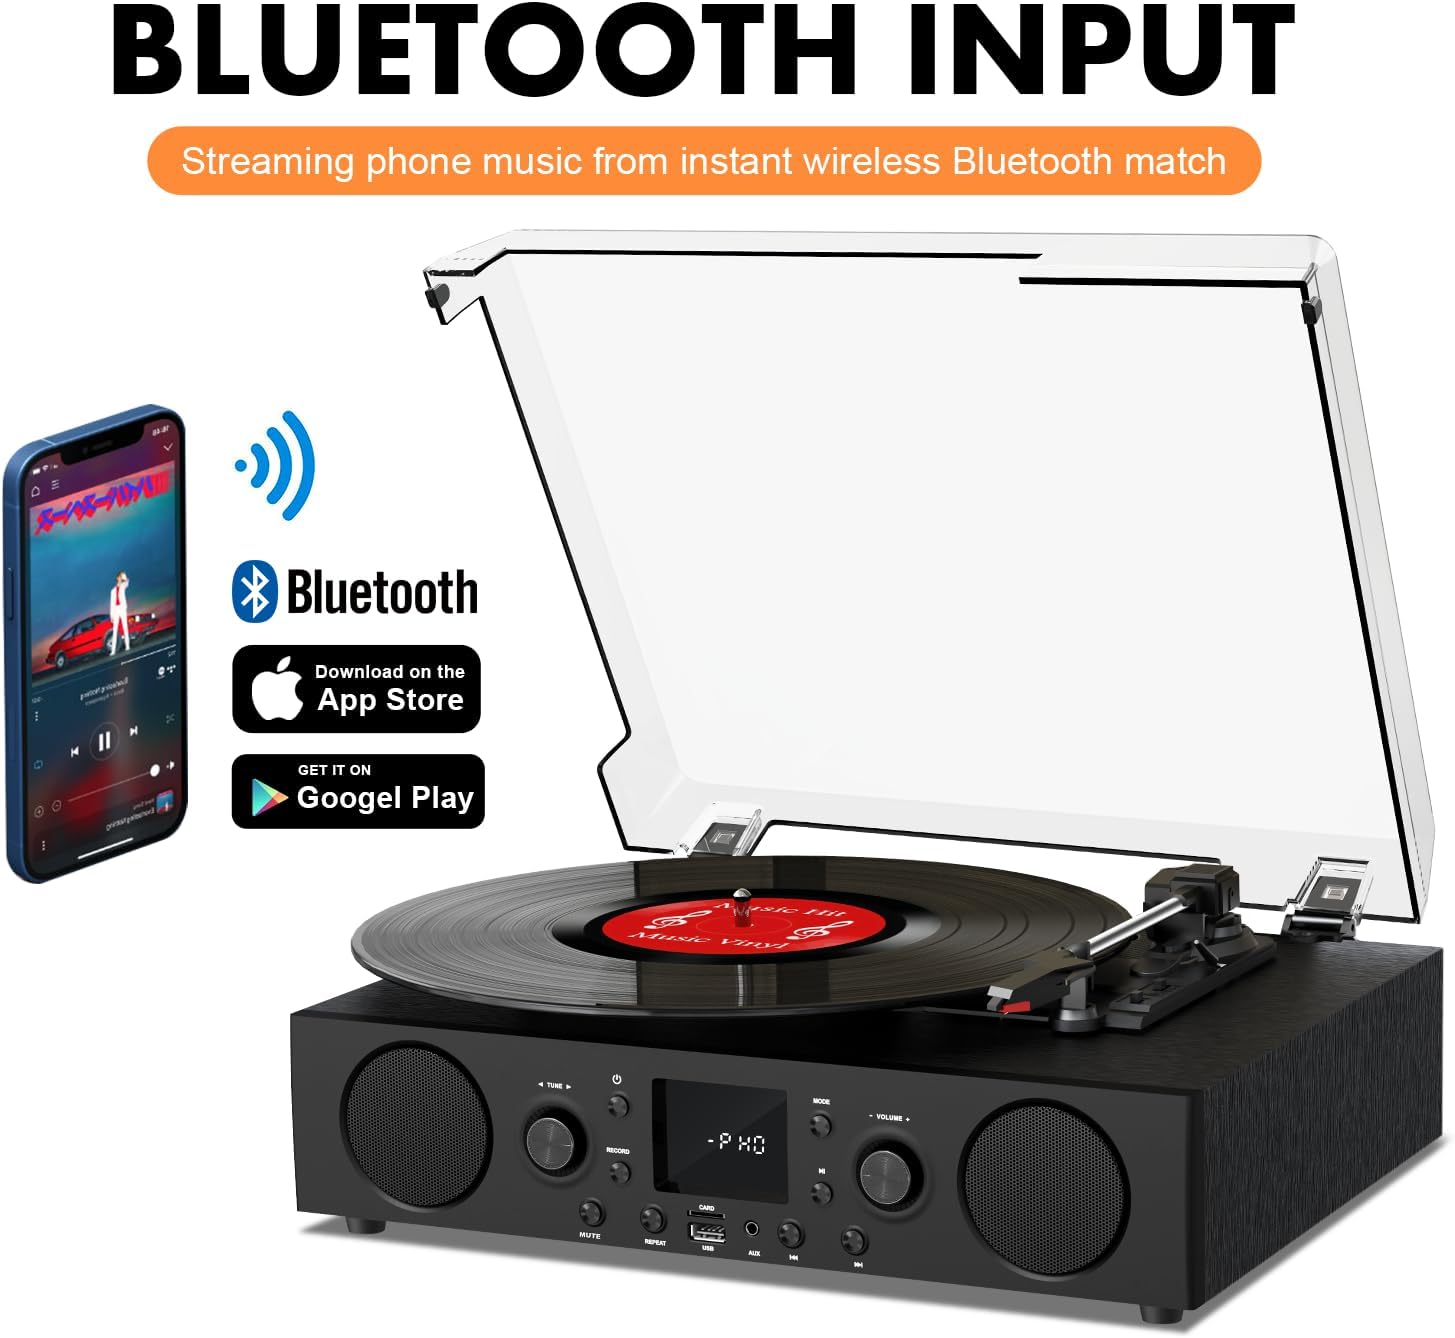
Figure 6.2: Connecting a smartphone via Bluetooth to the turntable.
- Appuyez sur le Mode button until "Bluetooth" or a similar indicator appears on the LED display. The unit will enter pairing mode.
- Sur votre smartphone, tablette ou ordinateur, activez le Bluetooth et recherchez les appareils disponibles.
- Select "DANFI AUDIO DF TE-103" (or similar name) from the list of devices to pair.
- Once paired, you can stream audio wirelessly from your device to the record player.
- Note: This turntable supports Bluetooth input only and cannot transmit audio to Bluetooth headphones or speakers.
6.3 USB/SD Input and MP3 Encoding

Figure 6.3: Vinyl to MP3 encoding process using a USB flash drive.
- Lecture USB/SD : Insert a USB flash drive or SD card into the respective port. Press the Mode button to select USB/SD mode. The unit will automatically play compatible audio files.
- Conversion de vinyle en MP3 :
- Insert a USB flash drive or SD card into the port.
- Start playing a vinyl record.
- Appuyez sur le Enregistrer button. The LED display will indicate recording is in progress.
- Appuyez sur le Enregistrer button again to stop recording. The recorded audio will be saved as an MP3/WAV file on the USB drive/SD card.
6.4 Radio FM
- Appuyez sur le Mode button to select FM Radio mode. The current frequency will appear on the LED display.
- Use the tuning controls (often the Skip/Search buttons) to scan for radio stations.
- The unit can store approximately 20 stations.
6.5 RCA Line Out and AUX Input

Figure 6.4: Connecting to external speakers using RCA Line Out.
- Sortie ligne RCA : Connect RCA cables from the rear of the record player to the audio input of an external amplifier or powered speakers. This allows for boosted volume and playback through a larger sound system. The turntable's internal speakers will not be muted automatically when using RCA output.
- Entrée AUX: Connect an external audio source (e.g., MP3 player, smartphone) to the 3.5mm AUX IN port on the front panel using an audio cable. Press the Mode button to select AUX mode to play audio from the connected device.
6.6 Égaliseur (EQ)

Figure 6.5: Available equalizer presets for audio customization.
Appuyez sur le EQ button to cycle through the available sound equalizer presets: Jazz, Pop, Classical, Rock, and Vocal. Select the preset that best suits your audio preference.
7. Entretien
- Nettoyage: Utilisez un chiffon doux et sec pour nettoyer l'extérieur de l'appareil. Pour le couvercle anti-poussière, utilisez un chiffon légèrement poncé.amp Essuyez avec un chiffon puis séchez soigneusement. Évitez les nettoyants abrasifs.
- Entretien du stylet : Periodically check the stylus (needle) for wear or damage. A worn stylus can damage records and degrade sound quality. Replace the stylus with a compatible backup needle when necessary.
- Soins des disques : Keep your vinyl records clean and stored vertically in their sleeves to prevent dust accumulation and warping.
8. Dépannage
| Problème | Cause possible | Solution |
|---|---|---|
| Pas de courant | Cordon d'alimentation non branché ; prise de courant inactive | Vérifiez que le cordon d'alimentation est bien branché ; testez la prise avec un autre appareil |
| Pas de son | Volume too low; Incorrect mode selected; External speakers not connected/powered | Increase volume; Press Mode button to select correct source; Check RCA connections and external speaker power |
| La platine ne tourne pas | Unit not powered on; Tonearm not moved over record | Ensure power is on; Gently move tonearm over the record to activate platter |
| Bluetooth ne se connecte pas | Mode Bluetooth désactivé ; appareil trop éloigné ; déjà associé à un autre appareil | Select Bluetooth mode; Move device closer; Disconnect from other devices and try pairing again |
| Mauvaise qualité sonore du vinyle | Disque sale ; stylet usé ; vitesse incorrecte sélectionnée | Clean record; Replace stylus; Select correct RPM speed |
9. Spécifications
| Fonctionnalité | Détail |
|---|---|
| Nom du modèle | TE 103 |
| Marque | DANFI AUDIO DF |
| Dimensions du produit | 14.37 x 10.82 x 5.28 pouces |
| Poids de l'article | 6.2 livres |
| Matériel | Acrylic, Engineered Wood |
| Vitesses du plateau tournant | 33 1/3, 45, 78 tours/minute |
| Composants inclus | Power unit, 45 rpm adaptor, Slipmat, Backup needle |
| Caractéristiques spéciales | Equalizer (EQ), FM Radio, USB Input, USB/SD Card Recording, Bluetooth Input |
| Connectivité | Bluetooth (Input only), USB, SD Card, AUX Input, RCA Line Out |
| Appareils compatibles | Headphones, MP3 Players, Personal Computers, Smartphones, Speakers, Tablets |
| Consommation électrique (mode marche) | 5 watts |
10. Garantie et assistance
For warranty information or technical support, please refer to the documentation provided with your purchase or contact DANFI AUDIO DF customer service through their official channels. Keep your purchase receipt as proof of purchase for warranty claims.