
1. Introduction
This manual provides detailed instructions for the setup, operation, and maintenance of your AMIR Projection Alarm Clock (Model WA146-AMUS). This digital alarm clock features a 7.9-inch LED display, a 180° rotatable projector, adjustable brightness, multiple alarm modes, and temperature display. Please read this manual thoroughly before use to ensure proper functionality and to maximize your product experience.

Illustration 1.1 : Avant view of the AMIR Projection Alarm Clock showing its 7.9-inch display and key features like time, alarm, 12/24H, snooze, projection, 4-level brightness, temperature, and night mode.
2. Contenu du colis
Vérifiez que tous les éléments sont présents dans le colis :
- AMIR Projection Alarm Clock (WA146-AMUS)
- Câble de chargement USB (1.5 mètre)
- Manuel d'utilisation
3. caractéristiques du produit
- Écran LED de 7.9 pouce : Large, clear digital display for easy viewing.
- Projecteur rotatif à 180° : Projects time onto walls or ceilings, adjustable for optimal viewing.
- Luminosité réglable : Four levels of display brightness (Bright, Medium, Low, Off) to suit different environments.
- Modes d'alarme multiples : Set alarms for Monday-Friday, Monday-Saturday, or Everyday.
- Fonction de répétition: Customizable snooze interval from 1 to 60 minutes.
- Affichage multifonction: Shows time, date, and indoor temperature.
- Format 12/24 heures : Passez facilement du format horaire 12 heures au format 24 heures.
- Mode nuit : Automatically dims the display between 18:00 and 6:00 (adjustable time range).
- Alimentation double : Operates via USB cable (for constant display) or 3 AAA batteries (for memory function during power outages).
4. Commandes et affichage
Familiarize yourself with the clock's buttons and display elements.

Image 4.1 : Arrière view of the alarm clock, indicating the power port, battery compartment, projection lamp, and control buttons (SWAP, +, -, ALARM, MODE, PROJECT/SNOOZE).
- Écran d'affichage : Affiche l'heure, la date, la température et l'état de l'alarme.
- Projection Lamp: Situé sur le côté, il projette l'heure sur une surface.
- Port d'alimentation (5 V CC) : Pour connecter le câble d'alimentation USB.
- Compartiment à piles : Holds 3 AAA batteries for backup power.
- SWAP Button: Used for various settings adjustments.
- Boutons « + » / « - » : Adjust values during settings, or change display brightness.
- Bouton d'alarme: Used to set and activate alarms.
- Bouton MODE : Permet de faire défiler les modes d'affichage et d'accéder aux modes de réglage.
- PROJECT/SNOOZE Button: Activates/deactivates projection, or triggers snooze during an alarm.
5. Installation
5.1 Alimentation de l'horloge
Le réveil peut être alimenté de deux manières :
- USB Cable Power (Recommended): Connect the provided USB cable to the DC 5V power port on the back of the clock and plug the other end into a USB power adapter (not included) or a USB port. The LED screen will remain constantly on.
- Puissance de la batterie : Insert 3 AAA batteries (not included) into the battery compartment. When powered by batteries, the display will turn off after a short period to conserve power. Press any button to activate the display. Batteries also provide a memory feature, retaining time settings during power outages when using USB power.
5.2 Préparation initiale
Before first use, ensure you remove the protective film from the display screen.
6. Mode d'emploi
6.1 Réglage de l'heure et du format 12/24 heures
- Appuyez et maintenez enfoncé le MODE button for 3 seconds. The 12/24H format will flash. Use the '+' or '-' des boutons pour sélectionner votre format préféré.
- Presse MODE again. The hour digits will flash. Use '+' or '-' pour régler l'heure.
- Presse MODE again. The minute digits will flash. Use '+' or '-' pour régler les minutes.
- Presse MODE again to confirm and exit time setting.

Image 6.1: Visual guide for setting the time and selecting 12-hour or 24-hour format using the MODE, '+' and '-' buttons.
6.2 Réglage de l'alarme
- Appuyez et maintenez enfoncé le ALARME button for 3 seconds. The alarm hour digits will flash. Use '+' or '-' pour régler l'heure du réveil.
- Presse ALARME again. The alarm minute digits will flash. Use '+' or '-' pour régler les minutes de l'alarme.
- Presse ALARME again. The snooze time (default 5 minutes) will flash. Use '+' or '-' to set the snooze interval from 1 to 60 minutes.
- Presse ALARME again. The alarm mode (1-5, 1-6, or 1-7) will flash. Use '+' or '-' pour sélectionner:
- 1-5: Du lundi au vendredi
- 1-6: Du lundi au samedi
- 1-7: Tous les jours
- Presse ALARME again to confirm and exit alarm setting.

Image 6.2: Visual guide for setting the alarm time, snooze duration, and selecting one of the three alarm modes.
6.3 Activation/Désactivation de l'alarme
After setting the alarm, a small alarm icon will appear on the display, indicating the alarm is active. To deactivate the alarm, short press the ALARME Appuyez sur le bouton jusqu'à ce que l'icône d'alarme disparaisse.
6.4 Utilisation de la fonction Snooze
Lorsque l'alarme sonne, appuyez sur le grand bouton. PROJECT/SNOOZE button to activate snooze. The alarm will pause for the set snooze interval and then sound again. To turn off the alarm completely, press any other button.

Image 6.3: Illustration of the snooze function, showing a person pressing the large PROJECT/SNOOZE button for extra sleep time.
6.5 Réglage de la luminosité de l'écran
Appuyez brièvement sur le '+' or '-' buttons to cycle through the four display brightness levels: Bright, Medium, Low, and Off.

Image 6.4: Demonstrates the four adjustable brightness levels of the clock's display: Bright, Medium, Dim, and Off.
6.6 Utilisation de la fonction de projection
The clock can project the time onto a wall or ceiling. The projection distance ranges from 1.6ft to 16ft.
- Activer/Désactiver la projection : Appuyez brièvement sur le PROJECT/SNOOZE bouton pour allumer ou éteindre la projection.
- Ajuster l'angle de projection : Manually rotate the projection lamp on the side of the clock to adjust the projection angle.
- 180° Flip Projection: Si l'heure projetée apparaît à l'envers, appuyez et maintenez la touche enfoncée. ÉCHANGER button to flip the projection 180 degrees.
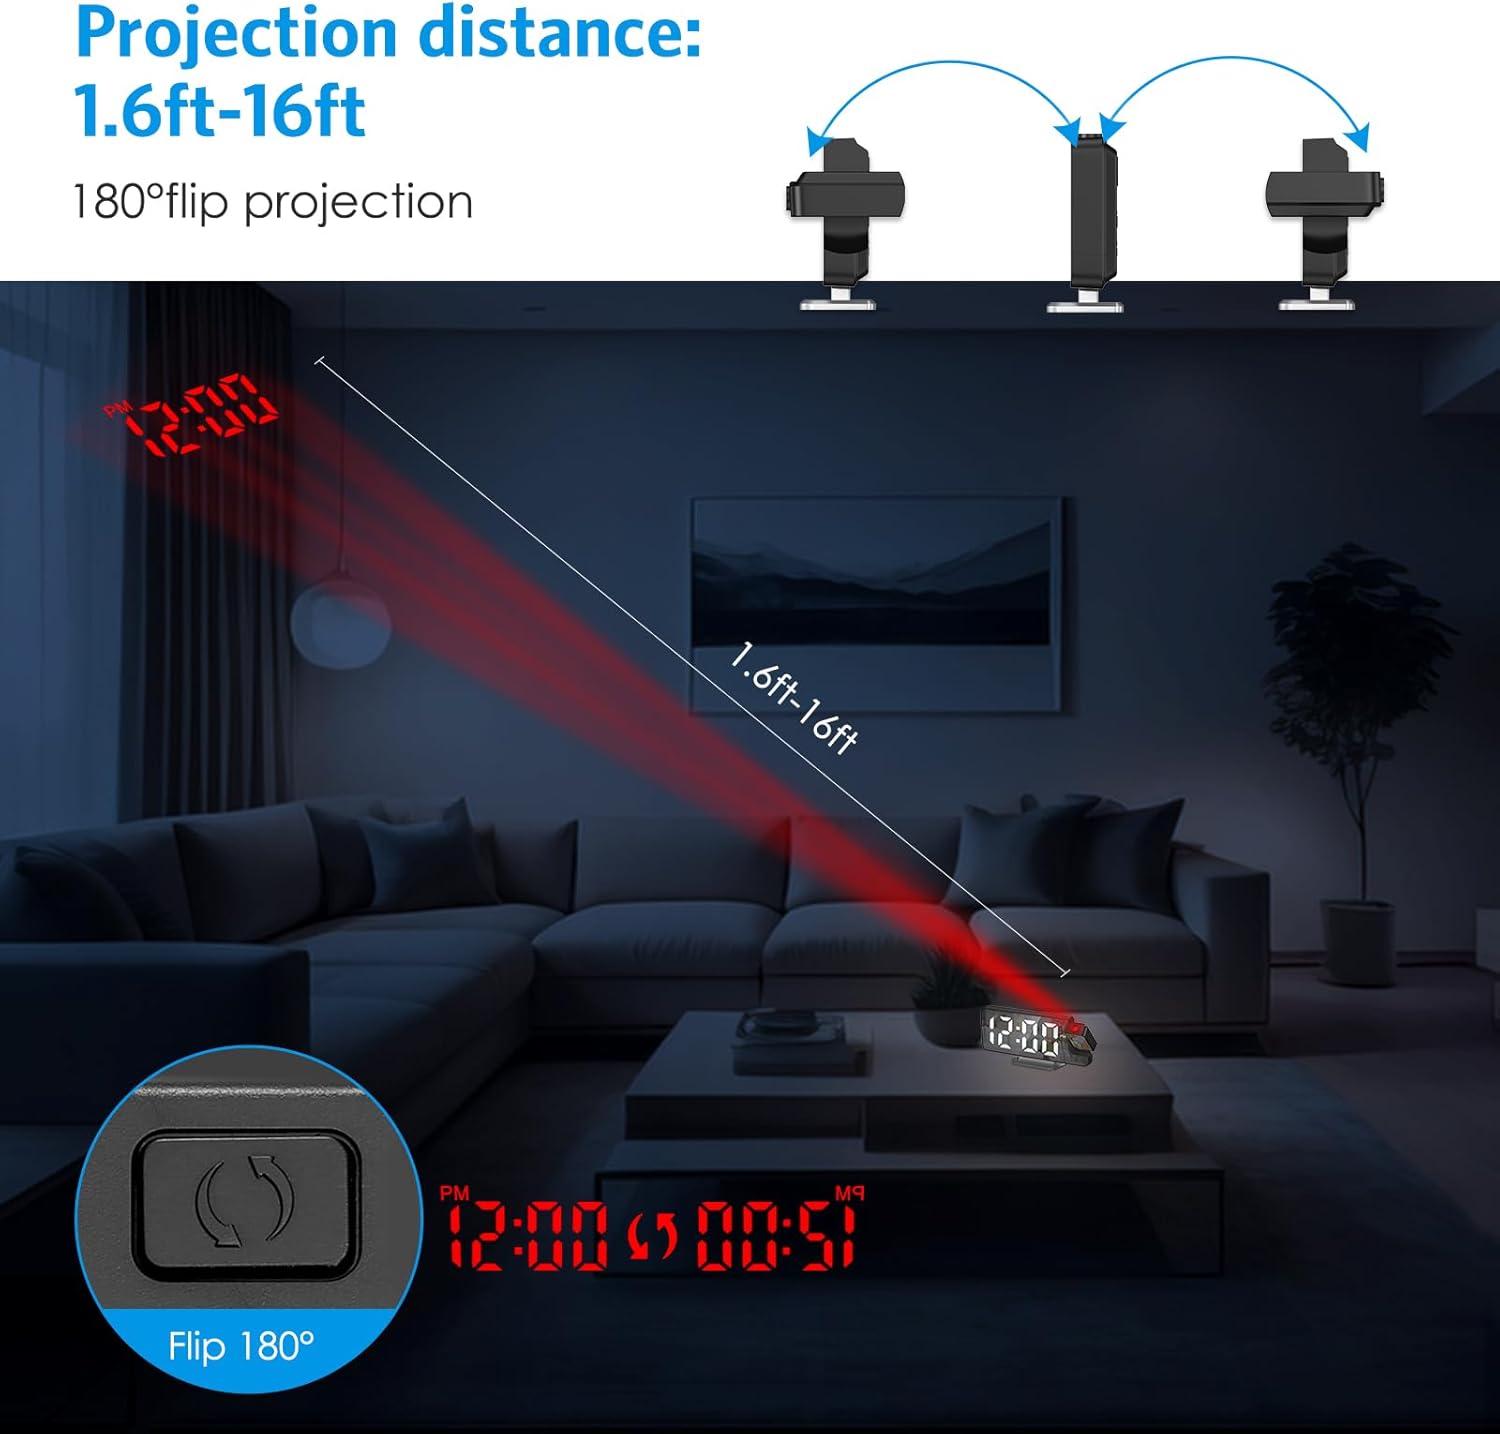
Image 6.5: Illustrates the projection distance range (1.6ft-16ft) and the 180° flip projection capability.
Video 6.1: This video demonstrates the AMIR Projection Alarm Clock's features, including 3 levels of brightness adjustment, time/date/temperature rotation on the main display, manual adjustment of projection angle, one-touch on/off projection, and 180-degree projection rotation.
6.7 Mode nuit
Night mode automatically dims the display during a specified period to reduce light disturbance. The default night mode period is from 18:00 to 6:00.
- Activer/Désactiver le mode nuit : Appuyez sur le MODE button repeatedly until 'ON' or 'OFF' appears next to the night mode icon. Use '+' or '-' pour basculer.
- Adjust Night Mode Time Range: Lorsque le mode nuit est activé, appuyez longuement sur MODE button until the start hour flashes. Use '+' or '-' pour régler. Appuyez sur MODE to move to the start minute, then end hour, and end minute, adjusting each with '+' or '-'. Presse MODE pour sauver.

Image 6.6: The alarm clock operating in Night Mode, showing the display dimmed and time projected onto the wall.
7. Entretien
To ensure the longevity and optimal performance of your AMIR Projection Alarm Clock, follow these maintenance guidelines:
- Nettoyage: Use a soft, dry cloth to wipe the display and exterior surfaces. Avoid abrasive cleaners or solvents, which can damage the finish.
- Placement: Placez l'horloge sur une surface stable et plane, à l'abri de la lumière directe du soleil, des températures extrêmes et d'une forte humidité.
- Pouvoir: If not using the clock for an extended period, remove the AAA batteries to prevent leakage.
8. Dépannage
Si vous rencontrez des problèmes avec votre réveil, consultez les problèmes et solutions courants suivants :
| Problème | Cause possible | Solution |
|---|---|---|
| L'écran est éteint ou fonctionne par intermittence (sur batterie). | Battery saving mode activated. | Press any button to activate the display. For continuous display, use USB power. |
| Time changes randomly or is incorrect. | Power interruption or incorrect setting. | Ensure AAA batteries are installed for memory backup. Re-set the time following Section 6.1. Avoid placing near strong electromagnetic fields. |
| La projection est floue ou imprécise. | Incorrect focus or distance. | Adjust the projection lamp's focus ring (if available) or move the clock closer/further from the projection surface. Ensure the surface is flat and clear. |
| L'alarme ne sonne pas. | L'alarme n'est pas activée ou le volume est trop faible. | Verify the alarm icon is visible on the display. Check alarm settings (Section 6.2). Ensure alarm volume is not set to minimum (if adjustable). |
| Projection is upside down. | L'orientation de la projection nécessite un ajustement. | Appuyez et maintenez enfoncé le ÉCHANGER button to flip the projection 180 degrees (Section 6.6). |
9. Spécifications
| Fonctionnalité | Détail |
|---|---|
| Marque | AMIR |
| Numéro de modèle | WA146-AMUS |
| Type d'affichage | LED numérique |
| Taille de l'écran | 7.9 pouces |
| Dimensions du produit (L x H) | 4.13"W x 1.25"H (Note: This seems to be a partial dimension, likely referring to height/depth. The main image shows 7.5in width.) |
| Source d'énergie | USB Cable Power (DC 5V) or 3 AAA Batteries |
| Type de matériau | Acrylonitrile butadiène styrène (ABS) |
| Caractéristiques spéciales | 2 Alarms + 3 Levels Volume, Adjustable Brightness, Large Display, Snooze, USB/Battery Powered, 180° Rotatable Projector, Temperature Display, Night Mode |
10. Garantie et assistance
The AMIR Projection Alarm Clock (WA146-AMUS) comes with a Lifetime Warranty, ensuring long-term reliability. For any questions, technical assistance, or support needs, please contact AMIR customer service. Refer to the product packaging or the official AMIR website pour les coordonnées.