
1. Informations importantes sur la sécurité
Please read all instructions carefully before using the EVTSCAN Projection Clock. Keep this manual for future reference.
- N’exposez pas l’appareil à des températures extrêmes, à la lumière directe du soleil ou à une forte humidité.
- Évitez de faire tomber l'horloge ou de la soumettre à des chocs violents.
- N’essayez pas de démonter ou de réparer l’appareil vous-même. Contactez un technicien qualifié.
- Use only the specified power adapter (DC 5.0V, 1.2A) or appropriate batteries (2xAAA, not included).
- Tenir hors de portée des enfants.
2. Produit terminéview
The EVTSCAN Projection Clock is a versatile digital alarm clock featuring a 3-inch backlit LCD screen that displays time, date, day of the week, temperature, and humidity. It includes a projection function to display time and temperature on a wall or ceiling, dual alarms with snooze, and a USB port for charging mobile phones.
Caractéristiques principales :
- 12/24-hour time format display.
- Date and day of the week display (7 languages for week).
- Temperature detection (-9℃ to +50℃) and humidity detection (20% to 95%).
- Projection function with 180-degree rotation for time and temperature.
- Dual alarm clocks with slowly increasing volume.
- Fonction de répétition d'alarme de 5 minutes.
- USB charging port for mobile devices.
- Adjustable backlight with 4 levels (high, medium, low, off).

Figure 2.1 : Devant view of the EVTSCAN Projection Clock, showing the LCD display and projection lens.
3. Contenu du colis
Lors du déballage, veuillez vérifier que tous les éléments énumérés ci-dessous sont présents et en bon état :
- 1 x EVTSCAN Projection Clock
- 1 x câble USB
- 1 x Manuel d'utilisation en anglais
Note: 2xAAA batteries are required for battery power and are not included in the package.
4. Installation
4.1 Alimentation de l'appareil
The EVTSCAN Projection Clock can be powered by either AAA batteries or via the included USB cable.
4.1.1 Installation de la batterie
- Repérez le couvercle du compartiment à piles à l'arrière de l'horloge.
- Slide open the cover.
- Insérez deux (2) piles AAA, en veillant à respecter la polarité (+/-).
- Fermez soigneusement le couvercle du compartiment à piles.
Note: When powered by batteries, the backlight will only light up for 8 seconds when activated to conserve power. The projection lamp will also light up for 8 seconds.
4.1.2 USB Power Connection
- Connect the small end of the provided USB cable to the DC 5.0V 1.2A input port on the back of the clock.
- Connect the larger end of the USB cable to a compatible USB power adapter (not included) or a powered USB port.
Note: When powered by USB, the backlight and projection lamp can remain continuously on, with adjustable brightness for the backlight.
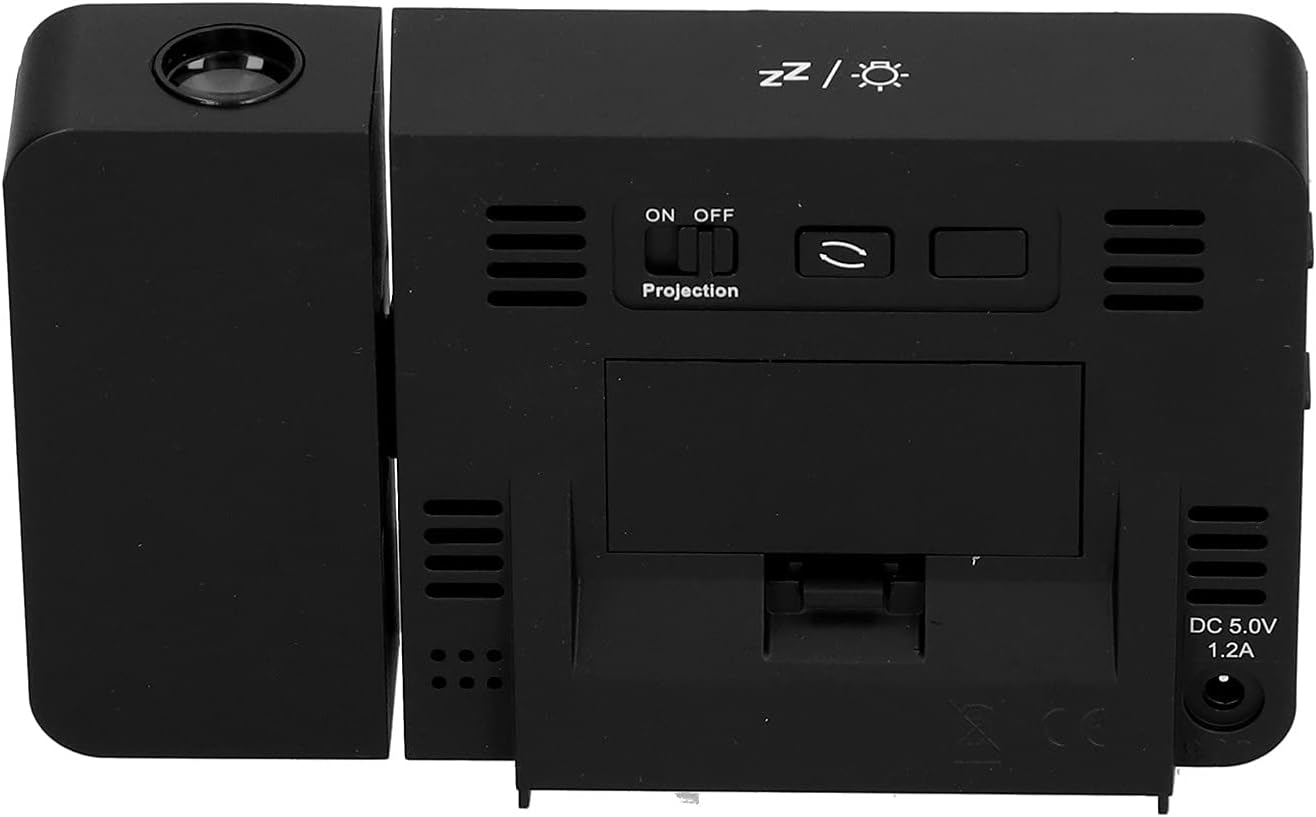
Figure 4.1 : Arrière view of the clock, indicating the battery compartment and DC 5.0V 1.2A power input.
5. Mode d'emploi
5.1 Fonctions des boutons
Familiarize yourself with the control buttons located on the front and sides of the clock:
- TEMPS: Passe en mode de réglage de l'heure.
- ALARME: Passe en mode de réglage de l'alarme.
- +: Increases values, switches 12/24HR format, adjusts backlight.
- -: Decreases values, switches temperature units (℃/℉).
- Projection ON/OFF Switch: Activates or deactivates the projection. (Located on the back/side)
- Alarm 1 ON/OFF Switch: Activates or deactivates Alarm 1. (Located on the side)
- Alarm 2 ON/OFF Switch: Activates or deactivates Alarm 2. (Located on the side)
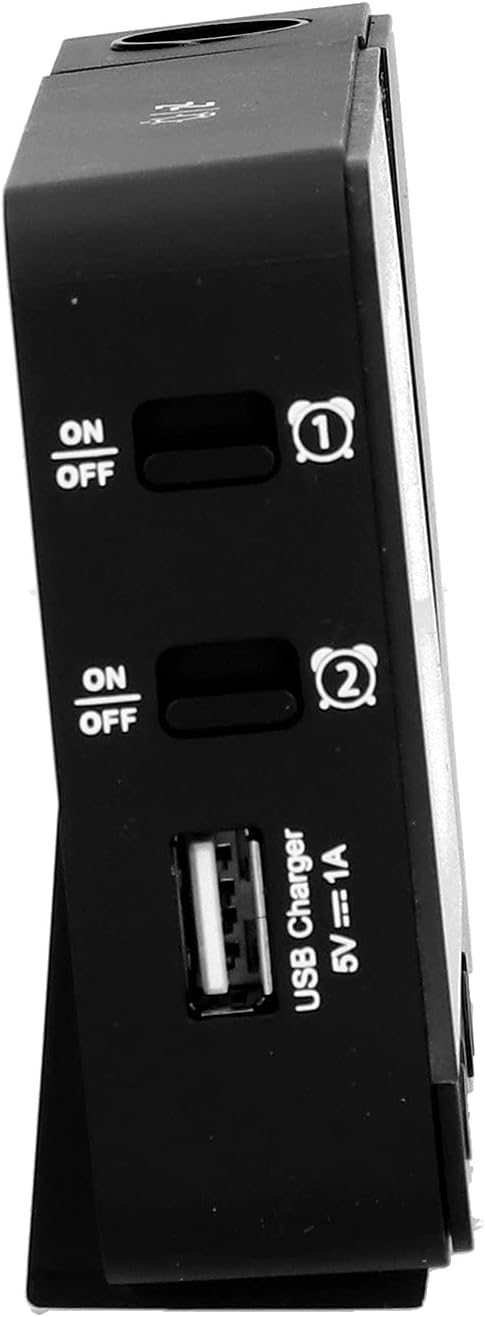
Figure 5.1 : Côté view showing Alarm 1 and Alarm 2 ON/OFF switches, and the USB charging port.
5.2 Réglage de l'heure et de la date
- Appuyez et maintenez enfoncé le TEMPS Appuyez sur ce bouton pour accéder au mode de réglage de l'heure. L'affichage de l'heure clignotera.
- Utilisez le + or - boutons pour régler l'heure.
- Presse TEMPS Vérifiez à nouveau l'heure et passez au réglage des minutes. Ajustez avec + or -.
- Continuez à appuyer TEMPS to cycle through setting year, month, and day. Adjust each with + or -.
- Après avoir réglé la date, appuyez sur TEMPS une dernière fois pour quitter le mode de réglage.
- Pour basculer entre le format 12 heures et le format 24 heures, appuyez sur la touche correspondante. + button during normal time display.
- To switch between Celsius (℃) and Fahrenheit (℉) for temperature, press the - button during normal time display.
5.3 Réglage des alarmes
L'horloge comporte deux alarmes indépendantes (Alarme 1 et Alarme 2).
- Appuyez et maintenez enfoncé le ALARME button to enter Alarm 1 setting mode. The Alarm 1 hour display will flash.
- Utilisez le + or - boutons pour régler l'heure de l'alarme.
- Presse ALARME again to confirm the hour and move to Alarm 1 minute setting. Adjust with + or -.
- Presse ALARME again to move to Alarm 2 hour setting, and repeat the process for Alarm 2.
- Après avoir réglé l'alarme sur 2 minutes, appuyez sur ALARME une dernière fois pour quitter le mode de réglage.
- To activate or deactivate an alarm, use the corresponding Alarme 1 ON/OFF or Alarme 2 ON/OFF switch on the side of the clock. An alarm icon will appear on the display when active.
5.3.1 Fonction de répétition
When an alarm sounds, press any button (except the alarm ON/OFF switch) to activate the 5-minute snooze function. The alarm will sound again after 5 minutes. To turn off the alarm completely, slide the corresponding alarm ON/OFF switch to OFF.
5.4 Fonction de projection
The clock can project the time and temperature onto a wall or ceiling.
- Localisez le Projection activée/désactivée switch on the back of the clock. Slide it to ON to activate the projection.
- Adjust the angle of the projection arm (the part with the lens) to direct the projection as desired. The arm can rotate nearly 180 degrees.
- The projection will display the current time and temperature in a soft red color.

Figure 5.2 : Côté view showing the projection arm extended and ready for use.

Figure 5.3 : The clock projecting time and temperature onto a wall in a bedroom setting.
5.5 Réglage du rétroéclairage
When the clock is powered by USB, the backlight can be adjusted to four levels: high, medium, low, or off. Repeatedly press the + button during normal time display to cycle through the brightness levels.
When powered by batteries, the backlight will illuminate for 8 seconds when any button is pressed, then turn off to conserve power.
5.6 ports de chargement USB
The clock features a USB charging port (5V=1A) on its side. You can use this port to charge your mobile phone or other small electronic devices while the clock is connected to USB power.
Note: The USB charging port only functions when the clock is powered via the USB cable. It does not work when the clock is running on battery power.
6. Entretien
6.1 Nettoyage
- Essuyez la surface de l'horloge avec un chiffon doux et sec.
- N’utilisez pas de nettoyants abrasifs, de solvants ou de sprays chimiques, car ils pourraient endommager la finition ou les composants électroniques.
- Keep the projection lens clean for clear projection. Use a soft, lint-free cloth.
6.2 Remplacement de la batterie
When the display becomes dim or the clock functions erratically while on battery power, it's time to replace the AAA batteries. Refer to Section 4.1.1 for battery installation instructions. Always replace both batteries at the same time with new ones.
7. Dépannage
| Problème | Cause possible | Solution |
|---|---|---|
| L'affichage de l'horloge est éteint ou faiblement lumineux. | No power, low batteries, or USB cable not connected. | Check battery installation and replace if necessary. Ensure USB cable is securely connected to a power source. |
| Projection is unclear or not visible. | Projection switch is OFF, lens is dirty, or projection distance is too far/close. | Ensure Projection switch is ON. Clean the projection lens. Adjust the clock's distance from the projection surface. |
| L'alarme ne sonne pas. | L'alarme n'est pas réglée ou est désactivée. | Verify alarm time is set correctly. Ensure the corresponding Alarm ON/OFF switch is in the ON position. |
| Le port de chargement USB ne fonctionne pas. | Clock is running on battery power, or USB cable is not connected to a power source. | Ensure the clock is powered via the USB cable and connected to a functional power adapter. |
| Date/heure incorrecte. | La date et l'heure ne sont pas correctement définies. | Reportez-vous à la section 5.2 pour réinitialiser la date et l'heure. |
8. Spécifications
| Modèle: | B0CLGDFCGX |
| Marque: | EVTSCAN |
| Matériel: | ABS (acrylonitrile butadiène styrène) |
| Dimensions du produit : | Environ 13.5 x 8 x 2.5 cm (5.3 x 3.1 x 1.0 pouces) |
| Poids: | Environ. 242 g (8.5 onces) |
| Type d'affichage : | Écran LCD numérique rétroéclairé |
| Source d'alimentation : | 2xAAA batteries (not included) or DC 5.0V 1.2A via USB cable |
| Sortie de charge USB: | 5V=1A |
| Plage de détection de température : | -9℃ to +50℃ (1℃ resolution) |
| Plage de détection d'humidité : | 20% to 95% (1% resolution) |
| Temperature/Humidity Calibration Time: | 30 secondes |
| Niveaux de rétroéclairage : | 4 levels (High, Medium, Low, Off) when USB powered; 8s illumination when battery powered. |
| Projection Lamp: | Always on when USB powered; 8s illumination when battery powered. |

Figure 8.1 : Product dimensions: 5.3 inches wide by 3.1 inches high.
9. Garantie et assistance
EVTSCAN products are manufactured to high quality standards. For specific warranty information, please refer to the warranty card included with your purchase or contact your retailer.
If you encounter any issues or have questions regarding your EVTSCAN Projection Clock, please contact the seller or EVTSCAN customer support for assistance. Please have your model number (B0CLGDFCGX) ready when contacting support.
Pour obtenir de l'aide supplémentaire, vous pouvez consulter le Boutique EVTSCAN sur Amazon.