1. Introduction
This manual provides detailed instructions for the installation, operation, and maintenance of your kielle Oudee Thermostatic Shower Set 20602010. Please read this manual thoroughly before installation and use to ensure proper function and safety. Keep this manual for future reference.
2. Consignes de sécurité
- L'installation doit être effectuée par un professionnel qualifié, conformément aux codes de plomberie et de construction locaux.
- Assurez-vous que l'alimentation en eau est coupée avant de commencer tout travail d'installation ou d'entretien.
- Vérifiez que tous les raccords sont bien fixés et étanches afin d'éviter les fuites.
- N’utilisez pas de nettoyants abrasifs ni de produits chimiques agressifs sur la finition chromée, car cela pourrait endommager la surface.
- The thermostatic mixer is designed to maintain a constant water temperature. Periodically check the temperature to ensure it is set to a safe level, especially for children or individuals with sensitive skin.
3. Contenu du colis
Déballez soigneusement le carton et vérifiez que tous les composants sont présents et en bon état. Si des pièces sont manquantes ou endommagées, contactez immédiatement votre revendeur.
- Thermostatic Shower Mixer (Faucet)
- Overhead Shower Head (approx. 260 mm)
- Douchette à main
- Shower Bar (Riser Rail)
- Tuyau de douche
- Matériel de montage

Figure 1 : Complete kielle Oudee Thermostatic Shower Set, showing the overhead shower, hand shower, thermostatic mixer, and riser rail.
4. Spécifications
| Fonctionnalité | Spécification |
|---|---|
| Marque | kielle |
| Modèle | Oudee 20602010 |
| Couleur | Chrome |
| Finition | Chrome |
| Matériel | Stainless steel or brass with chrome finish (Handle: Metal) |
| Nombre de poignées | 1 |
| Type de montage | Support mural |
| Dimensions du pommeau de douche de tête | Environ 260 mm |
| Hand Shower Jets | 3 jet functions |

Figure 2 : Technical drawing illustrating the dimensions and components of the kielle Oudee shower set.
5. Configuration et installation
This section outlines the general steps for installing the kielle Oudee Thermostatic Shower Set. Professional installation is highly recommended.
5.1 Vérifications avant l'installation
- Approvisionnement en eau: Ensure hot and cold water supply lines are available at the installation point. The thermostatic mixer requires both.
- Préparation du mur : The installation surface must be clean, flat, and structurally sound to support the weight of the shower set.
- Outils requis : Gather necessary tools such as a drill, level, measuring tape, wrench, screwdriver, and sealant.
5.2 étapes d'installation
- Couper l'alimentation en eau : Repérez le robinet d'arrêt principal et coupez l'arrivée d'eau dans la salle de bain.
- Installez le mélangeur thermostatique :
- Mark the desired height for the mixer on the wall.
- Install the eccentric connectors into the wall water outlets, ensuring they are level and at the correct distance for the mixer.
- Attach the thermostatic mixer to the eccentric connectors, using sealing washers and tightening securely.
- Install the Riser Rail:
- Position the riser rail above the mixer and mark the drilling points for the wall brackets.
- Percez des trous, insérez des chevilles et fixez les supports au mur.
- Attach the riser rail to the brackets.
- Attach the Overhead Shower Head:
- Connect the overhead shower arm to the top of the riser rail.
- Attach the 260mm overhead shower head to the shower arm. Ensure all connections are sealed.
- Connect the Hand Shower and Hose:
- Connect one end of the shower hose to the outlet on the thermostatic mixer.
- Connect the other end of the hose to the hand shower.
- Place the hand shower in its adjustable holder on the riser rail.
- Test de fuites : Ouvrez lentement l'arrivée d'eau principale et vérifiez l'étanchéité de tous les raccords. Resserrer les raccords qui fuient.
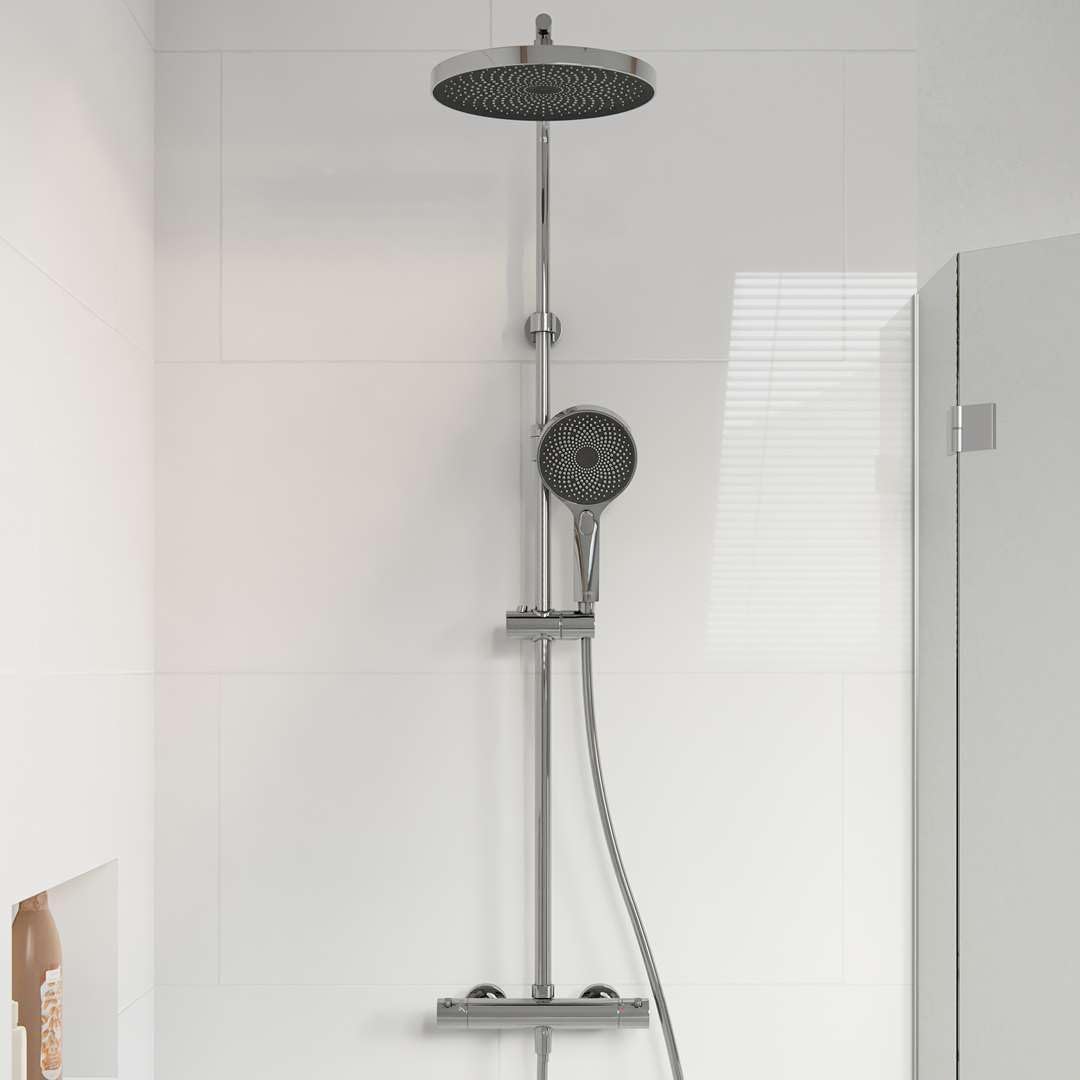
Figure 3 : Example of the kielle Oudee shower set installed in a shower enclosure.
6. Mode d'emploi
The kielle Oudee Thermostatic Shower Set is designed for ease of use and precise temperature control.
6.1 Contrôle de la température
- The thermostatic mixer features a single handle for temperature adjustment.
- Rotate the handle to the left for hotter water and to the right for colder water.
- Most thermostatic mixers have a safety stop (often at 38°C / 100°F) to prevent accidental scalding. To exceed this temperature, you typically need to press a button or override the stop while turning the handle further.
6.2 Sélection du débit d'eau et de la sortie
- The mixer also controls the water flow and switches between the overhead shower and the hand shower.
- Typically, a diverter knob or button on the mixer allows you to select the desired water outlet.
- Douche de tête : Provides a wide, rain-like spray for a full body shower experience.
- Douche à main: Offers flexibility for targeted rinsing. The hand shower features 3 distinct jet functions. These can usually be selected by rotating the spray plate or pressing a button on the hand shower head.
- SilkFlow: A gentle, soft spray for a relaxing experience.
- MistFlow: A fine, invigorating mist spray.
- Standard Spray: A powerful, focused spray for effective rinsing.

Figure 4 : The 260mm overhead shower head delivering a rain-like spray.

Figure 5 : The hand shower demonstrating its spray capabilities.

Figure 6 : The SilkFlow spray pattern from the hand shower, offering a gentle water flow.

Figure 7 : The MistFlow spray pattern from the hand shower, providing a fine, invigorating mist.

Figure 8 : The EasyClick button on the hand shower, used for switching between spray patterns.
7. Entretien et nettoyage
Regular cleaning and maintenance will ensure the longevity and optimal performance of your kielle Oudee shower set.
- Nettoyage de la finition chromée :
- Utilisez un chiffon doux et un savon doux ou un nettoyant non abrasif spécialement conçu pour les finitions chromées.
- Wipe the surfaces gently and rinse thoroughly with clean water.
- Sécher avec un chiffon doux pour éviter les taches d'eau.
- Ne pas utiliser : Abrasive sponges, scouring pads, harsh detergents, acid-based cleaners, or solvents, as these can damage the chrome.
- Nettoyage des pommeaux de douche :
- Over time, mineral deposits (limescale) can build up in the nozzles of the shower heads.
- Many modern shower heads feature flexible silicone nozzles that can be easily cleaned by gently rubbing them with your finger to dislodge deposits.
- For more stubborn deposits, a solution of white vinegar and water can be used. Soak the shower head (if detachable) or spray the solution onto the nozzles, let it sit for a short period, then rinse thoroughly.
- Cartouche thermostatique : If you notice inconsistent temperature control, the thermostatic cartridge may need cleaning or replacement. This should be done by a qualified plumber.
8. Dépannage
This section addresses common issues you might encounter with your shower set.
| Problème | Cause possible | Solution |
|---|---|---|
| Absence de débit d'eau ou faible pression |
|
|
| Température de l'eau irrégulière |
|
|
| Fuites provenant des connexions |
|
|
9. Garantie et assistance
Information regarding specific warranty terms and availability of spare parts for the kielle Oudee Thermostatic Shower Set 20602010 is not provided in the product data. Please refer to your purchase documentation or contact your retailer for details on warranty coverage and spare parts availability.
For technical support or further assistance, please contact kielle customer service or your authorized dealer.


