
Introduction
Thank you for choosing the ROCAM Digital Projection Alarm Clock, Model CR1024. This device combines a digital alarm clock with a 270° rotatable projection feature, FM radio, dual alarm settings, and a USB charging port. Please read this manual carefully to ensure proper use and to fully enjoy all its features.

Image: The ROCAM Digital Projection Alarm Clock displaying time, date, temperature, and humidity, positioned on a bedside table next to a cup of coffee and a notebook.
Caractéristiques du produit
- Projection rotative à 270° : Project time onto your wall or ceiling with adjustable angle and focus.
- 5-Level Dimmable LED Display: Adjust the brightness of the main display to your preference.
- Radio FM et minuterie de sommeil : Enjoy your favorite radio stations and set a sleep timer for automatic shutdown.
- Dual Alarm with Weekend/Weekday Mode: Set two independent alarms with customizable schedules (Mon-Sun, Mon-Fri, Sat-Sun, One-Time).
- USB-C Power Input & USB-A Charging Output: Power the clock via USB-C and charge external devices like smartphones via USB-A.
- Batterie de secours: Conserve les réglages de l'heure et de l'alarme en cas de panne de courant.tages (piles non incluses).
- Affichage de la température et de l'humidité : Shows indoor temperature (°C/°F) and humidity.
- Fonction veilleuse : Integrated night light for soft illumination.
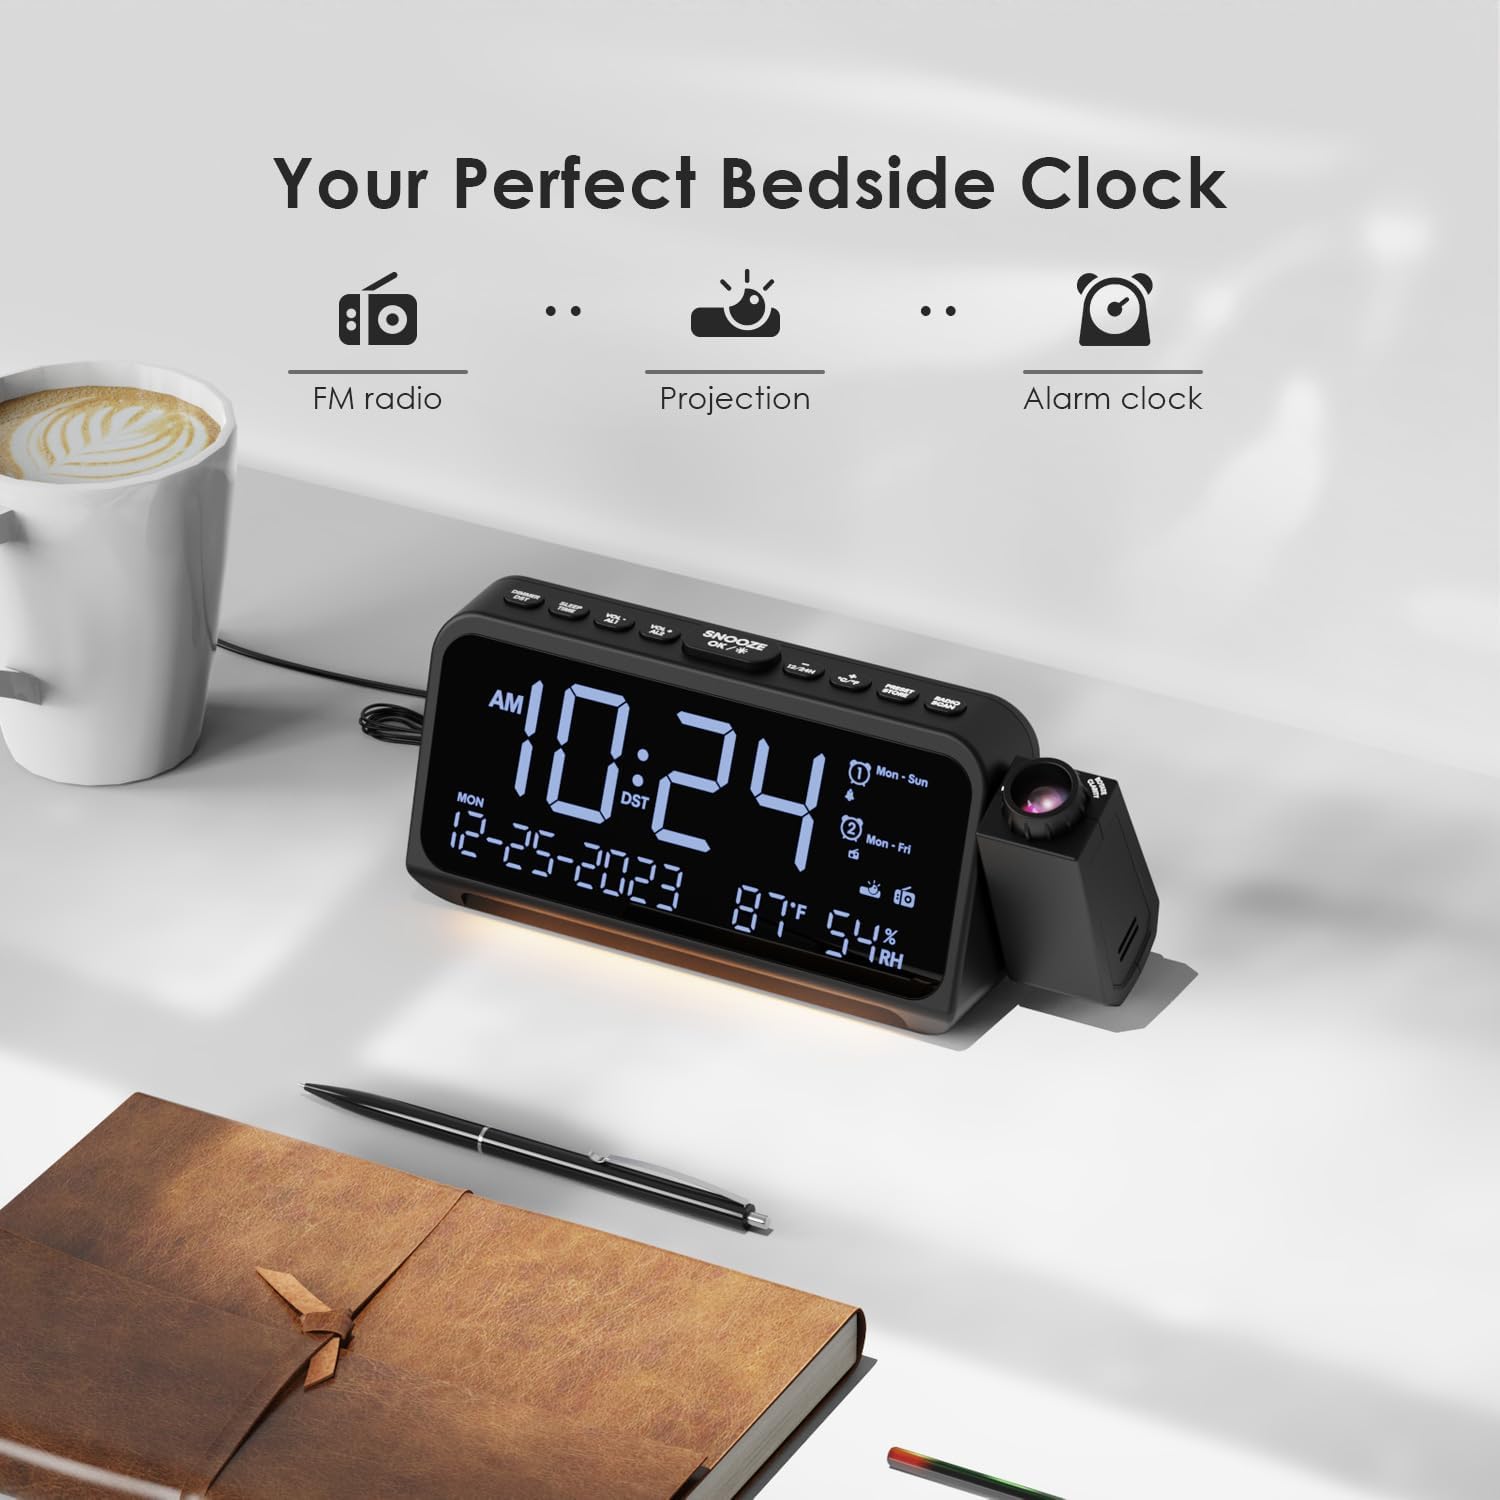
Image: Visual representation of the clock's main functions: FM radio, projection, and alarm clock.
Contenu du colis
Veuillez vérifier que le colis contient les éléments suivants :
- ROCAM Digital Projection Alarm Clock (CR1024)
- Câble d'alimentation USB de type C
- Adaptateur secteur
- Manuel d'utilisation
Note: 1 CR2 battery is required for backup functionality and is not included in the package.

Image: The alarm clock, USB-C cable, power adapter, and user manual laid out, with product dimensions (20cm x 8.7cm x 3.81cm) and weight (240g) indicated.
Produit terminéview
Boutons du panneau supérieur :
- SNOOZE/OK/*: Snooze alarm, confirm settings, or activate night light.
- VOL-/AL1: Decrease volume, set Alarm 1.
- VOL+/AL2: Increase volume, set Alarm 2.
- 12/24H : Basculez entre le format 12 heures et 24 heures.
- °C/°F : Basculez entre l'affichage de la température en degrés Celsius et Fahrenheit.
- PRESET/STORE: Save FM radio presets.
- RADIO/SCAN: Turn FM radio on/off, scan for stations.
- RÉGLAGE DE L'HEURE: Passez en mode de réglage de l'heure.
- ENSEMBLE D'ALARME: Entrez dans le mode de réglage de l'alarme.
Side Panel & Rear:
- Objectif de projection : Projects time onto a surface.
- Molette de mise au point : Ajuste la netteté de l'image projetée.
- Rotation des projections : Allows 270° adjustment of the projection angle.
- Bouton DIM : Adjusts projection brightness.
- Bouton d'alimentation : Turns the projection on/off.
- Type-C Input (5V-2A): Raccordement à l'alimentation principale.
- USB-A Output (5V-1A): Pour recharger des appareils externes.
- Antenne FM : Étendez la portée pour une meilleure réception radio.
- Compartiment à piles : For CR2 backup batteries.

Image : détaillée view of the top control buttons and the projection unit, highlighting the dual alarm settings.

Image: The back of the alarm clock, illustrating the Type-C power input and the USB-A output port for charging other devices.
Installation
1. Connexion électrique :
- Connect the provided USB Type-C cable to the Type-C input port on the back of the alarm clock.
- Plug the other end of the USB cable into the power adapter, then plug the adapter into a standard wall outlet.
- L'écran s'allumera, indiquant que l'horloge est sous tension.

Image: The alarm clock is shown connected to a wall outlet via its USB-C power cable and adapter.
2. Installation de la batterie de secours :
- Repérez le compartiment à piles sous l'horloge.
- Ouvrez le couvercle du compartiment.
- Insert 1 CR2 battery (not included) according to the polarity markings (+/-).
- Close the battery compartment cover. This battery will preserve time and alarm settings during a power outage.

Image: The bottom of the alarm clock with the battery compartment open, showing where to insert CR2 batteries.
Mode d'emploi
1. Réglage de l'heure et de la date :
- Appuyez et maintenez enfoncé le RÉGLAGE DE L'HEURE Appuyez sur le bouton. Les chiffres de l'heure se mettront à clignoter.
- Utiliser VOL+ or vol- boutons pour régler l'heure. Appuyez sur RÉGLAGE DE L'HEURE encore une fois pour confirmer.
- Répétez le processus pour les minutes, l'année, le mois et le jour.
- Presse 12/24H pour basculer entre le format 12 heures et le format 24 heures.
- Presse ° C / ° F to switch between Celsius and Fahrenheit for temperature display.
2. Réglage des alarmes (Alarme 1 et Alarme 2) :
- Appuyez et maintenez enfoncé le ENSEMBLE D'ALARME bouton. L'icône Alarme 1 et les chiffres des heures clignoteront.
- Utiliser VOL+ or vol- pour régler l'heure de l'alarme souhaitée. Appuyez sur ENSEMBLE D'ALARME pour confirmer.
- Répétez pendant quelques minutes.
- Select alarm mode (Mon-Sun, Mon-Fri, Sat-Sun, One-Time) using VOL+ or vol-. Presse ENSEMBLE D'ALARME pour confirmer.
- Choose alarm sound: buzzer or FM radio. Use VOL+ or vol- pour sélectionner. Appuyez sur ENSEMBLE D'ALARME pour confirmer.
- To set Alarm 2, briefly press ENSEMBLE D'ALARME again and repeat the steps.
- To activate/deactivate an alarm, briefly press AL1 or AL2L'icône d'alarme apparaîtra/disparaîtra sur l'écran.
Image: The clock display showing options for setting two alarms with different ringtone choices and day modes (Mon-Sun, Mon-Fri, Sat-Sun, One-Time).
3. Fonction de répétition :
Lorsqu'une alarme retentit, appuyez sur le SNOOZE/OK/* Appuyez sur le bouton pour la mettre en sourdine pendant 9 minutes. L'alarme sonnera de nouveau après cette période.
4. Luminosité de l'écran (variateur) :
Appuyez sur le SNOOZE/OK/* button repeatedly to cycle through 5 levels of display brightness (L-1 to L-5) or turn the display off.

Image: The clock display showing five different brightness levels (L-1 to L-5) for the main LED screen.
5. Paramètres de projection :
- Activer/désactiver : Appuyez sur le Bouton d'alimentation on the side of the projection unit to turn the projection on or off.
- Régler la luminosité : Appuyez sur le FAIBLE button on the side of the projection unit to cycle through 5 levels of projection brightness.
- Ajuster l'angle : Rotate the projection unit up to 270° to direct the time onto your desired surface (wall or ceiling).
- Ajuster la mise au point : Faites pivoter le Molette de mise au point on the projection unit to sharpen the projected image.

Image: The digital time '10:24' projected in red onto a dark wall, demonstrating the projection feature.

Image: The projection unit rotating 270 degrees, showing how the projected time can be adjusted for optimal viewing.

Image: The projected time showing five distinct brightness levels, from level 1 (dimmest) to level 5 (brightest).
6. Fonctionnement de la radio FM :
- Déployez l'antenne FM pour une meilleure réception.
- Appuyez sur le RADIO/SCAN button to turn the FM radio on.
- Appuyez et maintenez RADIO/SCAN pour scanner et enregistrer automatiquement les stations disponibles.
- Utiliser VOL+ or vol- to manually tune to a station or cycle through saved presets.
- Presse PRÉRÉGLAGE/MAGASIN to save the current station as a preset.
- Presse RADIO/SCAN again to turn the FM radio off.

Image: The clock displaying an FM radio frequency (108.0 MHz) and options for a sleep timer (OFF, 15, 30, 60, 90 minutes).
7. Minuterie de veille :
When the FM radio is on, press the SNOOZE/OK/* button repeatedly to set a sleep timer (15, 30, 60, 90 minutes, or OFF). The radio will automatically turn off after the selected duration.

Image: A hand pressing a button on the clock, with sleep timer options (P01, P06, P12, P15, P20) displayed, indicating timed radio playback.
8. USB Charging Output:
Connect your smartphone or other USB-powered device to the USB-A output port (5V-1A) on the back of the clock to charge it. Ensure the alarm clock is powered via its USB-C input.
Entretien
- Nettoyage: Essuyez l'horloge avec un chiffon doux et sec. N'utilisez pas de produits nettoyants abrasifs ni de solvants.
- Remplacement de la batterie : Si l'horloge prend du retard lors d'une coupure de couranttage, replace the CR2 backup battery.
- Placement: Avoid placing the clock in direct sunlight, high temperatures, or high humidity.
Dépannage
| Problème | Solution |
|---|---|
| L'affichage de l'horloge est vide. | Ensure the USB-C power cable is securely connected to both the clock and a working power outlet. Check if the display brightness is set to OFF. |
| L'alarme ne sonne pas. | Verify that the alarm is activated (alarm icon visible). Check the alarm volume. Ensure the alarm mode (Mon-Sun, Mon-Fri, etc.) is correctly set for the current day. |
| La projection est floue. | Faites pivoter le Molette de mise au point on the projection unit until the image is clear. Ensure the projection surface is within optimal range. |
| Mauvaise réception radio FM. | Fully extend the FM antenna. Try repositioning the clock to improve signal. Perform an auto-scan to find stronger stations. |
| Le port de chargement USB ne fonctionne pas. | Ensure the alarm clock is powered by the USB-C input. Check the charging cable and the device being charged. |
Caractéristiques
- Numéro de modèle : CR1024
- Dimensions: 20 x 3.81 x 8.7 cm (L x l x H)
- Poids: 240 g
- Puissance d'entrée : USB Type-C, 5 V-2 A
- Sortie USB : USB Type-A, 5V-1A
- Batterie de secours: 1 pile CR2 (non incluse)
- Gamme de fréquence FM: 87.5 - 108 MHz
Garantie et assistance
ROCAM products are designed for reliability and performance. This product comes with a standard manufacturer's warranty. For specific warranty details, please refer to the warranty card included in your package or contact ROCAM customer support.
If you encounter any issues or have questions regarding your ROCAM Digital Projection Alarm Clock, please contact our customer support team. Contact information can typically be found on our official website ou sur l'emballage du produit.