BaBylissPRO FX829
BaBylissPRO FXONE LO-PROFX Professional Cordless Clippers User Manual
Modèle: FX829
Introduction
This manual provides comprehensive instructions for the safe and effective use of your BaBylissPRO FXONE LO-PROFX Professional Cordless Clippers. Please read all instructions carefully before use and retain this manual for future reference.
Composants et contenu de l'emballage
Your BaBylissPRO FXONE LO-PROFX Professional Cordless Clippers package includes the following items:

Image: The package contents include the clipper, cleaning brush, 6 clipper guards, screwdriver, lubricating oil, charging cord, battery-charging stand, FXONE battery, and blade cover.
- FXONE LO-PROFX Professional Cordless Clipper
- Interchangeable FXONE Lithium Battery
- Support de charge de batterie
- 6 Clipper Guards (various sizes)
- Brosse de nettoyage
- Huile de graissage
- Cordon de charge
- Couverture de lame
- Screwdriver (for blade adjustment)
Installation
1. Installation et chargement de la batterie
The FXONE LO-PROFX Clippers feature an innovative interchangeable battery system, ensuring continuous operation. The battery can be easily removed and charged separately.
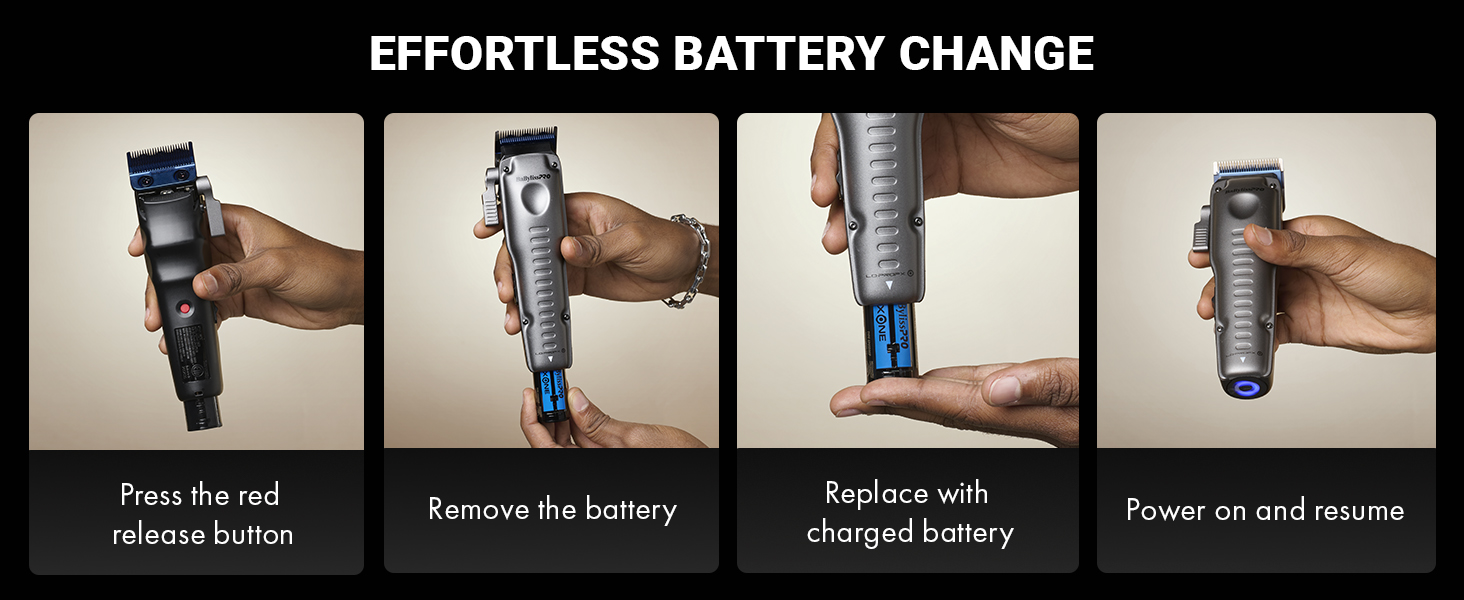
Image: A four-panel image illustrating the steps to change the battery: press the red release button, remove the battery, replace with a charged battery, and power on.
- To remove the battery, locate the red release button on the back of the clipper and press it firmly. The battery will eject from the base.
- Place the battery into the charging stand. The stand is designed to charge the battery independently.
- A full charge takes approximately 2 hours and provides up to 2.5 hours of runtime.
- To insert a charged battery, align it with the opening at the base of the clipper and push until it clicks securely into place.
2. Réglage de la lame
The clipper features a 5-position locking stretch taper lever for precise cutting length adjustments. The ultra-thin MIM blade is designed for clean lines and smooth fades.

Image: Un détail view of the clipper highlighting the ultra-thin blue metal-injection molded blade, 5-position locking stretch taper lever, ergonomic grip, and metal shield cover.
- Use the taper lever on the side of the clipper to adjust the cutting length of the blade. The locking mechanism ensures the setting remains stable during use.
- For zero-gap adjustment, refer to the detailed instructions in the included manual or consult a professional.
Mode d'emploi
1. Mise sous/hors tension
To turn the clipper on or off, use the power switch located on the side of the unit. The N1 brushless motor provides 6,800 RPM / 13,600 SPM for efficient cutting.
2. Using Clipper Guards
Attach the desired clipper guard to achieve various cutting lengths for shaping, fading, and blending.
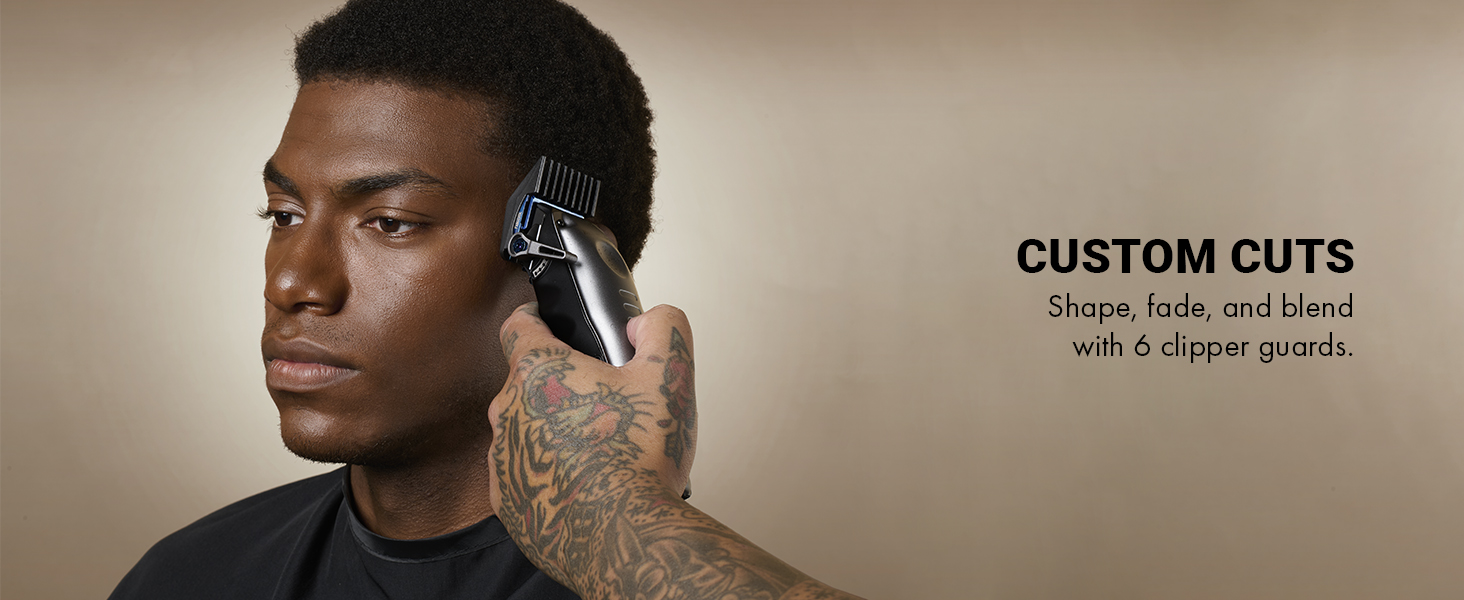
Image: A barber using the BaBylissPRO FXONE LO-PROFX clipper with a guard to create a custom cut on a client's hair.
- Select the appropriate guard size for your desired hair length.
- Snap the guard securely onto the clipper blade.
- Begin cutting, moving the clipper against the direction of hair growth for an even cut.
3. Indicateur de niveau de batterie
The clipper features a battery level indicator to show the remaining charge. This indicator is typically located at the base of the clipper and illuminates to show battery status.
Entretien
1. Blade Cleaning and Oiling
Regular cleaning and oiling are crucial for maintaining the performance and longevity of your clipper blades. The MIM blade features built-in oil reservoirs to reduce friction and lower blade temperature.
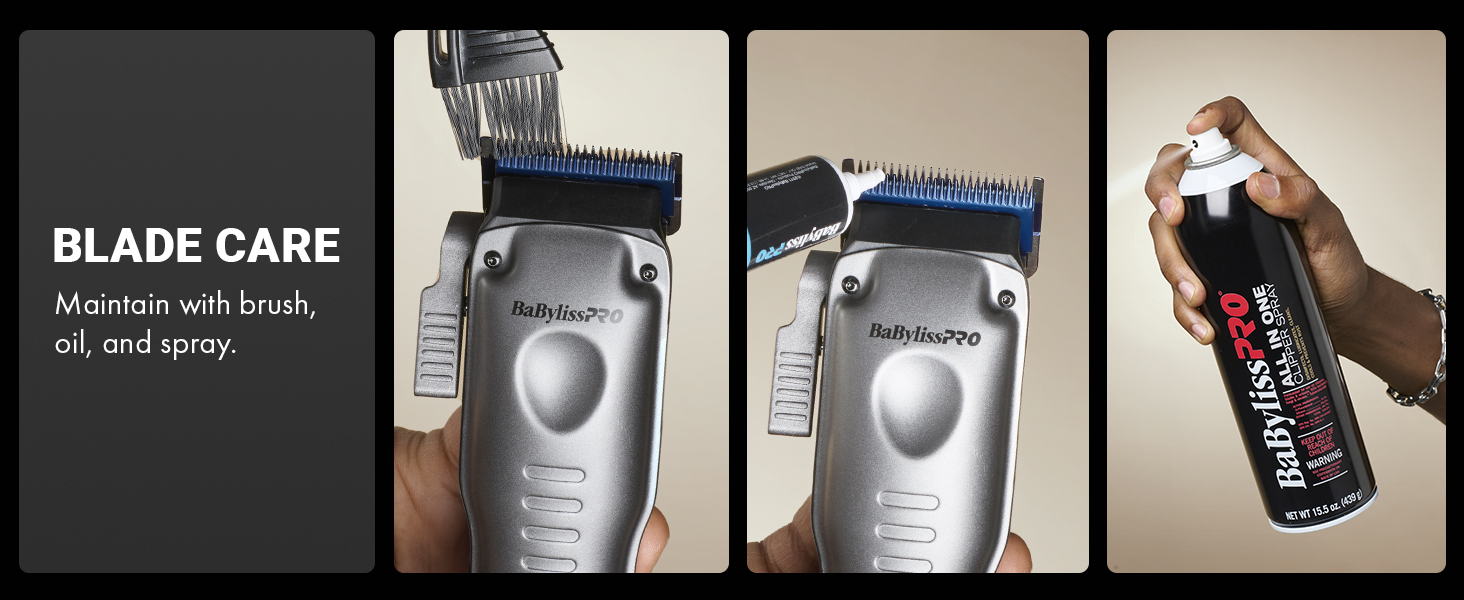
Image: A sequence of images demonstrating blade care: brushing off hair, applying lubricating oil, and using a blade spray.
- After each use, turn off the clipper and remove any attached guards.
- Utilisez la brosse de nettoyage fournie pour enlever les cheveux qui se détachent des lames.
- Apply a few drops of lubricating oil to the blades while the clipper is running for a few seconds to ensure even distribution.
- For thorough cleaning, a blade spray can be used as directed on the product.
Dépannage
| Problème | Cause possible | Solution |
|---|---|---|
| La tondeuse ne s'allume pas | La batterie est déchargée ou mal insérée. | Ensure battery is fully charged and correctly inserted. Check the battery level indicator. |
| Clipper pulling hair | Les lames sont émoussées, sales ou mal huilées. | Clean and oil the blades. If problem persists, consider replacing the blades. |
| Performances de coupe réduites | Blades are dirty, dull, or motor is struggling due to low battery. | Clean and oil blades. Ensure battery is fully charged. |
Caractéristiques
| Fonctionnalité | Détail |
|---|---|
| Nom du modèle | BaBylissPRO FXONE LO-PROFX |
| Numéro de modèle de l'article | FX829 |
| Marque | BaBylissPRO |
| Type de moteur | N1 Brushless Motor |
| Vitesse du moteur | 6,800 RPM / 13,600 SPM |
| Matériau de la lame | Titanium (Metal Injection Molded) |
| Type de batterie | Interchangeable Lithium Ion |
| Durée d'exécution | Up to 2.5 hours per battery |
| Temps de charge | 2 heures |
| Poids de l'article | 0.94 kilogrammes (environ 2.07 livres) |
| Composants inclus | Clipper, battery, charging station, blade, motor, comb attachments, scissors, brush, cape, case, cleaning accessories |
Vidéos officielles des produits
NEW FXONE System Overview
Vidéo: Un responsable au-dessusview of the new FXONE system, showcasing the interchangeable battery, motor, blades, and various tools including the LO-PROFX clipper, trimmer, and shaver.
Garantie et assistance
For warranty information, product registration, or technical support, please refer to the documentation included in your product packaging or visit the official BaBylissPRO webConsultez le site. Conservez votre reçu d'achat comme preuve d'achat pour toute réclamation au titre de la garantie.
Ask a question about this manual
Ask about setup, troubleshooting, compatibility, parts, safety, or missing instructions. Manuals+ will review the question and use this page’s manual context to help answer it.