Xprinter XP-Q801K
Manuel d'utilisation de l'imprimante thermique de reçus Xprinter XP-Q801K
Model: XP-Q801K
1. Introduction
This manual provides comprehensive instructions for the setup, operation, and maintenance of your Xprinter XP-Q801K Thermal Receipt Printer. This printer is designed for efficient and reliable receipt printing in various business environments, featuring high-speed direct thermal printing and a USB interface for easy connectivity.

Figure 1 : Face avant view of the Xprinter XP-Q801K Thermal Receipt Printer, showing the paper output slot and control buttons.
2. Installation
2.1 Déballage
Retirez délicatement l'imprimante et tous ses accessoires de l'emballage. Vérifiez que tous les composants sont présents :
- Xprinter XP-Q801K Thermal Receipt Printer
- Adaptateur secteur
- Câble USB
- Rouleau de papier (démarreur)
- Manuel de l'utilisateur (ce document)
2.2 Connexion de l'imprimante
Before connecting, ensure the printer is powered off. Locate the ports on the rear of the printer.
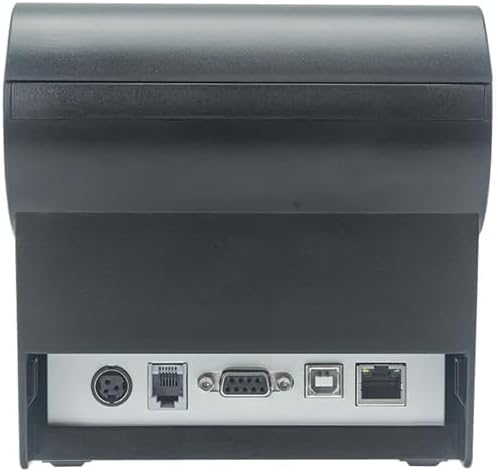
Figure 2 : Arrière view of the printer, highlighting the power, USB, and other interface ports.
- Connecter l'alimentation : Insert the power adapter cable into the printer's power input port (DC 24V/2.5A) and plug the adapter into a suitable electrical outlet (AC 100-240V, 50-60Hz).
- Connectez USB : Connect one end of the provided USB cable to the USB port on the printer and the other end to an available USB port on your computer.
- Tiroir-caisse (facultatif) : If using a cash drawer, connect its cable to the cash drawer port (DC 24V/1A) on the printer.
2.3 Loading the Paper Roll
L'imprimante utilise des rouleaux de papier thermique de 80 mm de large.
- Open the paper cover by pushing the cover open button (usually located on the side or front).
- Insert the thermal paper roll with the printing surface facing the print head. Ensure the roll is seated correctly in the paper compartment.
- Tirez un petit morceau de papier au-delà du massicot.
- Refermez fermement le couvercle en papier jusqu'à ce qu'il s'enclenche.
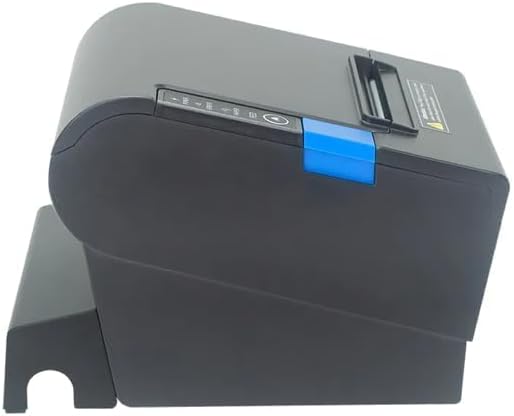
Figure 3 : Côté view of the printer, illustrating the paper cover mechanism.
2.4 Installation du pilote
The printer requires a driver to communicate with your computer. Drivers are typically available for Windows, Linux, Android, and Mac operating systems.
- For Windows users, the printer often supports plug-and-play installation or requires a specific Windows driver.
- For Linux, Android, and Mac, SDKs (Software Development Kits) are usually provided for integration.
Consultez les instructions du fabricant. website or the included driver CD/USB drive for the latest drivers and installation instructions specific to your operating system.
3. Utilisation de l'imprimante
3.1 Mise sous/hors tension
Locate the power switch on the side or rear of the printer. Flip the switch to the 'ON' position to power on the printer. The 'POWER' indicator light will illuminate. Flip to 'OFF' to power down.
3.2 Indicator Lights and Buttons
The front panel typically features several indicator lights and buttons:
- POUVOIR: Indique que l'imprimante est sous tension.
- ERREUR: Illuminates or flashes to indicate an error condition (e.g., paper out, print head overheating, cutter error).
- PAPIER: Indicates that the paper roll is low or out.
- Bouton ALIMENTATION : Press to manually feed paper. Hold to perform a self-test print (if supported by model).
3.3 Impression de base
Once the printer is connected and drivers are installed, you can print receipts from your POS software or application. Ensure the printer is selected as the default or active printer in your system settings.
The printer supports various print speeds up to 300 mm/s and automatic paper cutting after each print job.
4. Entretien
Un entretien régulier garantit des performances optimales et prolonge la durée de vie de votre imprimante.
4.1 Nettoyage de la tête d'impression
The print head should be cleaned regularly, especially if print quality degrades.
- Éteignez l'imprimante et débranchez le câble d'alimentation.
- Ouvrez le couvercle du papier.
- Utilisez un coton-tige légèrement dampened with isopropyl alcohol (ethanol) to gently wipe the thermal elements of the print head.
- Laissez la tête d'impression sécher complètement avant de refermer le couvercle et de rebrancher l'alimentation.
4.2 Cleaning the Cutter
Paper dust can accumulate around the cutter blade, affecting its performance.
- Éteignez l'imprimante et débranchez le câble d'alimentation.
- Carefully remove any visible paper dust or debris from around the cutter blade using a soft brush or compressed air.
- Do not use liquids on the cutter.
4.3 Nettoyage général
Essuyez l'extérieur de l'imprimante avec un chiffon doux et sec.amp tissu. Évitez d'utiliser des produits chimiques agressifs ou des nettoyants abrasifs.
5. Dépannage
Cette section aborde les problèmes courants que vous pourriez rencontrer avec votre imprimante.
| Problème | Cause possible | Solution |
|---|---|---|
| L'imprimante ne s'allume pas. | Câble d'alimentation non connecté ; prise de courant défectueuse ; interrupteur éteint. | Ensure power cable is securely connected. Test power outlet. Turn power switch to 'ON'. |
| Impression interdite. | Paper out; Paper loaded incorrectly; Driver not installed or incorrect; USB cable loose; Printer not selected. | Load new paper roll. Re-load paper correctly. Install/reinstall correct driver. Check USB connection. Select printer in software. |
| ERROR light is on/flashing. | Paper out; Paper jam; Print head overheating; Cutter error. | Load paper. Clear paper jam. Allow printer to cool down. Check cutter for obstructions. |
| Mauvaise qualité d'impression. | Dirty print head; Low quality paper; Old paper roll. | Clean the print head (see Section 4.1). Use high-quality thermal paper. Replace old paper rolls. |
Si le problème persiste après avoir essayé ces solutions, veuillez contacter le service client.
6. Spécifications
| Fonctionnalité | Détail |
|---|---|
| Méthode d'impression | Thermique directe |
| Largeur du papier | 80 mm |
| Vitesse d'impression | 230 mm / s, 260 mm / s, 300 mm / s |
| Interface | USB |
| Espacement des lignes | 3.75 mm (adjustable by commands) |
| Character Size (ANK) | Font A: 1.5 × 3.0 mm (12 × 24 dots) Font B: 1.1 × 2.1 mm (9 × 17 dots) |
| Character Size (Chinese/Traditional Chinese) | 3.0 × 3.0 mm (24 × 24 dots) |
| Types de codes-barres | UPC-A / UPC-E / JAN13 (EAN13) / JAN8 (EAN8) / CODE39 / ITF / CODABAR / CODE93 / CODE128 |
| Code à barres 2D | QR Code / PDF417 |
| NV Flash Memory | 256 Ko |
| Puissance d'entrée | AC 100-240V, 50-60Hz |
| Puissance de sortie | CC 24 V/2.5 A |
| Sortie du tiroir-caisse | CC 24 V/1 A |
| Poids | 1.0 kg |
| Dimensions (P × L × H) | 194.5 × 145 × 146.4 mm |
| Température de fonctionnement | 0~45°C |
| Humidité de fonctionnement | 10 à 80 % d'humidité relative |
| La vie de coupeur | 1.5 million de coupes |
| Vie de la tête d'impression | 150 km |
| Compatibilité du système d'exploitation | Windows, Linux, Android, Mac |
Ask a question about this manual
Ask about setup, troubleshooting, compatibility, parts, safety, or missing instructions. Manuals+ will review the question and use this page’s manual context to help answer it.