
1. Produit terminéview
The GOLOZA LA-C337 is a versatile digital alarm clock featuring a 180° rotatable projection, a large curved LED display, and a convenient USB charging port. It is designed for clear time display and easy operation.

Image 1.1: The GOLOZA Digital Projection Alarm Clock, showcasing its curved display and compact design, placed on a nightstand.
2. Contenu du colis
Veuillez vérifier que le colis contient les éléments suivants :
- GOLOZA Digital Projection Alarm Clock (LA-C337)
- Câble micro USB
- Adaptateur secteur
- Manuel d'utilisation
3. caractéristiques du produit
- Curved LED Display: Large, clear digital time display with adjustable brightness.
- Projection à 180° : Projects time onto a wall or ceiling with adjustable brightness and rotation.
- Double alarme : Set two independent alarms with progressive volume.
- Fonction de répétition: Permet de profiter d'un temps de sommeil supplémentaire après que le réveil ait sonné.
- Port de charge USB: Rechargez vos appareils mobiles en toute simplicité.
- Batterie mémoire : Built-in button battery maintains time settings during power outaget.
Image 3.1 : Un gros plan view of the GOLOZA Digital Projection Alarm Clock's clear, blue LED display, showing the time.
4. Configuration initiale
4.1 Connexion d'alimentation
- Connect the Micro USB cable to the power input port on the back of the alarm clock.
- Branchez l'autre extrémité du câble USB à l'adaptateur secteur fourni.
- Branchez l'adaptateur secteur dans une prise électrique standard. L'affichage de l'horloge s'allumera.
Note: The built-in button battery serves as a backup for time and alarm settings during a power interruption. It does not power the main display or projection.
4.2 Réglage de l'heure et de la date
Specific button names are not provided, but typically these clocks have 'TIME SET', 'MODE', or similar buttons. Refer to the physical unit for exact button labels.
- Appuyez et maintenez enfoncé le Réglage de l'heure button (or similar) to enter time setting mode. The hour digits will flash.
- Utilisez le +/- or Haut/Bas boutons pour régler l'heure.
- Appuyez sur le Réglage de l'heure Appuyez de nouveau sur le bouton pour confirmer l'heure et passer au réglage des minutes. Les chiffres des minutes clignoteront.
- Utilisez le +/- or Haut/Bas boutons pour régler les minutes.
- Appuyez sur le Réglage de l'heure button again to confirm minutes and exit time setting mode.
- Follow similar steps to set the date if your model supports it (usually by pressing the Time Set button multiple times to cycle through year, month, day).
5. Mode d'emploi
5.1 Réglage des alarmes
L'horloge prend en charge deux alarmes indépendantes (Alarme 1 et Alarme 2).
- Appuyez et maintenez enfoncé le Alarme 1 button (or similar) to enter Alarm 1 setting mode. The alarm hour digits will flash.
- Utilisez le +/- or Haut/Bas boutons pour régler l'heure de l'alarme.
- Appuyez sur le Alarme 1 Appuyez de nouveau sur le bouton pour confirmer l'heure et passer au réglage des minutes. Les chiffres des minutes de l'alarme clignoteront.
- Utilisez le +/- or Haut/Bas boutons pour régler les minutes de l'alarme.
- Appuyez sur le Alarme 1 button again to confirm minutes and select the alarm sound (e.g., Beep, Chord, Bird Song).
- Appuyez sur le Alarme 1 button one more time to activate/deactivate Alarm 1 and exit setting mode. An alarm icon will appear on the display when active.
- Répétez le processus pour Alarme 2 en utilisant le bouton correspondant.
5.2 Réglage de la luminosité de l'écran
The main LED display typically has multiple brightness levels.
- Appuyez sur le Luminosité button (or a dedicated dimmer button) repeatedly to cycle through the available brightness levels (e.g., High, Medium, Low, Off).
5.3 Using Projection Feature
La fonction de projection vous permet de view the time on a wall or ceiling.
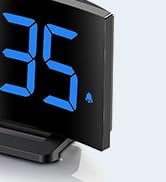
Image 5.1: The GOLOZA Digital Projection Alarm Clock actively projecting the time onto a surface, demonstrating its projection capability.
- Activation/Désactivation de la projection : Appuyez sur le Projecteur button (or similar) to turn the projection on or off.
- Réglage de la luminosité de la projection : While the projector is on, press the Luminosité du projecteur button (or the same Projector button repeatedly) to cycle through brightness levels (e.g., High, Medium, Low).
- Projection rotative : The projector lens can be physically rotated 180° to adjust the projection angle. Some models may also have a button to flip the projected image.
5.4 USB Charging Port Usage
Le port USB intégré permet de recharger des appareils externes.
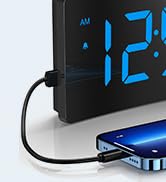
Image 5.2: The GOLOZA Digital Projection Alarm Clock with a smartphone connected to its USB charging port, illustrating its charging capability.
- Connect your device's USB charging cable to the USB output port on the alarm clock.
- Vérifiez que le réveil est allumé.
- The clock's USB port provides power to charge your device.
5.5 Fonction de répétition
Lorsqu'une alarme retentit, appuyez sur le Somnoler button (often a large button on top) to temporarily silence the alarm. The alarm will sound again after a preset interval (e.g., 9 minutes).
5.6 Réglage du volume de l'alarme
The alarm volume is progressive, meaning it starts soft and gradually increases. Some models may offer adjustable volume levels.
- Si disponible, appuyez sur Volume button (or a dedicated switch) to adjust the alarm volume to your preferred level.
6. Entretien
- Nettoyage: Essuyez l'horloge avec un chiffon doux et sec. N'utilisez pas de produits nettoyants abrasifs ni de solvants.
- Placement: Placez l'horloge sur une surface stable et plane, à l'abri de la lumière directe du soleil, des sources de chaleur et de l'humidité.
- Batterie: The internal button battery is for memory backup. If the clock consistently loses settings after a power outage, the battery may need replacement by a qualified technician.
7. Dépannage
| Problème | Cause possible | Solution |
|---|---|---|
| L'affichage de l'horloge est éteint. | Pas de connexion électrique. | Assurez-vous que l'adaptateur secteur est bien branché à l'horloge et à une prise électrique fonctionnelle. |
| La projection est faible ou floue. | Incorrect brightness setting; dirty lens; too much ambient light. | Adjust projection brightness. Clean the projector lens with a soft cloth. Reduce ambient light in the room. |
| L'alarme ne sonne pas. | Alarm is not activated; alarm volume is too low. | Ensure the alarm icon is visible on the display. Check and adjust alarm volume. |
| Les réglages de l'heure sont perdus après une coupure de courant.tage. | Internal backup battery is depleted or faulty. | The internal button battery may need replacement. Contact customer support. |
| Le chargement USB ne fonctionne pas. | Clock not powered; faulty USB cable; device not compatible. | Ensure the clock is powered. Try a different USB cable. Check device compatibility. |
8. Spécifications
| Fonctionnalité | Détail |
|---|---|
| Numéro de modèle | LA-C337 |
| Dimensions (L x l x H) | 17.7 x 3.81 x 7.8 cm |
| Poids | 310 grammes |
| Marque | GOLOZA |
| Couleur | Bleu |
| Style | Modern/Elegant/Minimalist |
| Caractéristiques spéciales | Integrated Design, Built-in Button Battery (for memory), USB Charging Port, Super Clear Projection, Progressive Volume, Curved Display |
| Source d'énergie | Electrical (USB Powered) |
| Forme | Rectangular, Curved Screen |
| Piles incluses | No (Internal button battery for memory backup is pre-installed but not user-replaceable) |
| Code UPC/GTIN | 647697054284 |
9. Garantie et assistance
GOLOZA is committed to providing quality products and customer satisfaction.
- Politique de retour: 6 Months Return period.
- Garantie: Garantie de 24 mois à compter de la date d'achat.
- Soutien: Lifetime Support is provided for this product.
For any questions, technical assistance, or warranty claims, please contact GOLOZA customer service through your purchase platform or the official GOLOZA website.