1. Introduction
This user manual provides detailed instructions for the installation, operation, and maintenance of your Xprinter XP-D200N Thermal Receipt Printer. The XP-D200N is a high-speed thermal printer designed for reliable and efficient receipt printing in various business environments. Please read this manual thoroughly before using the printer to ensure proper functionality and to prevent damage.
2. Consignes de sécurité
Pour garantir un fonctionnement sûr et éviter d'endommager l'imprimante ou de vous blesser, veuillez respecter les consignes de sécurité suivantes :
- Always use the provided power adapter. Using an incorrect adapter may damage the printer and void the warranty.
- N’exposez pas l’imprimante à l’eau, à l’humidité ou à des températures extrêmes.
- Évitez de placer l'imprimante en plein soleil ou à proximité de sources de chaleur.
- N’essayez pas de démonter ou de réparer l’imprimante vous-même. Confiez toute intervention à un personnel qualifié.
- Assurez-vous que l’imprimante est placée sur une surface stable et plane.
- Keep the printer away from dust and debris to maintain optimal performance.
3. Contenu du colis
Veuillez vérifier le contenu de votre colis. Si des articles sont manquants ou endommagés, contactez immédiatement votre fournisseur.
- Xprinter XP-D200N Thermal Receipt Printer
- Adaptateur secteur
- Cordon d'alimentation
- Câble USB
- Rouleau de papier thermique (démarrage)
- Manuel de l'utilisateur (ce document)
4. Produit terminéview
The Xprinter XP-D200N is a compact and efficient thermal receipt printer. Below are images illustrating its key components and design.
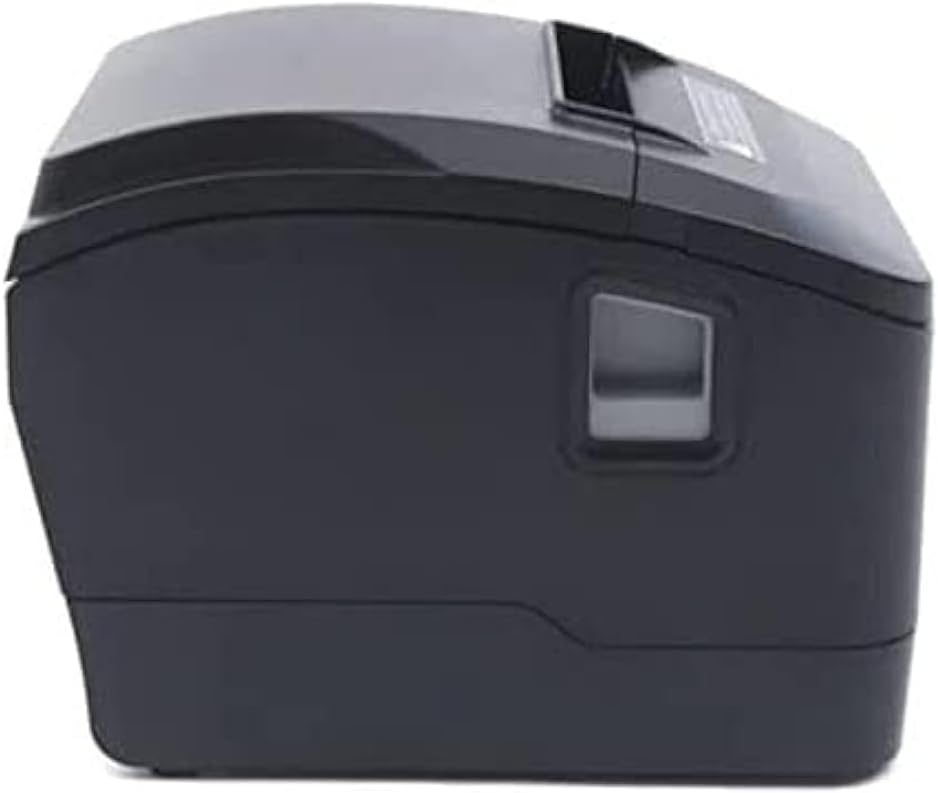
Figure 4.1 : Face avant view of the Xprinter XP-D200N Thermal Receipt Printer. This image shows the sleek, black casing and the paper output slot.
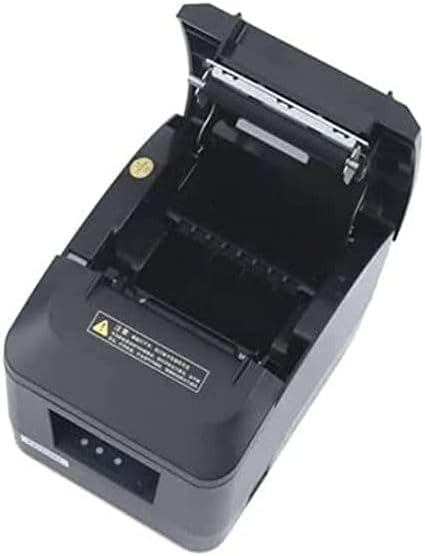
Figure 4.2 : Côté view of the Xprinter XP-D200N Thermal Receipt Printer. This perspective highlights the compact design and the power switch on the right side.

Figure 4.3 : Haut view of the Xprinter XP-D200N Thermal Receipt Printer with the cover open, revealing the thermal paper roll compartment and the print head mechanism. This view is essential for paper loading and maintenance.
5. Installation
5.1 Branchement de l'alimentation
- Assurez-vous que l'interrupteur d'alimentation de l'imprimante est en position OFF.
- Connect the power adapter to the power input port on the back of the printer.
- Plug the power cord into the power adapter, then into a standard electrical outlet.
5.2 Connexion à un ordinateur
The XP-D200N supports both USB and LAN connectivity.
Connexion USB :
- Connectez une extrémité du câble USB au port USB de l'imprimante.
- Connectez l’autre extrémité du câble USB à un port USB disponible sur votre ordinateur.
Connexion LAN (Ethernet) :
- Connectez un câble Ethernet au port LAN de l'imprimante.
- Connectez l'autre extrémité du câble Ethernet à votre routeur ou commutateur réseau.
- Refer to the printer's advanced settings or driver utility for network configuration (e.g., IP address settings).
5.3 Chargement du papier thermique
- Open the printer cover by pressing the release button or lifting the cover latch. (Refer to Figure 4.3).
- Insert the thermal paper roll into the compartment with the paper feeding from the bottom and the leading edge extending towards the front of the printer. Ensure the paper is aligned correctly.
- Tirez un petit morceau de papier au-delà du massicot.
- Fermez fermement le couvercle de l'imprimante jusqu'à ce qu'il s'enclenche.
5.4 Installation du pilote
After connecting the printer, you will need to install the appropriate drivers on your computer. Drivers are typically provided on a CD included with the printer or can be downloaded from the official Xprinter website. Suivez les instructions à l'écran pendant l'installation.
6. Mode d'emploi
6.1 Mise sous/hors tension
- To power on: Ensure the power cord is connected, then flip the power switch to the ON position. The indicator light will illuminate.
- To power off: Flip the power switch to the OFF position.
6.2 Impression de base
Once the printer is connected and drivers are installed, you can print receipts from your point-of-sale (POS) software or other applications. Select the Xprinter XP-D200N as your default printer in your application's print settings.
6.3 indicateurs d'état
The printer features indicator lights (usually on the front panel) that provide information about its status:
- Indicateur d'alimentation : Solid light indicates the printer is powered on.
- Indicateur d'erreur : Flashing or solid light indicates an error (e.g., paper out, cover open, print head overheat). Refer to the troubleshooting section.
- Paper Out Indicator: Illuminates when the paper roll is empty or nearly empty.
7. Entretien
7.1 Nettoyage de la tête d'impression
Un nettoyage régulier de la tête d'impression garantit une qualité d'impression optimale et prolonge la durée de vie de l'imprimante.
- Éteignez l'imprimante et débranchez le cordon d'alimentation.
- Ouvrez le capot de l'imprimante.
- Utilisez un coton-tige légèrement dampened with isopropyl alcohol (70% or higher) to gently wipe the thermal print head surface. Avoid touching the print head with bare hands.
- Allow the print head to dry completely before closing the cover and reconnecting power (approximately 2-3 minutes).
7.2 Nettoyage général
Essuyez l'extérieur de l'imprimante avec un chiffon doux et sec.amp chiffon. N'utilisez pas de nettoyants abrasifs ou de solvants.
7.3 Remplacement du rouleau de papier
When the paper out indicator illuminates or print quality degrades, it's time to replace the paper roll. Follow the steps in Section 5.3 "Loading Thermal Paper".
8. Dépannage
| Problème | Cause possible | Solution |
|---|---|---|
| L'imprimante ne s'allume pas. | No power, faulty power adapter/cord. | Check power connections. Ensure power switch is ON. Test outlet. |
| Impression interdite. | Paper out, cover open, incorrect driver, incorrect printer selected, cable disconnected. | Load paper, close cover, check USB/LAN connection, verify driver installation, select correct printer in software. |
| Mauvaise qualité d'impression (lignes pâles et blanches). | Dirty print head, low quality thermal paper, print head damage. | Clean print head (Section 7.1). Replace thermal paper. If problem persists, contact support. |
| Bourrage papier. | Chargement du papier incorrect, corps étranger. | Turn off printer, open cover, carefully remove jammed paper. Reload paper correctly. |
| Error indicator light is on/flashing. | General error, paper out, cover open. | Check for paper out, ensure cover is closed. Power cycle the printer. If error persists, consult manufacturer's support. |
9. Spécifications
| Marque: | Imprimante X |
| Modèle: | XP-D200N |
| Type d'imprimante : | Imprimante thermique Réception |
| Méthode d'impression : | Thermique directe |
| Vitesse d'impression : | 220 mm/sec (as per product description) |
| Taille maximale du support : | 8 cm (80 mm) |
| Connectivité : | USB, LAN (Ethernet) |
| Puissance d'entrée : | 24 V – 2.5 A |
| Sortie imprimante : | Monochrome |
| Caractéristiques spéciales : | Sleek, Compact, Lightweight Design, High Print Quality, Durability, Low Noise, Automatic Paper Cutting |
| Dimensions du produit : | 18.4 x 14 x 13.5 cm |
| Poids de l'article : | 1.63 kg |
10. Garantie et assistance
The Xprinter XP-D200N Thermal Receipt Printer comes with a standard manufacturer's warranty. For specific warranty terms and conditions, please refer to the warranty card included with your product or visit the official Xprinter website. For technical support, driver downloads, or service inquiries, please contact your local dealer or the Xprinter customer support team through their official channels.
Pour obtenir les informations les plus récentes et les ressources d'assistance, veuillez consulter : www.xprinter.net