
ClocTeck ClocTeck-CL01
ClocTeck Transparent Digital Alarm Clock
Model: ClocTeck-CL01
Marque : ClocTeck
Introduction
This manual provides detailed instructions for the setup, operation, and maintenance of your ClocTeck Transparent Digital Alarm Clock. Please read this manual thoroughly before using the product to ensure proper function and longevity.
Consignes de sécurité
- N’exposez pas l’appareil à des températures extrêmes, à la lumière directe du soleil ou à une forte humidité.
- Évitez de laisser tomber ou de soumettre l'appareil à des impacts violents.
- Gardez l’appareil à l’écart de l’eau et d’autres liquides.
- N’essayez pas de démonter ou de réparer l’appareil vous-même. Contactez un technicien qualifié pour toute intervention.
- Use only the specified Type-C charging cable for power.
Contenu du colis
Veuillez vérifier le contenu du colis à l'ouverture :
- ClocTeck Transparent Digital Alarm Clock (Gold)
- Câble de chargement USB de type C
- Manuel de l'utilisateur (ce document)
Produit terminéview
The ClocTeck Transparent Digital Alarm Clock features a clear LCD display that shows time, date, day of the week, temperature, humidity, and a weather icon. It is designed with a sleek aluminum alloy case.
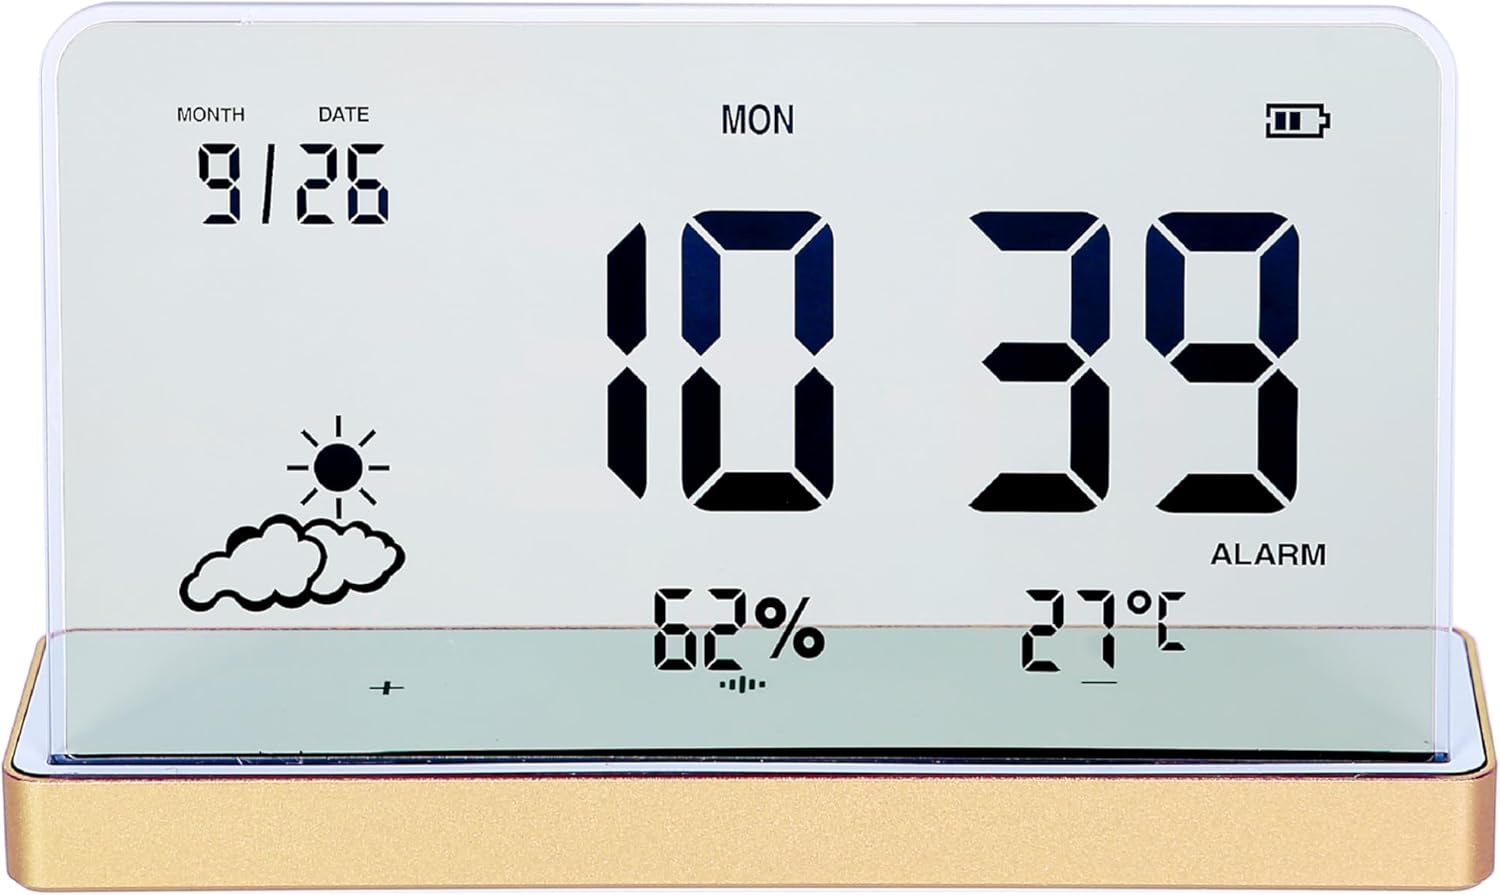
Figure 1 : Face avant view of the ClocTeck Transparent Digital Alarm Clock. The display shows the current time (10:39), date (9/26), day (MON), humidity (62%), temperature (27°C), and a partly cloudy weather icon. A battery indicator is visible in the top right corner.
Caractéristiques principales :
- Transparent LCD Display
- Time, Date, and Day Display
- Surveillance de la température et de l'humidité intérieures
- Up to 3 Programmable Alarms
- Rechargeable Battery with long standby time
- Durable Aluminum Alloy Case
Installation
1. Mise sous tension et chargement
The clock is powered by a built-in rechargeable battery. Before first use, or if the battery indicator is low, connect the provided Type-C USB charging cable to the charging port on the back or side of the clock and plug the other end into a standard USB power adapter (not included).
- A full charge provides approximately 75 days of operation.
- L'indicateur de batterie sur l'écran affichera l'état de charge.
2. Placement initial
Place the clock on a stable, flat surface. For accurate temperature and humidity readings, avoid placing it near heat sources, direct sunlight, or in areas with extreme drafts.
Mode d'emploi
The clock features several buttons, typically located on the back or bottom, for setting time, alarms, and other functions. Refer to the specific button labels on your device.
1. Réglage de l'heure et de la date
- Appuyez sur le ENSEMBLE pour accéder au mode de réglage de l'heure.
- Utilisez le UP et VERS LE BAS boutons pour régler l'heure. Appuyez sur ENSEMBLE pour confirmer et passer au procès-verbal.
- Répétez l'opération pour les minutes, l'année, le mois et la date.
- Presse ENSEMBLE à nouveau pour quitter le mode de réglage.
2. Réglage des alarmes
L'horloge prend en charge jusqu'à 3 alarmes indépendantes.
- Appuyez sur le ALARME button to cycle through Alarm 1, Alarm 2, Alarm 3, and alarm off modes.
- When an alarm is selected, press and hold the ALARME button to enter alarm setting mode for that specific alarm.
- Utilisez le UP et VERS LE BAS buttons to set the alarm hour and minutes. Press ALARME pour confirmer chaque étape.
- After setting the time, you may be prompted to set the alarm's activation days (e.g., weekdays, weekends, daily). Use UP/VERS LE BAS et ALARME pour sélectionner.
- Pour activer ou désactiver une alarme, appuyez brièvement sur le bouton. ALARME button until the alarm icon appears or disappears next to the corresponding alarm number on the display.
3. Affichage de la température et de l'humidité
The clock continuously displays indoor temperature and humidity. The temperature range is -20°C to 65°C, and the humidity range is 10% to 99%.
- Temperature is displayed in Celsius (°C).
- Humidity is displayed as a percentage (%).
4. Fonction Snooze
When an alarm sounds, press any button (other than the alarm off button, if present) to activate the snooze function. The alarm will sound again after a short interval (typically 5-10 minutes).
5. Réglage de la luminosité de l'affichage
The clock may feature automatic brightness adjustment or manual control. Consult the device's physical buttons for a dedicated brightness control button or a combination of buttons to adjust display intensity.
Entretien
- To clean the display and casing, utilisez un chiffon doux et sec. N’utilisez pas de nettoyants abrasifs ni de solvants.
- Assurez-vous que le port de chargement est exempt de poussière et de débris.
- Rangez l'horloge dans un endroit frais et sec lorsqu'elle n'est pas utilisée pendant une période prolongée.
Dépannage
| Problème | Cause possible | Solution |
|---|---|---|
| L'écran est vide ou sombre. | Low battery or power saving mode. | Charge the device using the Type-C cable. Check brightness settings. |
| L'alarme ne sonne pas. | Alarme non activée ou volume trop faible. | Ensure the alarm is set and activated (alarm icon visible). Check if there's a volume setting. |
| Relevés de température/humidité incorrects. | Appareil placé dans un environnement inadapté. | Relocate the clock away from direct heat, cold, or high drafts. Allow time for readings to stabilize. |
| Les boutons ne répondent pas. | Problème logiciel temporaire ou batterie faible. | Recharge the device. If issue persists, try a soft reset (refer to manual for reset procedure, if available, or let battery drain and recharge). |
Caractéristiques
- Modèle: ClocTeck-CL01
- Dimensions: Approximately 12.5 cm (Width) × 3.2 cm (Depth) × 8 cm (Height)
- Poids corporel : Environ 0.13 kg
- Matériau du boîtier : Alliage d'aluminium
- Type d'affichage : Transparent LCD Digital Display
- Plage de température : -20°C à 65°C
- Plage d'humidité: 10% à 99%
- Source d'alimentation : Batterie rechargeable (chargement USB de type C)
- Autonomie de la batterie : Environ 75 jours avec une charge complète
- Alarmes: 3 alarmes programmables

Figure 2: Dimensions of the ClocTeck Transparent Digital Alarm Clock. The image shows the clock with labels indicating a height of 8cm and a width of 12.5cm.
Garantie et assistance
ClocTeck provides a 12-month refund and exchange guarantee À compter de la date d'achat, cette garantie couvre les défauts de fabrication et les problèmes résultant d'une utilisation normale.
If you encounter any problems or have questions regarding your ClocTeck Transparent Digital Alarm Clock, please do not hesitate to contact our customer support team. We are committed to providing assistance and ensuring your satisfaction.
For support, please refer to the contact information provided on the product packaging or the seller's page where you purchased the item.
Ask a question about this manual
Ask about setup, troubleshooting, compatibility, parts, safety, or missing instructions. Manuals+ will review the question and use this page’s manual context to help answer it.