1. Consignes de sécurité
This OMTech 60W CO2 Laser Engraver is a Class 2 laser product with 0.827 mW output power. Always follow safety guidelines to prevent injury or damage. Read this manual completely before operation.
- Protection des yeux : Ne jamais regarder directement le faisceau laser. Toujours porter des lunettes de protection laser adaptées.
- Ventilation: Assurez une ventilation adéquate pour évacuer la fumée et les vapeurs générées pendant le fonctionnement. Le système d'assistance d'air intégré est utile, mais un système d'extraction externe est indispensable.
- Sécurité incendie : Do not leave the machine unattended during operation. Keep a fire extinguisher nearby. Engraving certain materials can cause flames.
- Compatibilité matérielle : Only engrave or cut materials compatible with CO2 lasers. Avoid materials that produce toxic fumes or are highly flammable.
- Arrêt d'urgence: Familiarisez-vous avec l'emplacement et le fonctionnement du bouton d'arrêt d'urgence.
- Surveillance: The widened viewing window is made from flame retardant material for safe observation of the engraving process.
2. Produit terminéview
The OMTech 60W CO2 Laser Engraver is designed for precision engraving and cutting on various non-metallic materials. It features a 20x28 inch (500x700 mm) work area, autofocus, and a 4-way pass-through for larger items.

Figure 2.1 : Face avant view de la graveuse laser CO2 OMTech 60W.
Caractéristiques principales :
- Puissance du laser : 60W CO2 laser tube.
- Zone de travail: 20x28 inches (500x700 mm).
- Autofocus: Automatic focal distance adjustment.
- Autolift Workbed: Adjustable workbed height.
- Passage à 4 voies : Accommodates larger and longer materials.
- Assistance aérienne : Integrated air assist for smoke and dust removal.
- Dual Workbeds: Includes honeycomb and aluminum blade beds.
- Compatibilité logicielle: Compatible with RDWorks, LightBurn, CorelDRAW, and AutoCAD.
3. Installation
3.1 Déballage et installation
Carefully unbox the laser engraver. Ensure the machine is placed on a stable, level surface in a well-ventilated area, away from flammable materials.
3.2 Connexions
- Pouvoir: Connectez le cordon d'alimentation à une prise mise à la terre.
- USB/Ethernet: Connect the machine to your computer using the provided USB or Ethernet cable.
- Pompe à eau : Connect the water pump and ensure the laser tube is properly cooled.
- Assistance aérienne : The machine has built-in air assist. Ensure the air compressor (if external) is connected and functioning.
- Système d'échappement : Connect the exhaust pipe to an external ventilation system to safely remove fumes.

Figure 3.1: Proper connection of the exhaust system is essential for safety and performance.
4. Mode d'emploi
4.1 Installation et configuration du logiciel
Install the recommended laser software (e.g., LightBurn, RDWorks) from the provided USB flash drive or official website. Follow the software's instructions for machine connection and initial setup.
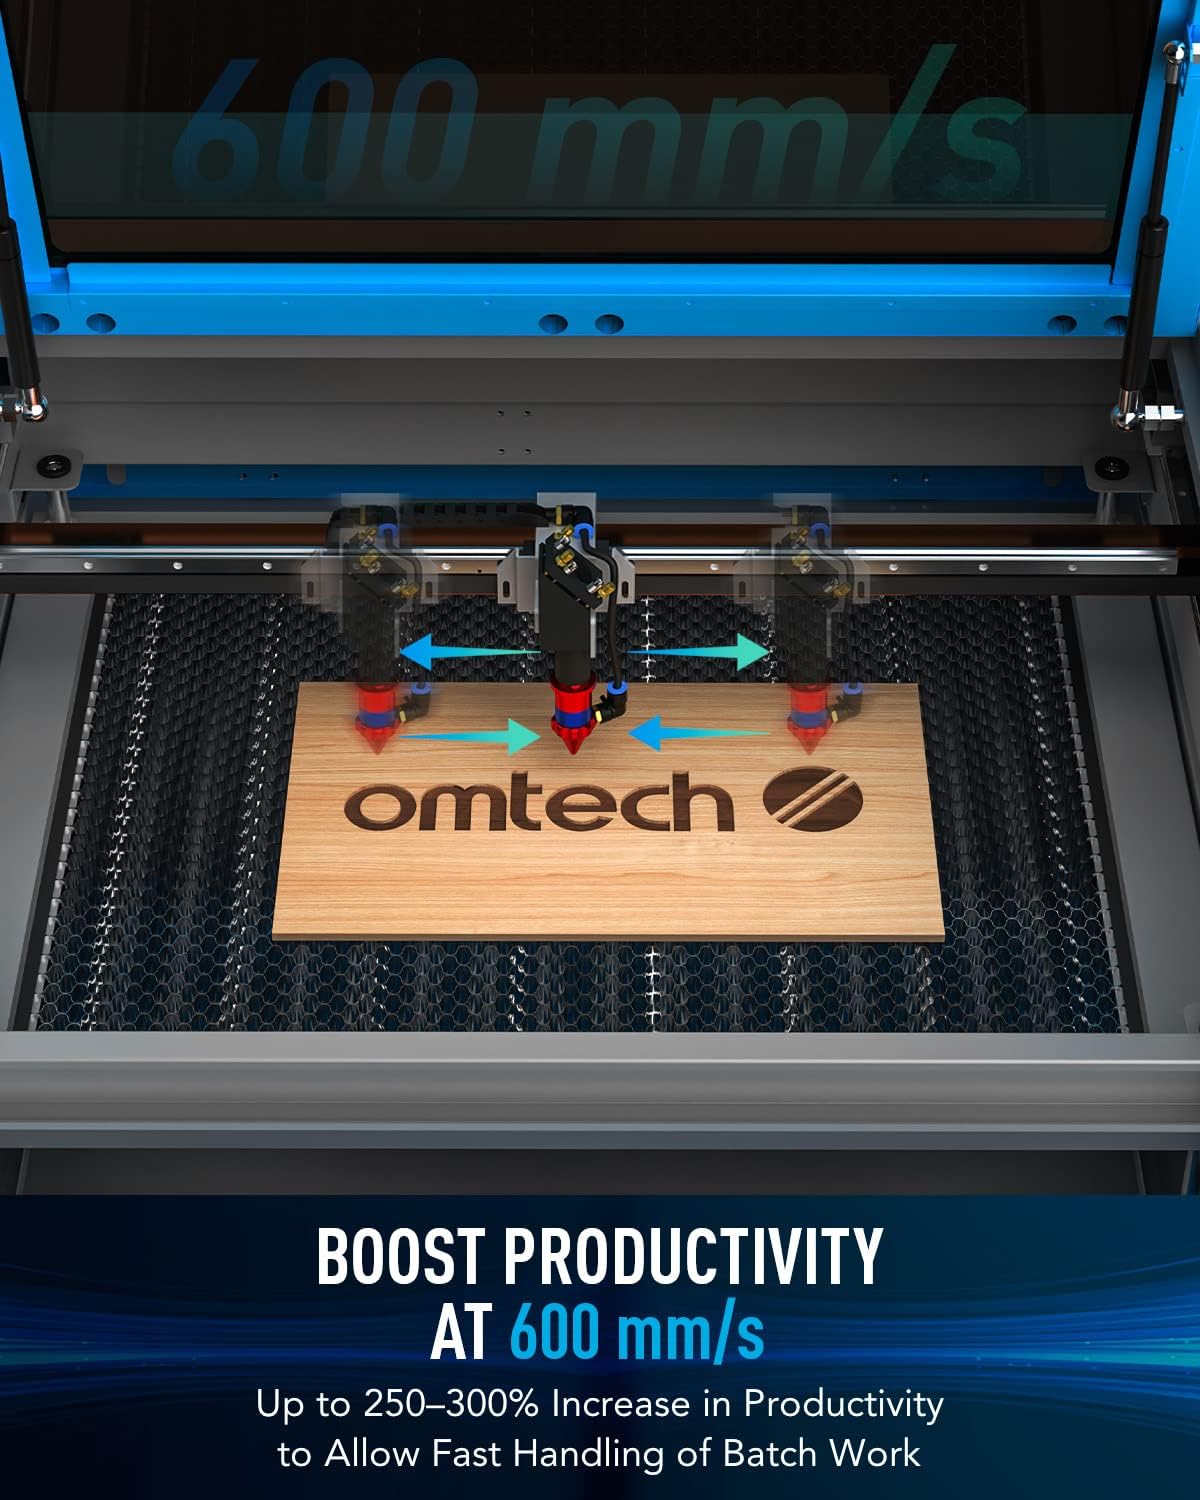
Figure 4.1: Digital control panel and compatible software interfaces.
4.2 Material Loading and Focusing
- Matériau de charge : Place your material flat on the workbed. For acrylic mirror, load with the non-reflective side facing up for engraving.
- Autofocus: Use the autofocus function to automatically set the correct focal distance. This eliminates manual adjustments and ensures precise results.

Figure 4.2: The autofocus feature automatically adjusts the laser head to the optimal focal distance.
4.3 Procédé de gravure et de découpe
Prepare your design in the software. Set appropriate power and speed settings for your material. Initiate the engraving or cutting process. Monitor the operation through the flame-retardant viewing fenêtre.
Video 4.1: Demonstration of laser engraving and cutting on acrylic mirror. This video illustrates material preparation, software settings, and post-processing for acrylic mirror projects.
Video 4.2: Guide on how to laser engrave a photo using a CO2 laser engraver. This video covers image preparation and specific settings for achieving detailed photo engravings.
5. Entretien
- Nettoyage: Regularly clean the work area, lenses, and mirrors to ensure optimal performance and longevity.
- Entretien du tube laser : The high-performance DC tube delivers 60W of power for up to 1000 hours of usage and doubles its lifespan when consistently used at lower settings. Ensure proper water cooling is maintained.
- Buse d'assistance pneumatique : Keep the air assist nozzle clear of debris to maintain efficient smoke and dust removal.
6. Dépannage
| Problème | Cause possible | Solution |
|---|---|---|
| Le laser ne se déclenche pas | Power supply issue, laser tube fault, software error | Check power connections, inspect laser tube, restart software/machine |
| Mauvaise qualité de gravure | Incorrect focus, wrong power/speed settings, dirty optics | Perform autofocus, adjust settings, clean lenses and mirrors |
| L'appareil ne se connecte pas à l'ordinateur. | USB/Ethernet cable issue, driver problem, software configuration | Check cable, reinstall drivers, verify software settings |
| fumée/émanations excessives | Ineffective exhaust, clogged air assist | Ensure exhaust system is powerful and clear, clean air assist nozzle |
7. Spécifications
- Dimensions du produit : 47.2 x 34.3 x 36.6 pouces
- Poids de l'article : 249 livres
- Vitesse de gravure maximale : 600 mm/s
- Taille du laissez-passer avant/arrière : 32.8 x 3.7 pouces
- Side/Side Pass Size: 20.4 x 0.7 pouces
- Transmission de données : Câble USB, câble Ethernet, clé USB, hors ligne
8. Contenu de la boîte
- Graveur laser CO2 1x 60W
- 1x Manuel d'utilisation
- Cordon d'alimentation 1x
- 1x Clé USB
- 1x câble USB
- 1x câble Ethernet
- 1x ruban adhésif double face
- 1x jeu de clés
- 1 tube d'isolant en silicone
- 1 résistance céramique
- 1 tuyau d'échappement
- 1x Tuyau Clamp
- 1 pompe à eau
- 1x Tuyau d'eau
- 1x jeu de câbles
- Touches 6x
9. Garantie et assistance
This OMTech 60W CO2 Laser Engraver comes with a two-year support warranty. For technical assistance, please contact our U.S.-based technical support team. 24/7 online customer service is also available.