
Introduction
The Abovsare Digital Alarm Clock is designed to provide clear time, date, and temperature information with a large LED display. Its modern design complements various room decors, and its silent operation ensures a peaceful environment. This manual provides detailed instructions for setting up and operating your new digital alarm clock.
Informations importantes sur la sécurité
- Always connect the device to a USB port or use only a 5V/1A or 5V/2A power adapter. Using an adapter with excessive voltage may cause screen damage or malfunction.
- This clock requires continuous power and must be plugged in to operate. It is not battery-operated for primary function. A built-in CR2025 3V button battery serves only as a memory backup for time data during power outaget.
- Évitez d'exposer l'horloge à des températures extrêmes, à la lumière directe du soleil ou à une forte humidité.
- N’essayez pas de démonter ou de réparer l’appareil vous-même. Confiez toute réparation à un technicien qualifié.
Contenu du colis
Veuillez vérifier que le colis contient les éléments suivants :
- Abovsare Digital Alarm Clock (Model B0BLCYTFB2)
- Câble d'alimentation USB
- USB Power Adapter (5V/1A or 5V/2A)
Produit terminéview
Familiarisez-vous avec les composants et les commandes de l'horloge.
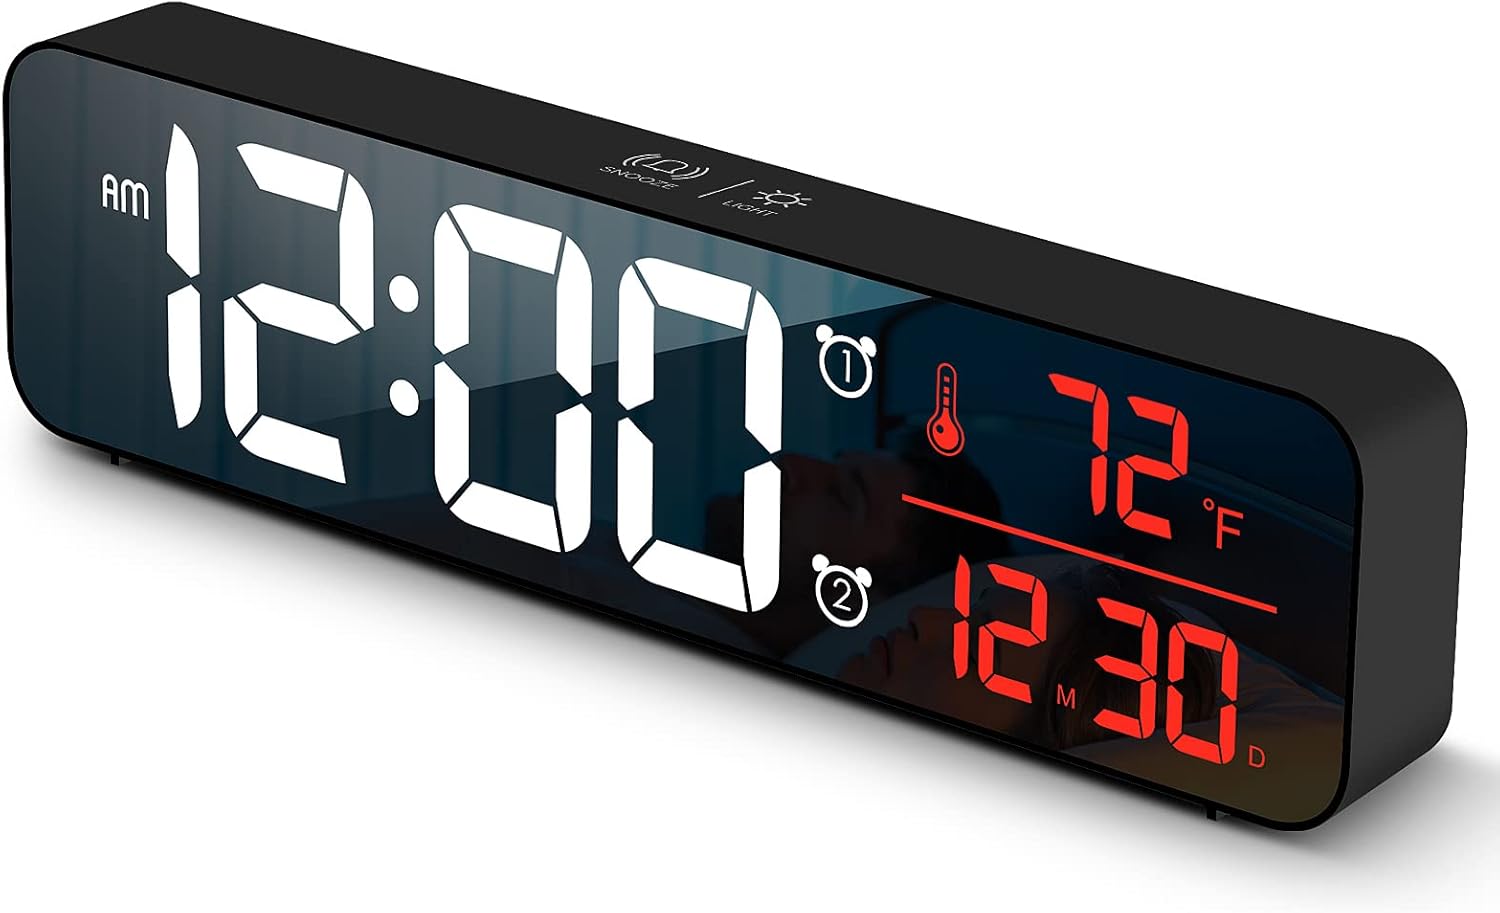
Figure 1 : Devant view of the Abovsare Digital Alarm Clock, displaying time, temperature, and date in red LED digits.
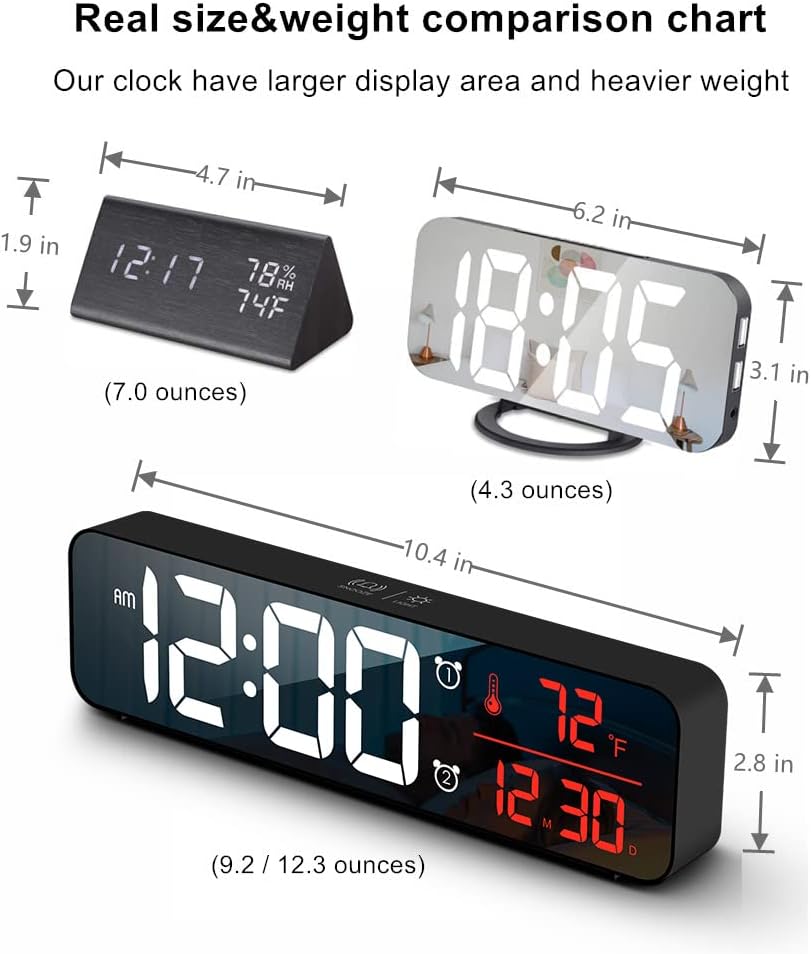
Figure 2 : Arrière view of the clock, highlighting the control buttons and USB power input. The buttons are typically for setting time, alarms, and adjusting modes.
Boutons et fonctions de commande :
- Bouton de réglage: Used to enter setting modes for time, date, and alarms.
- Boutons HAUT/BAS : Used to adjust values during settings and navigate options.
- Boutons ALARME 1/2 : Used to activate/deactivate and set Alarm 1 and Alarm 2.
- Bouton SNOOZE/LUMIÈRE (en haut) : Taps to adjust brightness, long press for snooze during alarm.
- Port d'alimentation USB : Connects the clock to the power adapter.
Installation
- Connexion électrique : Connect the provided USB power cable to the clock's USB port and then to the USB power adapter. Plug the adapter into a standard wall outlet. The display will light up.
- Réglage initial de l'heure :
- Appuyez sur le ENSEMBLE Appuyez une fois sur le bouton pour accéder au mode de réglage de l'heure. Les chiffres des heures clignoteront.
- Utilisez le UP or VERS LE BAS boutons pour régler l'heure.
- Presse ENSEMBLE Pour passer au réglage des minutes, procédez de nouveau. Ajustez les minutes avec UP or VERS LE BAS.
- Continuez à appuyer ENSEMBLE pour faire défiler les réglages de l'année, du mois et du jour, en ajustant chacun avec UP or VERS LE BAS.
- Presse ENSEMBLE une dernière fois pour quitter le mode de réglage.
- Unité de température: The clock displays temperature in either Celsius or Fahrenheit. Refer to the operating instructions for how to switch between these units.
Mode d'emploi
Time, Date, and Temperature Display
The clock continuously displays the current time, date (month/day), and indoor temperature. The large LED digits ensure readability from a distance.
Réglage de la luminosité

Figure 3 : The clock on a nightstand, demonstrating its display in a bedroom setting, with text indicating 5 levels of brightness adjustment.
The clock features 5 levels of brightness. You can adjust it manually or use the automatic dimmer function.
- Réglage manuel : Appuyez sur le SNOOZE / LUMIÈRE button on the top of the clock to cycle through the 5 brightness levels.
- Variateur automatique : The clock automatically adjusts brightness based on the time of day.
- 7:00 AM - 5:59 PM: Highlight brightness
- 6:00 PM - 10:59 PM: Medium brightness
- 11:00 PM - 5:59 AM: Darkest brightness
- 6:00 AM - 6:59 AM: Medium highlight
Note: If you manually adjust brightness, the clock will remember your setting for that specific time period on subsequent days. However, when a new period begins, the brightness will revert to the system's preset automatic rule.
Réglage des alarmes (Alarme 1 et Alarme 2)
The clock supports two independent alarms. This is useful for different wake-up times or for heavy sleepers.
- Appuyez sur le ALARME 1 or ALARME 2 button to select which alarm to set. The alarm icon and hour digits will flash.
- Utilisez le UP or VERS LE BAS boutons pour régler l'heure de l'alarme.
- Appuyez sur la touche sélectionnée ALARME button again to move to minute setting. Adjust minutes with UP or VERS LE BAS.
- Appuyez sur le ALARME button one last time to confirm and exit alarm setting. The alarm icon will remain lit, indicating the alarm is active.
- To deactivate an alarm, press its corresponding ALARME appuyez sur le bouton jusqu'à ce que l'icône d'alarme disparaisse de l'écran.
Ringtone Selection and Volume
The clock offers 40 selectable ringtones and 4 volume levels.
- During alarm setting, after setting the minutes, press the ALARME button again to enter ringtone selection. Use UP or VERS LE BAS à préview sonneries
- Appuyez sur le ALARME button again to enter volume adjustment. Use UP or VERS LE BAS to select one of the 4 volume levels.
- Appuyez sur le ALARME button to confirm your selection and exit.
Fonction de répétition
Lorsqu'une alarme retentit, appuyez sur SNOOZE / LUMIÈRE button on the top of the clock to activate the snooze function. The alarm will temporarily pause and sound again after a set interval (typically 5-9 minutes). To turn off the alarm completely, press any other button on the back of the clock.
Fonction mémoire

Figure 4 : Illustration of the memory function, showing the clock retaining time settings even after a power interruption, thanks to the internal CR2025 3V button battery.
The clock includes a built-in memory function. In the event of a power disconnection, the time and alarm settings will not be lost, eliminating the need to reset them once power is restored. This function is supported by an internal CR2025 3V button battery.
Entretien
- Clean the clock's display and casing avec un chiffon doux et sec.
- N’utilisez pas de nettoyants abrasifs, de solvants ou de sprays chimiques, car ils pourraient endommager la surface.
- Ensure the clock remains dry and away from water sources.
Dépannage
| Problème | Cause/solution possible |
|---|---|
| L'écran est éteint ou clignote. |
|
| Cannot set time/alarm correctly. |
|
| Alarm is too loud or too quiet. |
|
| Clock time drifts (gains/loses minutes). |
|
| Display brightness changes unexpectedly. |
|
Caractéristiques
| Fonctionnalité | Détail |
|---|---|
| Marque | Au-dessus |
| Modèle | B0BLCYTFB2 |
| Type d'affichage | LED numérique |
| Couleur | Wired-black Case+red Digit |
| Dimensions du produit | 10.4 po L x 2.8 po H |
| Source d'énergie | Corded Electric (USB-5V) |
| Caractéristiques spéciales | Large Display, Automatic Brightness Dimmer, Memory Function, Dual Alarms, Date, Temperature |
| Type de montage | Tabletop or Wall-mountable |
| Matériel | Acrylonitrile Butadiène Styrène (Plastique) |
| Poids de l'article | 1 livre (environ 16 onces) |
Garantie et assistance
Abovsare is committed to providing high-quality products. For specific warranty details and customer support, please refer to the information provided at the time of purchase or visit the official Abovsare brand store.
Abovsare Brand Store: https://www.amazon.com/stores/Abovsare/page/D02B5557-764F-4435-8DFB-4333D462DA1C