
1. Introduction
This manual provides detailed instructions for the setup, operation, maintenance, and troubleshooting of your ELECROW 10.1 Inch Touchscreen Monitor. Please read this manual thoroughly before using the product to ensure proper functionality and to prevent damage.
The ELECROW 10.1 inch portable monitor features a 1280x800 IPS display, offering clear visuals and wide viewing angles. It supports touch input and is compatible with various devices and operating systems, including Raspberry Pi, Jetson Nano, Banana Pi, PC, and Windows.
2. Installation
2.1 Contenu du paquet
Vérifiez que tous les éléments énumérés ci-dessous sont inclus dans votre colis :
- 1x 10.1 inch Touch Display
- 1x HD to HD Cable
- 2x USB cable (USB A to Micro USB)
- 1x HD to Mini HD Adapter
- 1x Screw Pack (4x Small Copper Pillars, 4x M2.5 Screws)
- 2x Bracket (Pro Stand)
- 1x Tournevis
- 1x Manuel d'utilisation

Image: All components included in the ELECROW 10.1 Inch Touchscreen Monitor package.

Image : détaillée view of the monitor, cables, stand, and tools.
2.2 Surcharge physiqueview et connexions
Familiarize yourself with the monitor's ports and dimensions.

Image: Monitor dimensions and port layout.

Image: Close-up of the monitor's rear panel showing port functions and mounting points.
2.3 Connexion du moniteur
The monitor connects via HDMI for video signal and USB for power and touch functionality. Ensure your device has compatible ports.
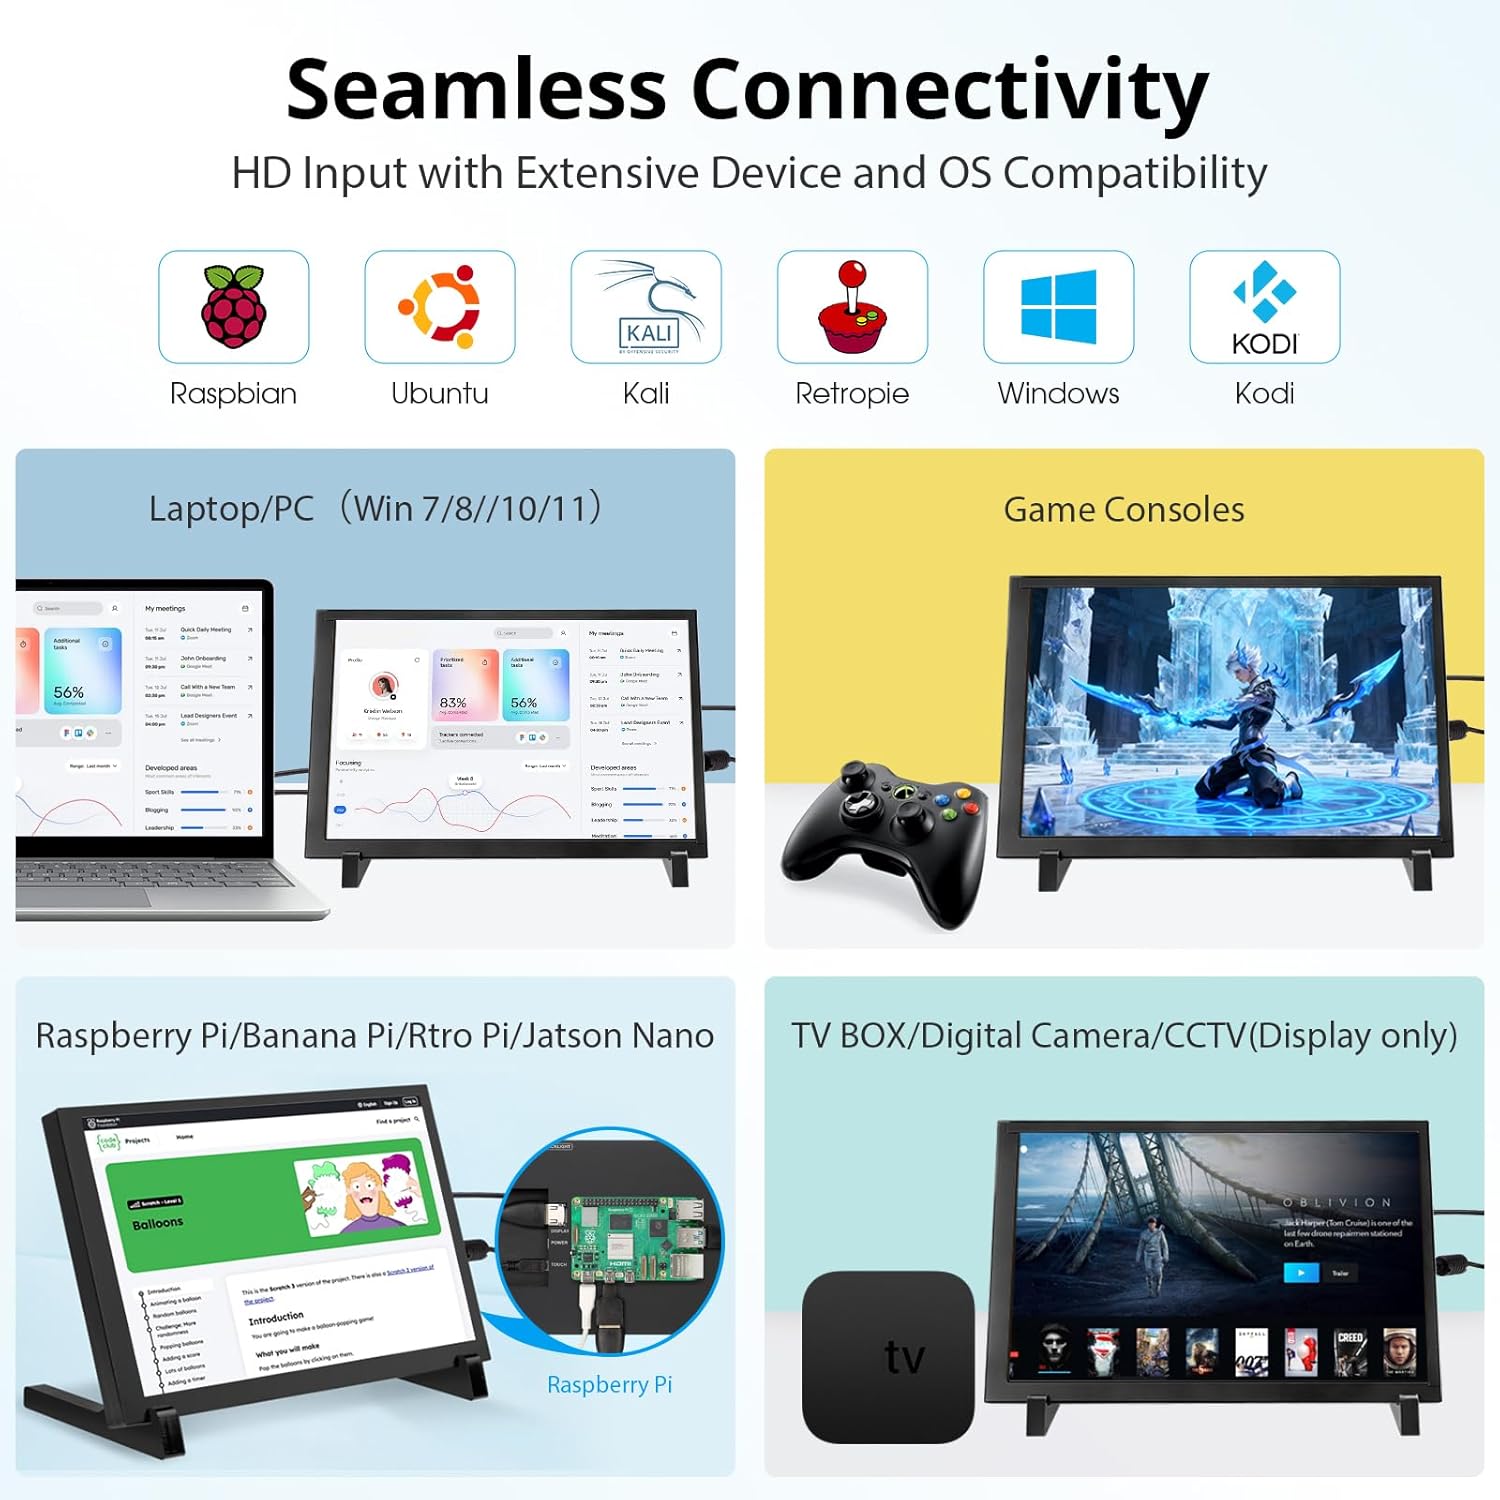
Image : Terminéview des appareils et systèmes d'exploitation compatibles.
2.3.1 Connexion à Raspberry Pi
Connect the monitor to your Raspberry Pi using the provided HDMI cable for video and a USB cable for power and touch. For Raspberry Pi 4/5, use the included HD to Mini HD adapter if necessary. The monitor supports single-point touch on Raspberry Pi OS (Raspbian), Ubuntu, and Kali Linux.

Image: Raspberry Pi connection setup.
2.3.2 Connexion à un PC/ordinateur portable
Connect the monitor to your PC or laptop using an HDMI cable for video and a USB cable for power and touch. The monitor supports 5-point touch on Windows 11/10/8/7 systems.

Image: PC/Laptop connection setup.
2.3.3 Connexion à d'autres appareils
The monitor is compatible with Jetson Nano, Banana Pi, Beaglebone, and game consoles. Use appropriate HDMI and USB connections for these devices.

Image: Jetson Nano connection setup.
2.4 options de montage
The monitor includes a stand for desktop use and features four mounting holes on the back for integration with Raspberry Pi or wall mounting.
2.4.1 Using the Included Stand
Attach the two bracket pieces to the bottom of the monitor to form a stable stand for desktop placement.
2.4.2 Mounting Raspberry Pi Behind the Display
The monitor is designed to allow a Raspberry Pi to be mounted directly behind it, creating a compact setup. Use the provided screws and copper pillars to secure the Raspberry Pi to the designated mounting holes.

Image: Raspberry Pi mounted discreetly behind the display.

Image: Integrated Raspberry Pi and monitor setup.
2.5 Configuration terminéeview Vidéo
Video: An official ELECROW overview and demonstration of the 10.1 Inch 1280x800 IPS LCD Touchscreen Monitor, showcasing its features and basic setup.
3. Mode d'emploi
3.1 Mise sous/hors tension
Once connected to a power source via the USB cable, the monitor will automatically power on. To power off, disconnect the USB power cable. Some operating systems may offer display power management options.
3.2 Fonctionnalités de l'écran tactile
The monitor features a capacitive touchscreen. The number of touch points supported depends on the connected operating system:
- Windows (11/10/8/7): Supports 5-point multi-touch.
- Raspberry Pi OS (Raspbian), Ubuntu, Kali Linux, Win10 IoT: Supports single-point touch.

Image: 5-point multi-touch in action.

Image: Multi-touch gestures supported.
3.3 Qualité d'affichage
The 1280x800 IPS LCD panel provides a wide 178-degree viewangle de vision et reproduction fidèle des couleurs.

Image: Display resolution comparison.

Image: Wide viewing angle demonstration.
3.4 Applications polyvalentes
The monitor can be used for various purposes beyond its primary function with development boards, including:
- As a second monitor for PC/Laptops.
- As a digital photo frame.
- For home monitoring displays (CCTV).
- As a display for gaming consoles.

Image : Examples of versatile display applications.

Image: Monitor used for gaming.

Image: Monitor used for home monitoring.
4. Entretien
4.1 Nettoyage de l'écran
Pour nettoyer l'écran, essuyez-le délicatement avec un chiffon doux non pelucheux. Pour les taches tenaces, frottez légèrement avec un chiffon doux.ampen the cloth with water or a screen-safe cleaning solution. Avoid using harsh chemicals, abrasive materials, or excessive moisture, as these can damage the screen surface.
4.2 Entretien général
- Tenez le moniteur à l'écart de la lumière directe du soleil, des sources de chaleur et des températures extrêmes.
- Évitez de faire tomber le moniteur ou de le soumettre à des chocs violents.
- Do not attempt to disassemble the monitor. Unauthorized disassembly will void the warranty.
- Assurez une ventilation adéquate lors de l'utilisation.
5. Dépannage
5.1 Aucun affichage / Écran noir
- Vérifiez l'alimentation : Ensure the monitor is receiving power via the USB cable and the power source is active.
- Vérifier la connexion HDMI : Verify that the HDMI cable is securely connected to both the monitor and the source device. Try a different HDMI cable if available.
- Sortie du périphérique source : Confirm that your source device (e.g., Raspberry Pi, PC) is configured to output video to the connected HDMI port.
- Compatibilité de résolution : Ensure the source device's output resolution is compatible with the monitor (1280x800).
5.2 Fonctionnalité tactile non fonctionnelle
- Check USB Touch Connection: Ensure the USB cable for touch functionality is securely connected from the monitor's 'TOUCH' port to a USB data port on your source device.
- Installation du pilote : For some operating systems (especially Linux distributions), specific drivers or configuration might be required for touch input. Refer to the documentation for your specific OS and device (e.g., Raspberry Pi documentation for touchscreen setup).
- Compatibilité OS: Confirm your operating system supports touch input with this monitor. Windows systems generally offer multi-touch, while Linux-based systems often require specific setup for single-touch.
5.3 Problèmes de qualité d'image
- Qualité du câble : A faulty HDMI cable can cause image distortion or flickering. Try a different cable.
- Résolution de la source : Ensure the source device is outputting at the monitor's native resolution (1280x800) for optimal clarity.
6. Spécifications
| Fonctionnalité | Spécification |
|---|---|
| Marque | ÉLECTROCROÛTE |
| Nom du modèle | DIS85101D |
| Taille de l'écran | 10.1 pouces |
| Résolution | 1280x800 |
| Résolution native | 1280x800 pixels |
| Rapport hauteur/largeur | 16:10 |
| Type d'affichage | Écran LCD |
| Technologie d'affichage | IPS |
| Description de la surface de l'écran | Brillant |
| Rapport de contraste | 2000:1 |
| Taux de rafraîchissement | 60 Hz |
| ViewAngle d'attaque | 178 degrés |
| Luminosité | 250 cd/m² |
| Temps de réponse | 8 millisecondes |
| Technologie de connectivité | HDMI, USB |
| Nombre total de ports HDMI | 1 |
| Nombre total de ports USB | 2 (Micro USB for power, Micro USB for touch/power) |
| Consommation d'énergie | 5.29 watts |
| Voltage | 5 volts |
| Poids de l'article | 521 g |
| Dimensions de l'article (P x L x H) | 1.6"P x 6.2"L x 9.4"H |
| Type de montage | Desk Mount, Wall Mount (4 mounting holes) |
| Appareils compatibles | Raspberry Pi 3/3B+/4B/5, Jetson Nano, Banana Pi, Beaglebone, PC (Windows, Linux, Ubuntu) |
7. Informations sur la garantie
This ELECROW 10.1 Inch Touchscreen Monitor comes with a Garantie constructeur de 1 ansVeuillez conserver votre preuve d'achat pour toute réclamation au titre de la garantie. La garantie couvre les défauts de matériaux et de fabrication dans des conditions normales d'utilisation. Elle ne couvre pas les dommages causés par une mauvaise utilisation, un accident, des modifications non autorisées ou une installation incorrecte.
8. Assistance clientèle
For technical assistance, troubleshooting not covered in this manual, or warranty inquiries, please contact ELECROW customer support through the retailer where you purchased the product or visit the official ELECROW website pour les coordonnées.