1. Introduction
The Oster Oven Fryer 12L 3-in-1 electric air fryer is designed for preparing lighter and healthier meals. This versatile appliance combines the functions of an air fryer, oven, and dehydrator, offering an expanded capacity suitable for daily family use. It provides practical and quick options for a variety of healthy preparations.

This image illustrates the key features: 3-in-1 functionality (Air Fryer, Oven, Dehydrator), 12 liters capacity, and 1800W power.
2. Consignes de sécurité importantes
Veuillez lire attentivement toutes les instructions avant d'utiliser l'appareil. Le non-respect de ces instructions peut entraîner un choc électrique, un incendie ou des blessures graves.
- Sécurité électrique : Assurer le voltage de votre prise de courant correspond au voltage specified on the appliance. Do not immerse the cord, plug, or appliance in water or other liquids.
- Surfaces chaudes : The appliance surfaces become hot during use. Always use oven mitts or gloves when handling hot components or accessories. Do not touch hot surfaces directly.
- Placement: Place the appliance on a stable, heat-resistant surface, away from walls and other heat sources. Ensure adequate ventilation around the unit.
- Surveillance: Une surveillance étroite est nécessaire lorsqu'un appareil est utilisé par ou à proximité d'enfants. Ne laissez pas l'appareil sans surveillance pendant son fonctionnement.
- Accessoires: Only use accessories recommended by the manufacturer. Using unapproved accessories may cause injury or damage to the appliance.
- Entretien: Débranchez l'appareil lorsqu'il n'est pas utilisé et avant de le nettoyer. Laissez-le refroidir complètement avant de manipuler ou de nettoyer ses pièces.
- Dommage: N’utilisez aucun appareil dont le cordon ou la prise est endommagé(e), ou si l’appareil présente un dysfonctionnement ou a été endommagé de quelque manière que ce soit. Contactez le service client pour un examen, une réparation ou un réglage.
- Utilisation prévue : Cet appareil est destiné à un usage domestique uniquement. Ne l'utilisez pas à l'extérieur.
3. Composants du produit
The Oster Oven Fryer comes with the following components:
- Main Unit (Oven Fryer)
- 2 x Airflow Racks (Grids)
- 1 x panier à rôtisserie
- 1 x Accessory Removal Hook
- 1 x Broche à rôtir
- 1 x égouttoir
- 1 x Manuel d'instructions
- 1 x Warranty and Technical Assistance Leaflet
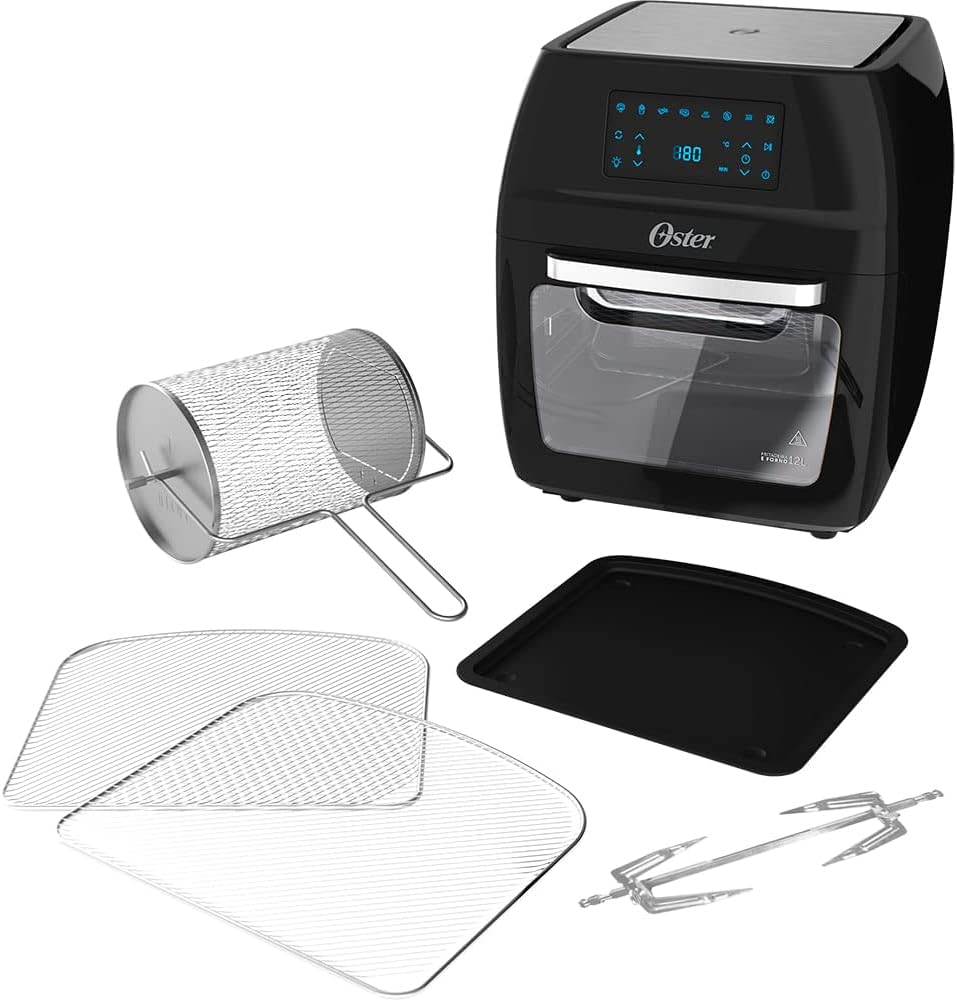
This image displays all included accessories alongside the main Oven Fryer unit.
4. Guide de configuration
4.1 Déballage
- Retirez soigneusement tous les composants de l'emballage.
- Remove any protective film or stickers from the appliance and accessories.
- Conservez les matériaux d'emballage pour un stockage ou une élimination ultérieure.
4.2 Nettoyage initial
- Wash the airflow racks, rotisserie basket, rotisserie spit, and drip tray with warm, soapy water. Rinse thoroughly and dry completely.
- Essuyez l'intérieur et l'extérieur de l'unité principale avec le produit.amp chiffon. N'utilisez pas de nettoyants abrasifs.
4.3 Placement
- Place the Oven Fryer on a stable, level, and heat-resistant surface.
- Assurez-vous qu'il y ait au moins 10 à 15 cm (4 à 6 pouces) d'espace libre autour de l'arrière et des côtés de l'appareil pour une ventilation adéquate.
- Do not place the appliance near flammable materials or under cabinets.
4.4 Première utilisation (élimination par combustion)
- Plug the appliance into a grounded 220V electrical outlet.
- Run the appliance empty for approximately 10-15 minutes at 180°C (350°F). This helps to burn off any manufacturing residues and eliminate initial odors. A slight odor or smoke during this process is normal.
- Ensure the area is well-ventilated during this initial burn-off.
5. Mode d'emploi
5.1 Panneau de configuration terminéview
The Oster Oven Fryer features an intuitive touch control panel. The digital display shows temperature and time settings, while various icons represent pre-programmed functions and customizable settings.

The touch control panel allows for easy selection of cooking functions and adjustments.
5.2 Pre-programmed Functions
The appliance includes 4 pre-programmed functions for common dishes:
- Légumes: Optimized settings for cooking various vegetables.
- Frites: Ideal for crispy French fries.
- La volaille: Convient aux poulets, aux dindes et autres volailles.
- Viandes: For cooking different types of meat.

These icons represent the four pre-programmed cooking functions.
5.3 Customizable Functions
In addition to pre-programmed options, you can customize settings using these 5 functions:
- Déshydrater: Pour sécher les fruits, les légumes et les viandes.
- Frire à l'air : For oil-free frying.
- Rôti: For roasting various foods.
- Réchauffer: Pour réchauffer des plats cuisinés à l'avance.
- Rôtissoire: For cooking whole poultry or large cuts of meat with continuous rotation.
5.4 Réglage de la température et du temps
- The temperature can be adjusted from 40°C à 200°C (105°F à 400°F).
- The timer allows for precise cooking durations and features an arrêt automatique for safety and convenience.
5.5 Utilisation des accessoires
Placez toujours le bac d'égouttage at the bottom of the oven to catch any oil or food particles.
5.5.1 Airflow Racks
- Insert the airflow racks into the desired slots within the oven.
- These are suitable for general air frying, roasting, or dehydrating.
- When using multiple racks, rotate them halfway through cooking for even results, especially with larger items.

The interior of the Oven Fryer showing the placement of two airflow racks.
5.5.2 Rotisserie Basket
- Place smaller items like French fries or vegetables into the rotisserie basket.
- To install, first insert the left side of the basket into the motor drive socket, then secure the right side into its support.
- Select the 'Rotisserie' function for continuous 360° rotation, ensuring even cooking.
- Use the accessory removal hook to safely remove the hot basket after cooking.
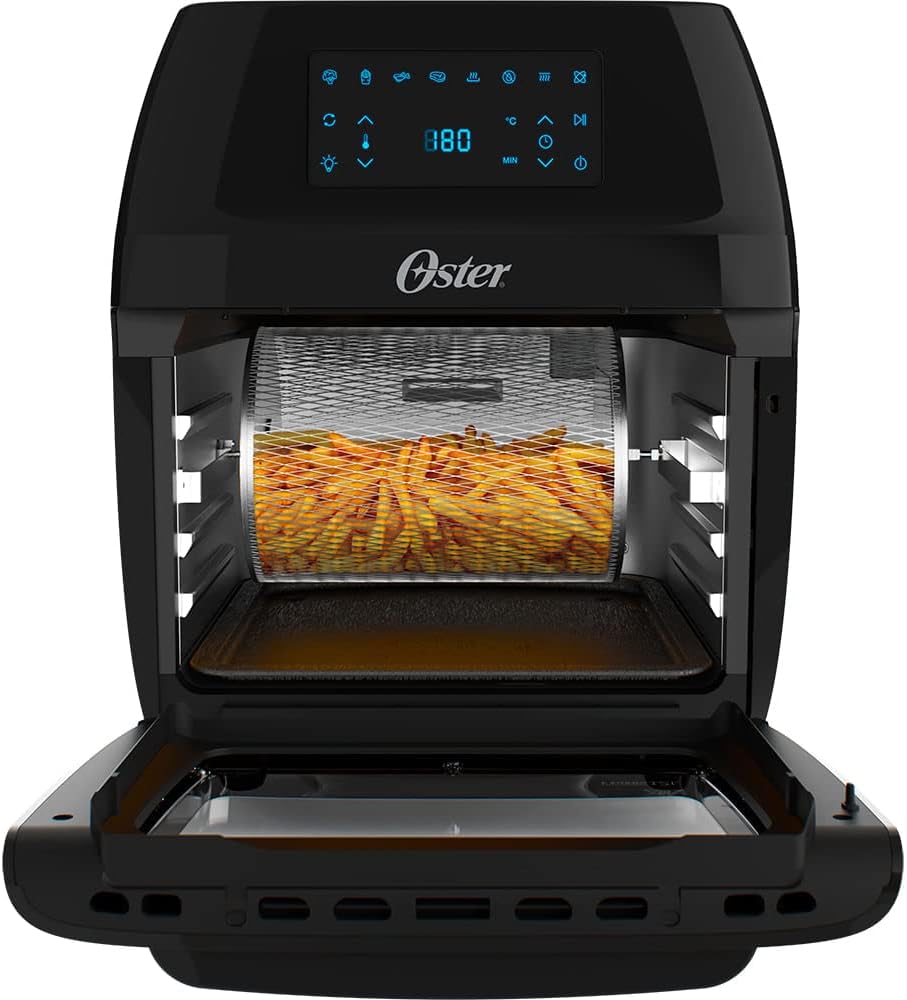
The rotisserie basket is ideal for achieving crispy results on items like French fries.
5.5.3 broche à rôtisserie
- Secure a whole chicken or large roast onto the rotisserie spit.
- Insert the left side of the spit into the motor drive socket, then secure the right side into its support.
- Activate the 'Rotisserie' function for 360° rotation, which ensures uniform cooking and browning.
- Use the accessory removal hook to safely remove the hot spit and food after cooking.

A whole chicken cooking evenly on the rotisserie spit inside the Oven Fryer.
5.6 Démarrage et pause
- After selecting your desired function and settings, press the Lecture/Pause pour démarrer la cuisson.
- Appuyez sur le Lecture/Pause button again to temporarily stop cooking. You can then adjust settings or check food.
- The appliance also features a reprogrammer function to change settings mid-cycle if needed.
5.7 Internal Illumination
The transparent door and internal illumination allow you to monitor the cooking process without opening the door, helping to maintain consistent temperature.
6. Nettoyage et entretien
Proper cleaning and maintenance ensure the longevity and optimal performance of your Oster Oven Fryer.
- Débranchez et refroidissez : Débranchez toujours l'appareil de la prise de courant et laissez-le refroidir complètement avant de le nettoyer.
- Accessoires: Remove all accessories (airflow racks, rotisserie basket, rotisserie spit, drip tray). Wash them with warm, soapy water using a non-abrasive sponge. Rinse thoroughly and dry completely. Note: These accessories are not dishwasher safe.
- Intérieur: Essuyez les murs intérieurs avec de la publicitéamp cloth and mild detergent. For stubborn food residues, a soft brush can be used. Avoid using metal scouring pads or harsh abrasive cleaners, as they can damage the non-stick coating.
- Extérieur: Essuyez l'extérieur de l'appareil avec de l'eau.amp Chiffon. N’utilisez pas de nettoyants abrasifs et n’immergez pas l’unité principale dans l’eau.
- Stockage: Avant de ranger l'appareil, assurez-vous que toutes les pièces soient propres et sèches. Rangez-le dans un endroit frais et sec.
7. Guide de dépannage
If you encounter any issues with your Oster Oven Fryer, please refer to the following common problems and solutions:
| Problème | Cause possible | Solution |
|---|---|---|
| L'appareil ne s'allume pas. | Appareil non branché ; problème de prise électrique ; dysfonctionnement de l’appareil. | Ensure the power cord is securely plugged into a working 220V outlet. Check the circuit breaker. If the issue persists, contact customer support. |
| Les aliments ne cuisent pas uniformément. | Overcrowding; incorrect temperature/time; improper accessory placement. | Do not overcrowd the racks or basket. Cook in smaller batches if necessary. Adjust temperature and time as per recipe. Ensure racks are rotated or food is shaken/flipped halfway through cooking. Verify rotisserie accessories are correctly installed. |
| Fumée blanche provenant de l'appareil. | Grease or food residue on heating element or drip tray. | Unplug the appliance and let it cool. Clean the heating element and drip tray thoroughly. Ensure the drip tray is always in place. |
| Odeur inhabituelle pendant la cuisson. | Première utilisation pour éliminer les résidus alimentaires. | A slight odor is normal during initial uses. Ensure the appliance is clean. If the odor is strong or persistent, unplug and contact support. |
| Rotisserie basket/spit not rotating. | Incorrect installation; 'Rotisserie' function not selected. | Ensure the left side of the accessory is fully engaged in the motor drive socket and the right side is secured. Select the 'Rotisserie' function on the control panel. |
8. Spécifications du produit
Here are the technical specifications for the Oster Oven Fryer 12L 3-in-1:
- Nom du modèle : OFRT780-220V
- Capacité: 12 litres
- Puissance de sortie : 1800 watts
- Voltage: 220 volts
- Dimensions (P x L x H) : 34.7 cm x 39 cm x 42.8 cm (13.66 po x 15.35 po x 16.85 po)
- Poids de l'article : 5.9 kilogrammes (13 livres)
- Matériel: Plastic, Glass (exterior); Plastic (interior)
- Méthode de contrôle : Panneau tactile
- Technologie de friture à air chaud : Circulation d'air chaud
- Caractéristiques spéciales : Programmable, Dehydrate Function, Automatic Shut-off Timer, Non-stick coating
- Utilisations recommandées : Roasting, Dehydrating, Frying
- Lavable au lave-vaisselle : No (for main unit and accessories)
- Pays d'origine : Chine
9. Garantie et assistance
9.1 Informations sur la garantie
This Oster Oven Fryer comes with a Garantie de 12 mois against manufacturing defects. Please retain your proof of purchase for warranty claims. The warranty covers defects in materials and workmanship under normal household use.
9.2 Assistance clientèle
For technical assistance, warranty claims, or any questions regarding your product, please refer to the contact information provided in the included Warranty and Technical Assistance leaflet. You may also visit the official Oster website de ressources d'assistance.