1. Introduction
Thank you for choosing the NEEWER TP-M200 Heavy Duty Video Tripod. This manual provides essential information for the safe and effective use of your tripod. Please read these instructions carefully before operation and retain them for future reference. This tripod is designed for stability and smooth camera movements, suitable for various photography and videography applications with DSLR cameras and camcorders.
2. Produit terminéview & Composants
The NEEWER TP-M200 tripod features a robust aluminum alloy construction, a 360° fluid drag head, and a quick release plate for versatile camera mounting. Key components include:
- Fluid Drag Head: Allows for smooth 360° horizontal panning and -70° to +90° vertical tilting.
- Plaque à dégagement rapide : Equipped with 1/4" and 3/8" screws for broad compatibility with various cameras and camcorders.
- Flip Locks: Securely extend and retract the tripod legs for height adjustment.
- 70mm Bowl Base: Provides stability and allows for quick leveling on uneven surfaces.
- Mid-Level Spreader: Enhances stability and allows for precise leg angle adjustments.
- Double Tube Metal Legs: Heavy-duty design for durability and stability.
- Niveau à bulle: Integrated to ensure the tripod is perfectly balanced.
- Pieds en caoutchouc antidérapants : Provides secure footing on various terrains.

Figure 1: Key structural components including the 70mm bowl base, mid-level spreader, and double tube metal legs.
3. Spécifications
| Marque | NOUVELLES |
| Nom du modèle | TP-M200 |
| Type de matériau | Alliage d'aluminium |
| Hauteur maximale | 200 cm (79 pouces) |
| Hauteur minimale | 88 cm (34.6 pouces) |
| Taille pliée | 91 cm (35.8 pouces) |
| Poids de l'article | 5.64 kilogrammes |
| Limite de poids | 8 kilogrammes (17.6 livres) |
| Type de tête | Tête fluide |
| Sections de jambe | 3 |
| Appareils compatibles | DSLR Cameras, Camcorders, Handheld Cameras, Mirrorless Cameras, Telephoto Lens Cameras, Camera Sliders |
4. Installation
4.1 Dépliage du trépied
- Placez le trépied sur une surface plane et stable.
- Déverrouillez les jambes de chaque jambe.
- Extend the legs to the desired height. Ensure all leg sections are fully extended or retracted evenly for optimal stability.
- Securely fasten all flip locks to prevent accidental collapse.

Figure 2: Adjustable height mechanism using flip locks, showing various height configurations from 35.8 inches (91cm) folded to 78.7 inches (200cm) fully extended.
4.2 Fixation de la caméra
- Repérez la plaque de dégagement rapide sur la tête fluide.
- Press the QR plate release button and slide the quick release plate out.
- Attach the quick release plate to the bottom of your camera or camcorder using the appropriate 1/4" or 3/8" screw. Ensure it is tightened securely.
- Faites glisser l'appareil photo avec sa plaque de dégagement rapide dans la tête fluide jusqu'à ce qu'il s'enclenche.
- Tighten the QR plate locking knob to prevent any movement.

Figure 3 : Détaillé view of the quick release plate mechanism and fluid head controls.
4.3 Mise à niveau du trépied
- Adjust the tripod legs until the built-in bubble level indicates a level position.
- For fine adjustments, the 70mm bowl base allows for minor leveling without adjusting the legs. Loosen the bowl base locking knob, adjust the head until level, and then re-tighten the knob.
5. Mode d'emploi
5.1 Déplacement panoramique et inclinaison
- Mouvement panoramique : Loosen the pan locking knob to allow horizontal rotation (360°). Tighten the knob to lock the head in position.
- Mouvement d'inclinaison : Loosen the tilt locking knob to allow vertical movement (-70° to +90°). Tighten the knob to secure the desired tilt angle.
- Use the fluid head handle for smooth and controlled movements.

Figure 4: Demonstrates the 360° panoramic rotation and vertical tilt range of the fluid head.
5.2 Capacité de charge
The tripod has a maximum load capacity of 8 kg (17.6 lbs). Do not exceed this weight limit to ensure stability and prevent damage to the tripod or your equipment.
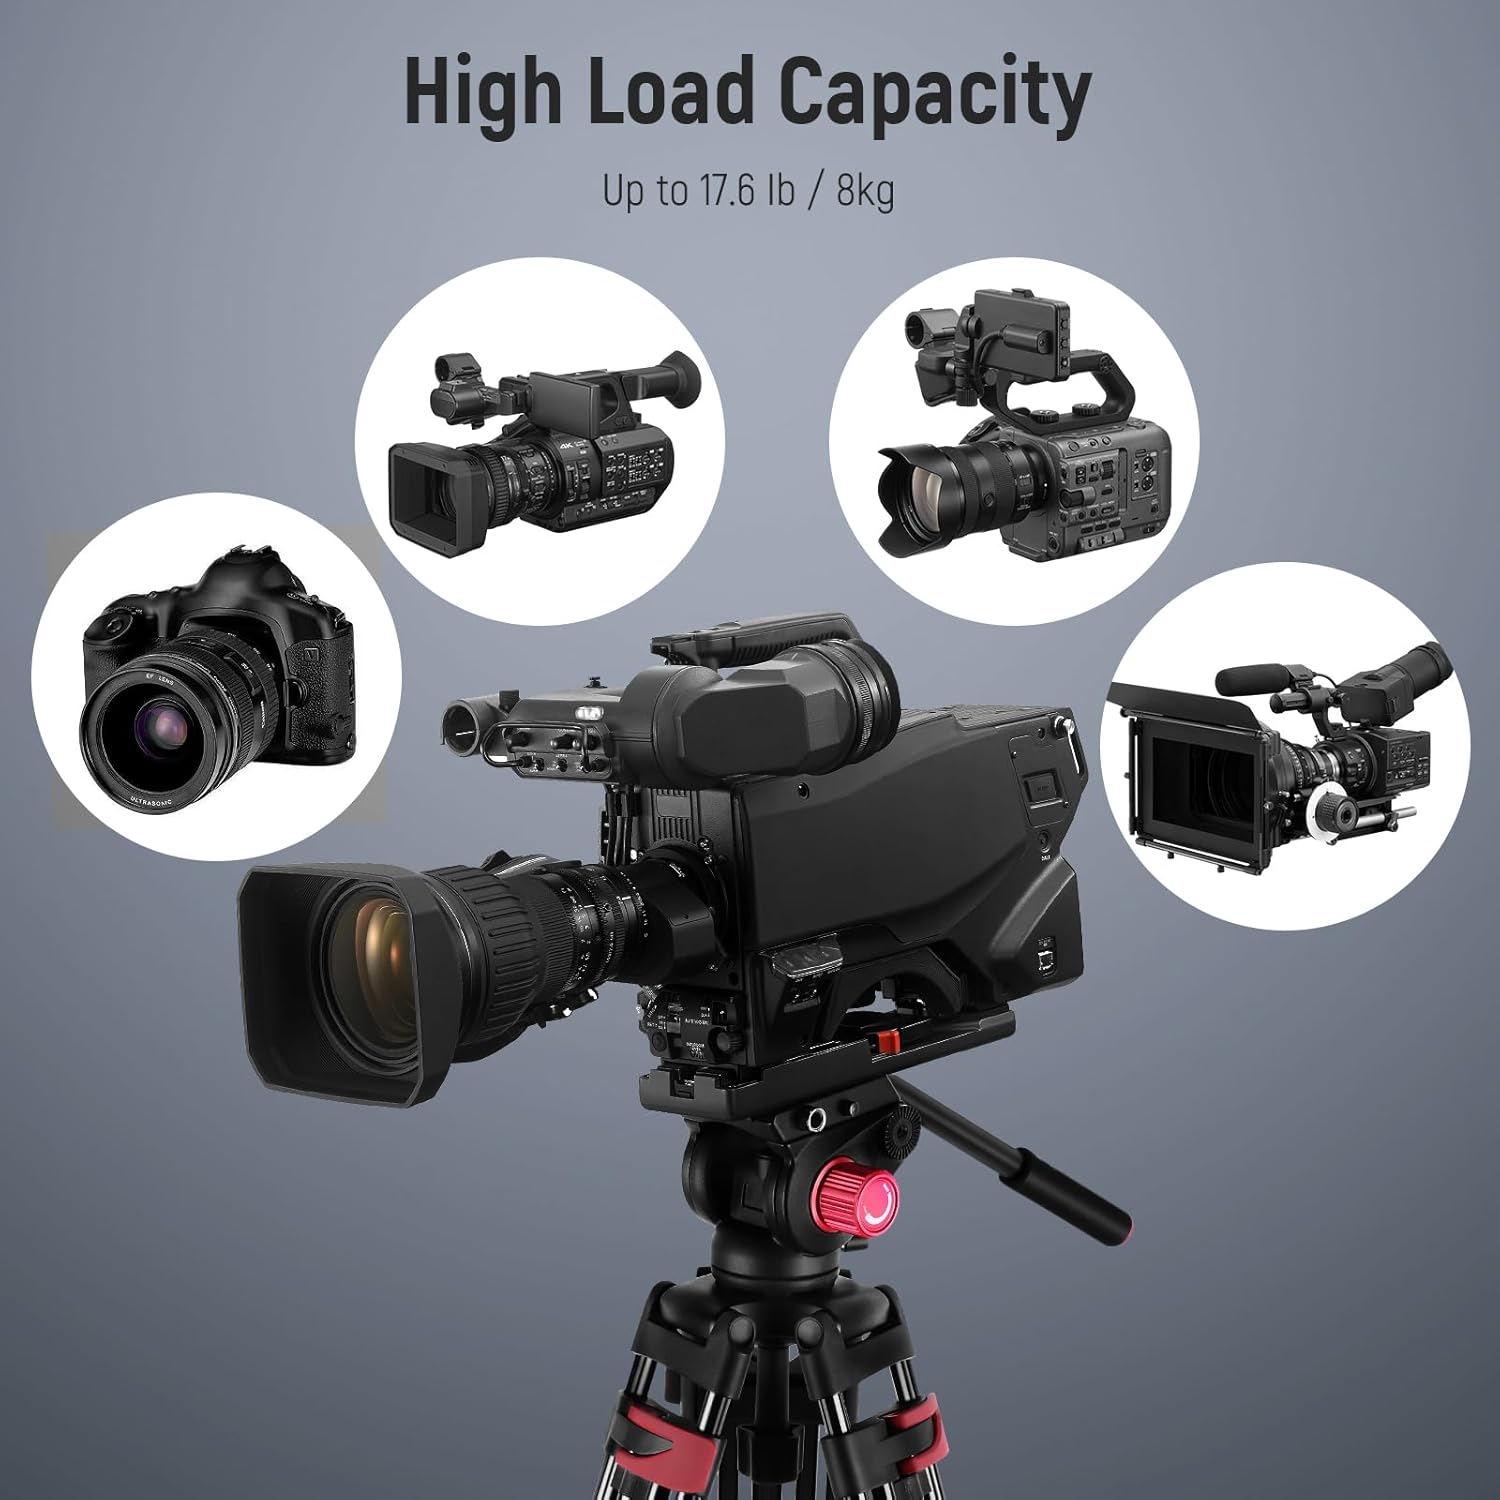
Figure 5: The tripod supports a variety of cameras and camcorders up to its maximum load capacity.
5.3 Compatibilité
The quick release plate features both 1/4" and 3/8" mounting screws, making it compatible with a wide range of photography and videography equipment, including:
- Appareils photo reflex numériques
- Appareils photo sans miroir
- Caméras portatives
- Telephoto Lens Cameras
- Professional Video Cameras
- Camera Sliders

Figure 6: The tripod's quick release plate offers wide compatibility with 1/4" and 3/8" screws.
6. Entretien
Un entretien approprié garantit la longévité et les performances optimales de votre trépied.
- Nettoyage: Essuyez le trépied avec un chiffon doux et sec après chaque utilisation. Pour les saletés tenaces, utilisez un chiffon légèrement plus sec.amp Nettoyer avec un chiffon et du savon doux, puis sécher soigneusement. Éviter les produits chimiques agressifs.
- Lubrification: Periodically check moving parts for smooth operation. If any part feels stiff, apply a small amount of silicone-based lubricant to the joints and locks. Do not over-lubricate.
- Stockage: Store the tripod in its included carrying bag in a cool, dry place, away from direct sunlight and extreme temperatures.
- Inspection: Regularly inspect all screws, knobs, and leg locks for tightness and wear. Tighten any loose components and replace worn parts as necessary.
7. Dépannage
If you encounter issues with your NEEWER TP-M200 tripod, refer to the following common problems and solutions:
| Problème | Cause possible | Solution |
|---|---|---|
| Le trépied est instable ou bancal. | Leg locks not fully tightened; uneven surface; weight exceeding capacity. | Ensure all leg locks are securely fastened. Adjust legs for a level surface using the bubble level. Verify camera weight is within the 8kg limit. |
| Fluid head movements are stiff or jerky. | Pan/tilt locking knobs are too tight; lack of lubrication; dirt in mechanism. | Loosen pan/tilt locking knobs slightly. Clean the head and apply a small amount of silicone lubricant if necessary. |
| Quick release plate does not attach securely. | QR plate not fully inserted; locking knob not tightened; obstruction. | Ensure the QR plate is fully seated and clicks into place. Tighten the QR plate locking knob firmly. Check for any debris obstructing the plate slot. |
| Les pieds ne se déploient ni ne se rétractent de manière fluide. | Dirt or debris in leg sections; worn leg locks. | Clean leg sections thoroughly. Inspect leg locks for damage and replace if necessary. |
8. Garantie et assistance
This NEEWER TP-M200 tripod comes with a Garantie fabricant d'un an à compter de la date d'achat. Cette garantie couvre les défauts de matériaux et de fabrication dans des conditions normales d'utilisation.
For warranty claims, technical support, or any inquiries regarding your product, please contact NEEWER customer service through the retailer where you purchased the product or visit the official NEEWER website pour les coordonnées.
Veuillez conserver votre preuve d'achat pour la validation de la garantie.