
1. Introduction
This manual provides detailed instructions for the setup, operation, maintenance, and troubleshooting of your AMIR Indoor/Outdoor Thermometer with 3 Wireless Sensors. This device is designed to monitor temperature and humidity in up to four different locations simultaneously, offering clear readings on a large LCD display.
2. Consignes de sécurité
- Do not disassemble the product. Unauthorized modifications may void the warranty and cause damage.
- If the display becomes blurry, replace the batteries promptly.
- Avoid placing the product in hot, humid, dusty, or corrosive gas environments to prevent damage to electronic components.
- Veillez à respecter la polarité des piles lors de leur insertion.
3. Contenu du colis
Vérifiez que tous les éléments sont présents dans le colis :
- 1 x AMIR Indoor/Outdoor Thermometer Main Unit
- 3 x Wireless Thermometer-Hygrometer Transmitters
- 1 x Manuel d'utilisation
- 1 x Apple Data Cable (for main unit power)
4. Installation
4.1 Alimentation de l'unité principale
L'unité principale peut être alimentée de deux manières :
- Puissance de la batterie : Insert 3 AA batteries (not included) into the battery compartment on the back of the main unit.
- Cable Power: Plug the included Apple data cable into the main unit's charging port and connect it to a USB power source.

Figure 1: Main unit power supply options (battery and cable).
4.2 Setting Up Wireless Sensors
The three wireless transmitters are identical. To differentiate them and ensure proper connection:
- On the back cover of each transmitter, locate the channel dial and set it to 1, 2, or 3 for each respective sensor.
- Insert 2 AAA batteries (not included) into each transmitter. The indicator light on the transmitter will flash red, signaling it is attempting to connect.
- The main unit will automatically connect to the transmitters. If a sensor does not connect immediately, it will attempt to reconnect in approximately 60-second cycles. To expedite the connection, remove and reinsert the batteries in the transmitter and wait for the red light to flash.

Figure 2: Main unit and three wireless sensors for multi-location monitoring.
Vidéo 1 : Terminéview of the AMIR Indoor Outdoor Thermometer, demonstrating its features and setup process.
5. Mode d'emploi
5.1 Large LCD Display and Backlight
The main unit features a 4.6-inch large LCD display for clear and simple readings. To activate the backlight, press the 'LIGHT' button on the right side of the unit. The backlight has one level when battery-powered and two levels when cable-powered.

Figure 3: Activating the LCD backlight for improved visibility.
5.2 Sélection de l'unité de température (°C/°F)
To switch between Celsius (°C) and Fahrenheit (°F), press the '°C/°F' button located on the right side of the main unit.
5.3 MAX/MIN Record
The thermo-hygrometer records the maximum and minimum temperature and humidity values over the past 24 hours. Press the 'MIN/MAX' button on the left side of the unit to cycle through current, maximum, and minimum readings.
5.4 Indicateur de confort de l'air
The display includes an air comfort indicator to quickly assess indoor conditions:
- SEC: Humidité < 40%
- COM (Confort) : 40% < Humidité < 70%
- HUMIDE: Humidité > 70 %

Figure 4: Air Comfort Indicator for quick environmental assessment.
5.5 Rappel de batterie faible
The unit will display a low battery icon when the main unit's battery voltage drops below 3.6V or the transmitters' battery voltage drops below 2.7V. Replace batteries promptly to ensure continuous operation.

Figure 5: Low battery reminder on the main unit and transmitters.
6. Options de montage
Both the main unit and the wireless transmitters offer flexible mounting options:
6.1 Main Unit Mounting
- Droit: Use the integrated stand to place the unit on a tabletop or desk.
- Montage mural: Utilisez le trou de suspension à l'arrière pour le fixer au mur.
- Dos magnétique : The unit has a magnetic back for attachment to metallic surfaces like refrigerators.
6.2 Montage du transmetteur
- Droit: Place the transmitter on a flat surface.
- Montage mural: Use the hanging hole for wall mounting.
- Lanyard/Suction Cup: The transmitter comes with a lanyard and suction cup for versatile placement, such as hanging or attaching to glass.
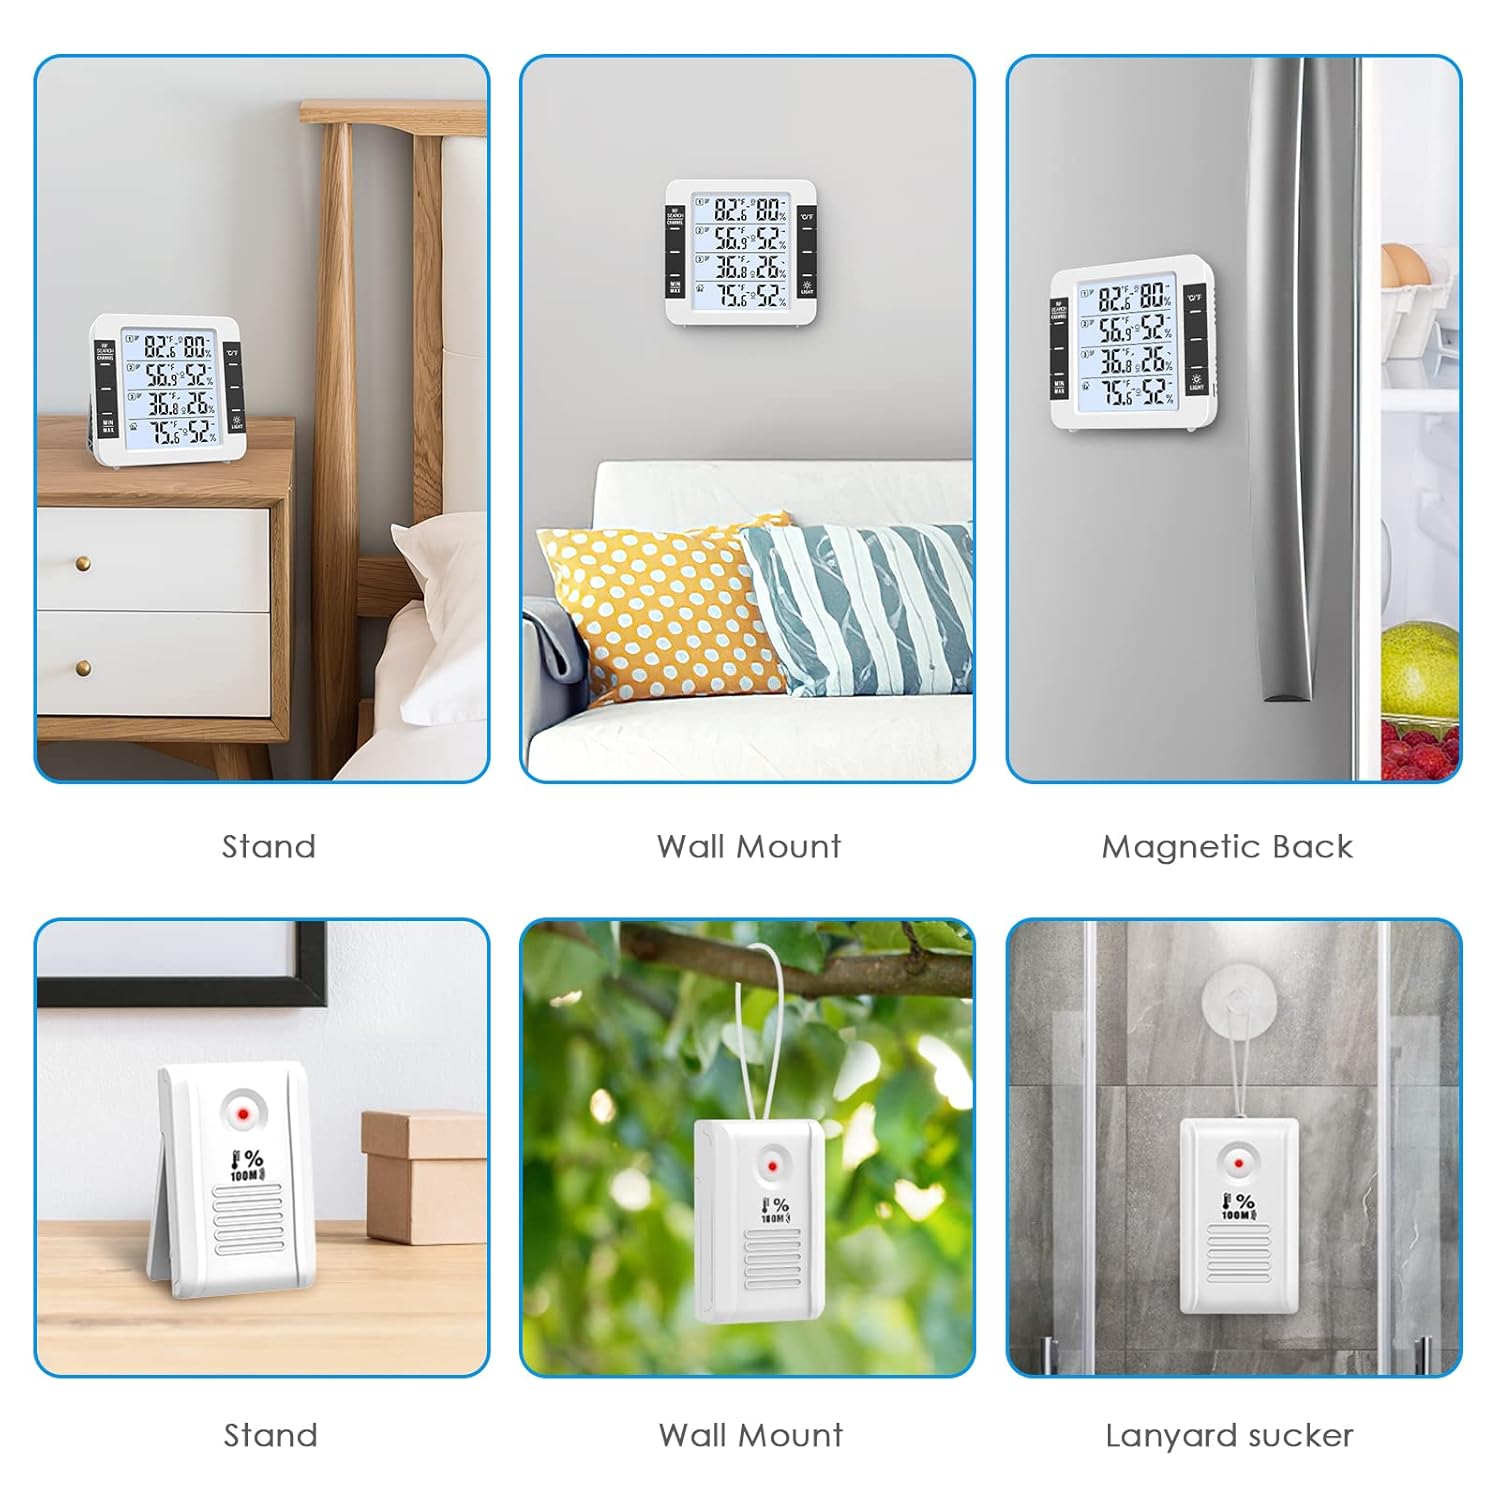
Figure 6: Multiple mounting options for the main unit and wireless sensors.
7. Entretien
7.1 Remplacement de la batterie
Replace batteries in the main unit (3 AA) and transmitters (2 AAA each) when the low battery indicator appears on the display. Always use new batteries and ensure correct polarity.
7.2 Nettoyage
Essuyez l'appareil avec un chiffon doux et sec. N'utilisez pas de nettoyants abrasifs et n'immergez pas l'appareil dans l'eau.
7.3 Considérations environnementales
To prolong the life and accuracy of your device, avoid exposing it to:
- Lumière directe du soleil ou sources de chaleur extrême.
- High humidity or direct water exposure.
- Excessive dust or corrosive gases.
8. Dépannage
8.1 Capteur non connecté
- Ensure batteries are correctly inserted and have sufficient charge in both the main unit and the sensor.
- Verify that the sensor's channel dial is set to a unique number (1, 2, or 3).
- Move the sensor closer to the main unit to check if it's a range issue. The maximum range is 100m/328ft in open air, but obstacles like walls can reduce this.
- Remove and reinsert the batteries in the problematic sensor to force a reconnection attempt.
8.2 Blurring Display
A blurring display typically indicates low battery power. Replace the batteries in the main unit.
8.3 Lectures inexactes
- Ensure sensors are not placed in direct sunlight or near heat/cold sources, which can skew readings.
- Allow the main unit and sensors to stabilize in their respective environments for at least 30 minutes after setup for accurate readings.
- Compare readings with another known accurate thermometer/hygrometer if possible.
9. Spécifications
| Fonctionnalité | Spécification |
|---|---|
| Plage de température intérieure | -20°C to 70°C (0°F to 60°C in some specifications) |
| Plage de température extérieure | -50°C à 70°C |
| Taux d'humidité | 10% à 99% |
| Précision de la température | ±1°C (±2°F) |
| Précision de l'humidité | ±5% |
| Fréquence de transmission sans fil | 433 MHz |
| Distance de transmission sans fil | Jusqu'à 100 m (328 pieds) en plein air |
| Alimentation de l'unité principale | 3 x AA batteries (not included) or Apple data cable (included) |
| Puissance de l'émetteur | 2 piles AAA (non incluses) par capteur |
| Dimensions de l'unité principale | 11.8 x 11.2 x 2.5 cm (approx. 4.65"W x 4.41"H) |
| Dimensions de l'émetteur | 8.3 x 5 x 2 cm |
10. Garantie et assistance
AMIR products are designed for reliability and performance. For warranty information or technical support, please refer to the contact details provided with your purchase or visit the official AMIR webConsultez le site. Conservez votre reçu d'achat comme preuve d'achat pour toute réclamation au titre de la garantie.