1. Introduction
The BENNING CM 2-1 is a True RMS current clamp multimeter designed for precise electrical measurements in various applications. This device offers accurate current measurement up to 400 A AC/DC and voltage measurement up to 600 V AC/DC. Key features include an AutoV function with low input impedance (LoZ) to suppress reactive voltage and a low pass filter (HFR high frequency suppression) for measurements on clocked motor drives. It is rated for measurement categories CAT IV 300 V and CAT III 600 V, ensuring safety and reliability.
2. Consignes de sécurité
WARNING: Read and understand all safety information and operating instructions before using this instrument. Failure to follow these instructions could result in severe injury or death.
- Always adhere to local and national safety regulations.
- Do not use the multimeter if it appears damaged or if the insulation on the test leads is compromised.
- Assurez-vous que la fonction et la plage appropriées sont sélectionnées avant d'effectuer toute mesure.
- Ne dépassez pas les limites d'entrée maximales pour aucune fonction.
- Soyez prudent lorsque vous travaillez avec du voltages above 30 V AC RMS, 42 V AC peak, or 60 V DC, as these pose a shock hazard.
- Always disconnect the test leads from the circuit before changing the function switch.
- Remplacez les piles lorsque le voyant de batterie faible s'allume afin de garantir des mesures précises.
- The device is rated CAT IV 300 V and CAT III 600 V. Understand these categories and use the meter only in appropriate environments.
3. Contenu du colis
Vérifiez que tous les articles sont présents et non endommagés lors du déballage :
- BENNING CM 2-1 True RMS Current Clamp Multimètre
- Protective carrying bag
- Jeu de cordons de test (rouge et noir)
- 2 piles AAA (préinstallées ou fournies séparément)

Image 3.1: The BENNING CM 2-1 multimeter shown with its protective carrying bag and test leads.
4. Produit terminéview
The BENNING CM 2-1 features a compact design with a clear digital display, a rotary function switch, and control buttons for various measurement modes.
4.1. Commandes et affichage
- Clamp Mâchoire: Pour la mesure sans contact du courant AC/DC.
- Commutateur rotatif : Selects measurement functions (OFF, LoZ, AutoV, V~, V-, Hz, Ω, A~, A-).
- HOLD/MIN MAX Button: Freezes the current reading or displays minimum/maximum values.
- AC/DC HFR/ZERO Button: Toggles between AC/DC current, activates the low pass filter (HFR), or zeros the DC current reading.
- Afficher: Digital readout for measurement values, units, and indicators.
- Input Jacks (COM, VΩ): Pour connecter les cordons de test pour voltage, résistance et autres mesures.
5. Installation
5.1. Installation de la batterie
The BENNING CM 2-1 requires 2 AAA batteries. These are typically included with the device.
- Assurez-vous que le multimètre est éteint.
- Repérez le compartiment de la batterie à l'arrière de l'appareil.
- Utilisez un tournevis pour ouvrir le couvercle du compartiment à piles.
- Insérez les 2 piles AAA en respectant la polarité correcte (+/-) indiquée à l'intérieur du compartiment.
- Replacez le couvercle du compartiment des piles et fixez-le avec la vis.
6. Mode d'emploi
6.1. Mesure du courant AC/DC (Clamp)
To measure AC or DC current without breaking the circuit:
- Turn the rotary switch to the “A~” or “A-” position.
- Press the AC/DC HFR/ZERO button to select AC or DC current if necessary. For DC current, press and hold to zero the display before measurement.
- Ouvrir le clamp jaw and enclose a single conductor. Ensure the jaw is fully closed.
- Lisez la valeur actuelle affichée.
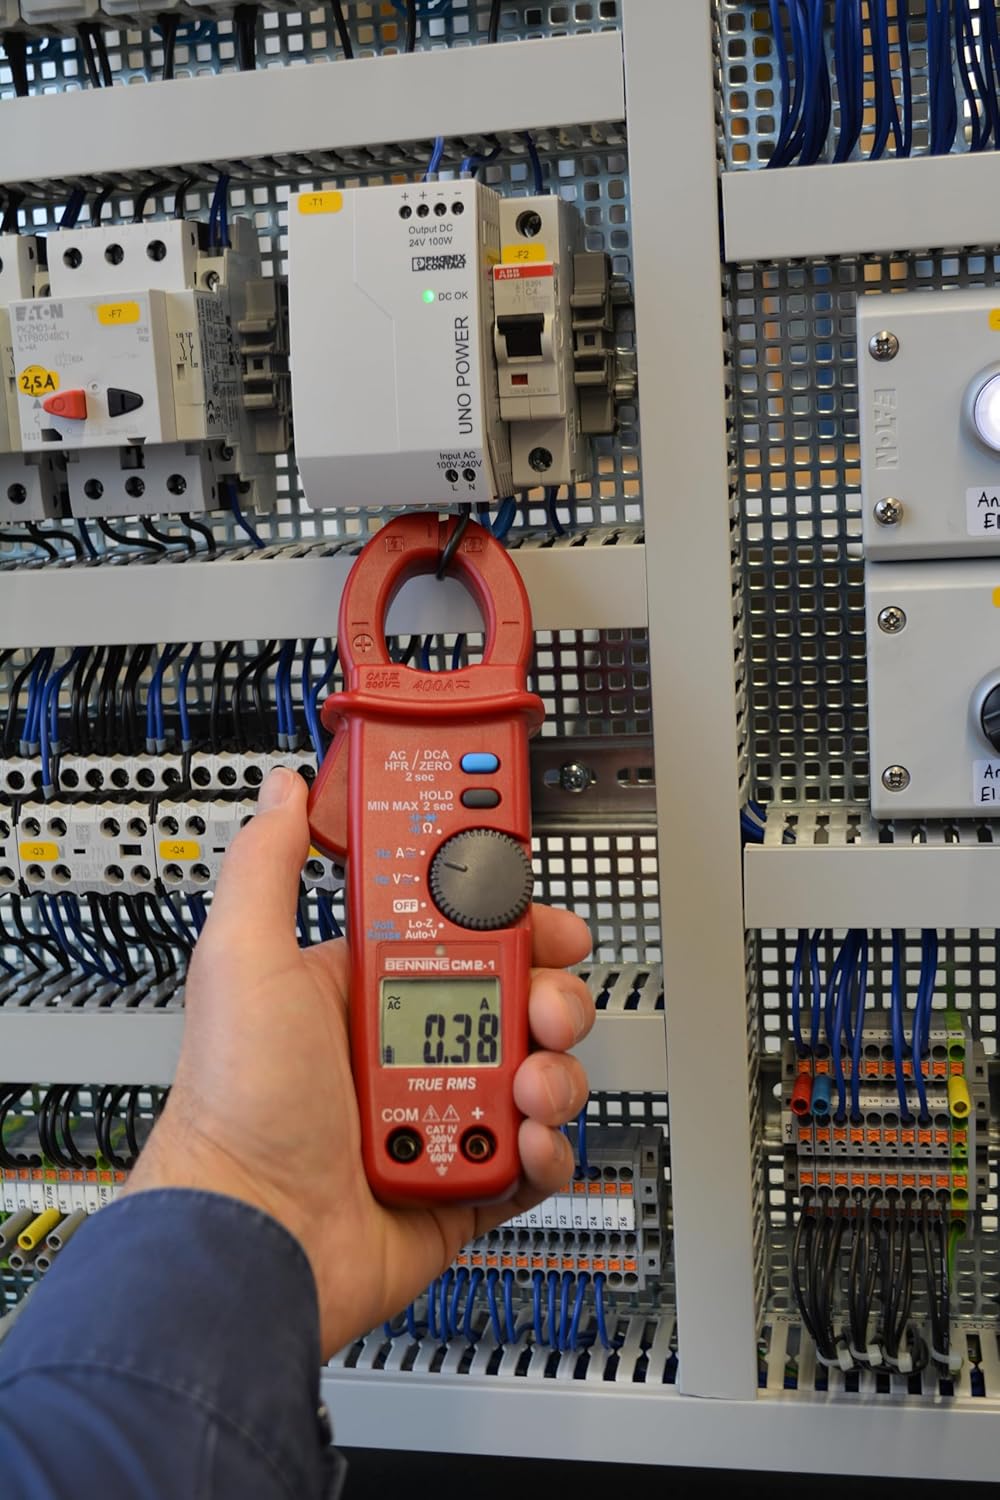
Image 6.1: The multimeter measuring current by clamping around a single conductor in an electrical panel.
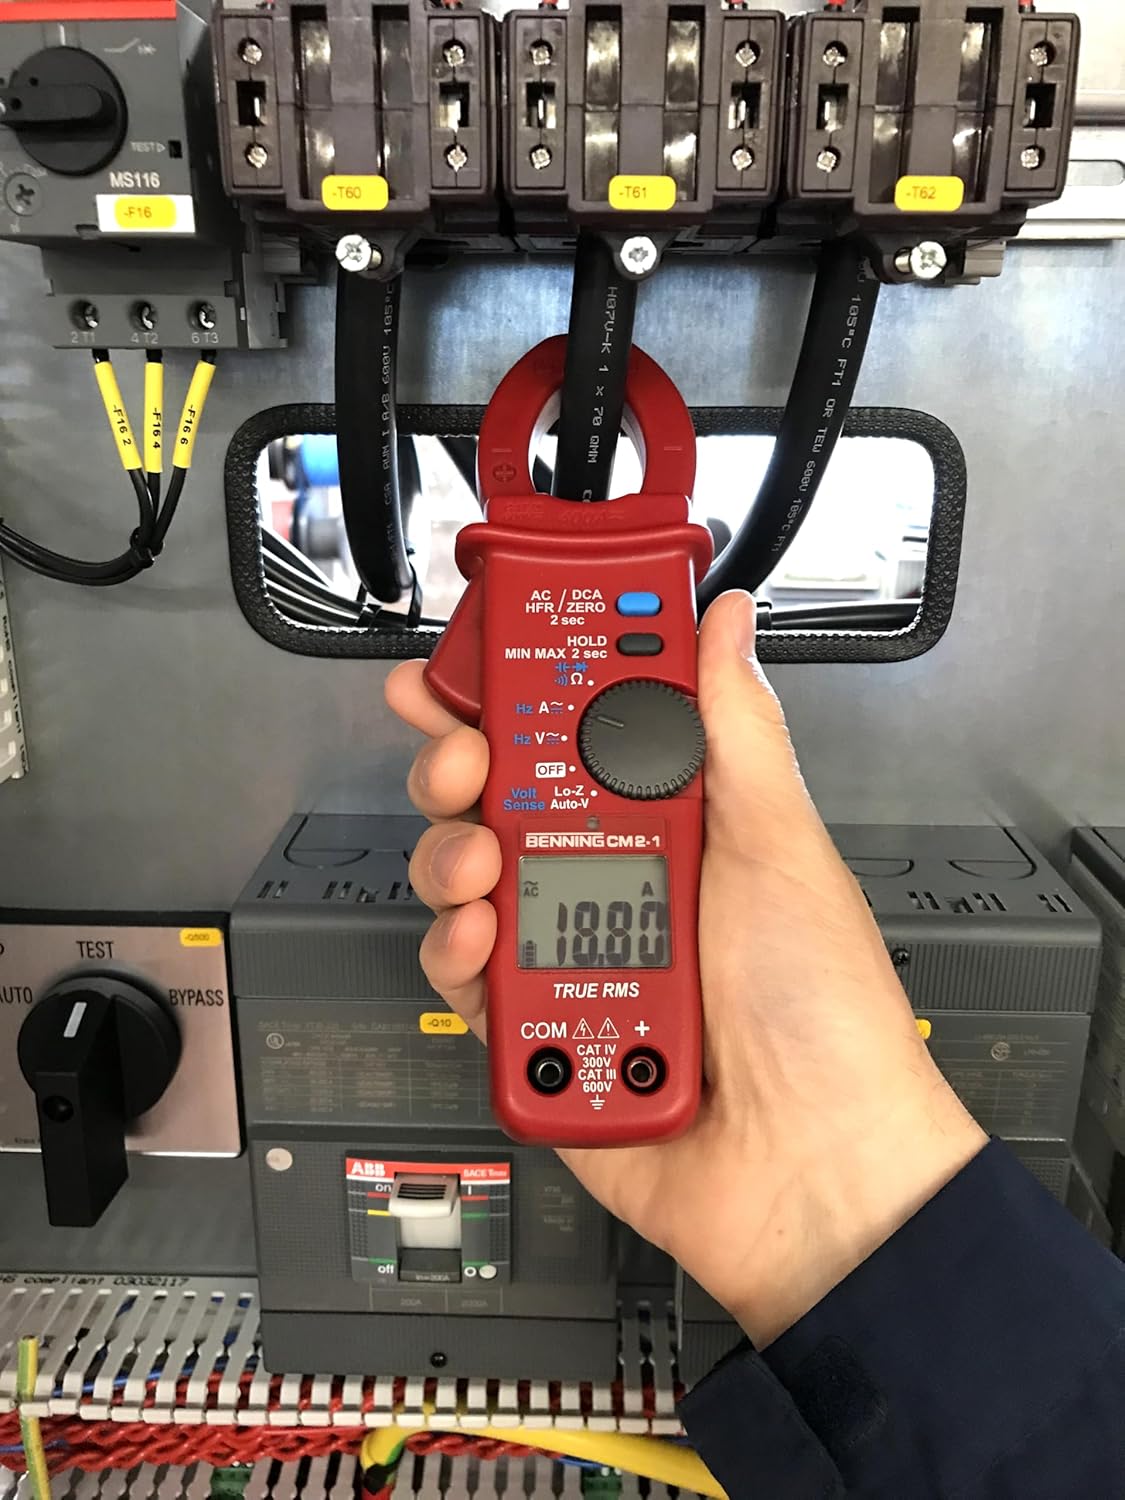
Image 6.2: A close-up of the BENNING CM 2-1 displaying a current measurement of 10.07 A.
6.2. Vol AC/DCtage Mesure
Pour mesurer le vol AC ou DCtage:
- Insert the red test lead into the VΩ jack and the black test lead into the COM jack.
- Turn the rotary switch to the “V~” for AC voltage or “V-” for DC voltage.
- Connectez les sondes de test aux bornes du circuit ou du composant à mesurer.
- Lire le voltage valeur sur l'affichage.

Image 6.3: The multimeter measuring voltage using test leads connected to terminals within an electrical cabinet.

Image 6.4: A close-up of the BENNING CM 2-1 displaying a voltage measurement of 124.00 V.
6.3. AutoV Function (LoZ)
The AutoV function with low input impedance (LoZ) helps to suppress 'ghost voltages' or 'reactive voltages' that can appear on unused wires or open circuits due to capacitive coupling. To use:
- Insert the red test lead into the VΩ jack and the black test lead into the COM jack.
- Turn the rotary switch to the “LoZ” position. The meter will automatically detect AC or DC voltage.
- Connectez les sondes de test aux bornes du circuit.
- Lire le voltage valeur sur l'affichage.
6.4. Low Pass Filter (HFR)
The HFR (High Frequency Rejection) low pass filter is used for stable and accurate measurements on variable frequency drives (VFDs) or other noisy electrical environments. To activate:
- Select the desired AC current (A~) or AC voltage (V~) function.
- Press and hold the AC/DC HFR/ZERO button until “HFR” appears on the display.
- Proceed with your measurement as usual. The filter will suppress high-frequency noise components.
7. Entretien
7.1. Nettoyage
Essuyez le boîtier avec la publicitéamp Nettoyer avec un chiffon et un détergent doux. Ne pas utiliser de produits abrasifs ni de solvants. S'assurer que l'appareil est parfaitement sec avant utilisation.
7.2. Remplacement de la batterie
Lorsque le témoin de batterie faible s'affiche, remplacez rapidement les piles pour garantir un fonctionnement précis et continu. Consultez la section 5.1 pour les instructions d'installation des piles.
8. Dépannage
- Pas d'affichage : Vérifiez l'installation et la charge des batteries. Remplacez-les si nécessaire.
- Lectures incorrectes : Ensure correct function and range are selected. Check test lead connections. Verify the clamp La mâchoire est complètement fermée pour les mesures actuelles.
- “OL” on Display: Indicates an overload (measurement exceeds the selected range). Select a higher range or ensure the input is within the device's specifications.
- Lectures instables : Ensure good contact with test probes. For current measurements, ensure only one conductor is within the clamp jaw. Consider using the HFR function in noisy environments.
9. Spécifications
| Spécification | Valeur |
|---|---|
| Fabricant | BENNING |
| Numéro de modèle | 044689 |
| Poids de l'article | 480 g |
| Dimensions du produit (L x l x H) | 17 x 5 x 13 cm |
| Piles | 2 piles AAA (incluses) |
| Type de cellule de batterie | Alcalin |
| Couleur | Rouge |
| Style | Numérique |
| Type de source d'alimentation | Alimenté par batterie |
| Type de mesure | Multimeter (True RMS) |
| Max. AC/DC Current | 400 A |
| Max. AC/DC Voltage | 600 V |
| Catégorie de mesure | Catégorie IV 300 V, Catégorie III 600 XNUMX V |
| Norme de sécurité | EN 61010-1 |
| Composants inclus | Benning CM 2-1, bag, test leads, batteries |
10. Garantie et assistance
BENNING products are manufactured to high-quality standards. For specific warranty information, please refer to the documentation provided with your purchase or visit the official BENNING website. For technical support, service, or inquiries, please contact your local BENNING distributor or customer service department.