Introduction
This manual provides instructions for the setup, operation, and maintenance of your WE Projection Alarm Clock Radio. Please read this manual thoroughly before use and retain it for future reference.
Consignes de sécurité
- N’exposez pas l’appareil à des températures extrêmes, à la lumière directe du soleil ou à une forte humidité.
- Gardez l’appareil à l’écart de l’eau et d’autres liquides.
- N’essayez pas de démonter ou de réparer l’appareil vous-même. Contactez un technicien qualifié.
- Utilisez uniquement l’adaptateur secteur fourni.
- Nettoyez l'appareil avec un chiffon doux et sec.
Contenu du colis
- WE Projection Alarm Clock Radio
- Adaptateur secteur
- Manuel d'utilisation
Produit terminéview
Familiarize yourself with the main components of your alarm clock radio:
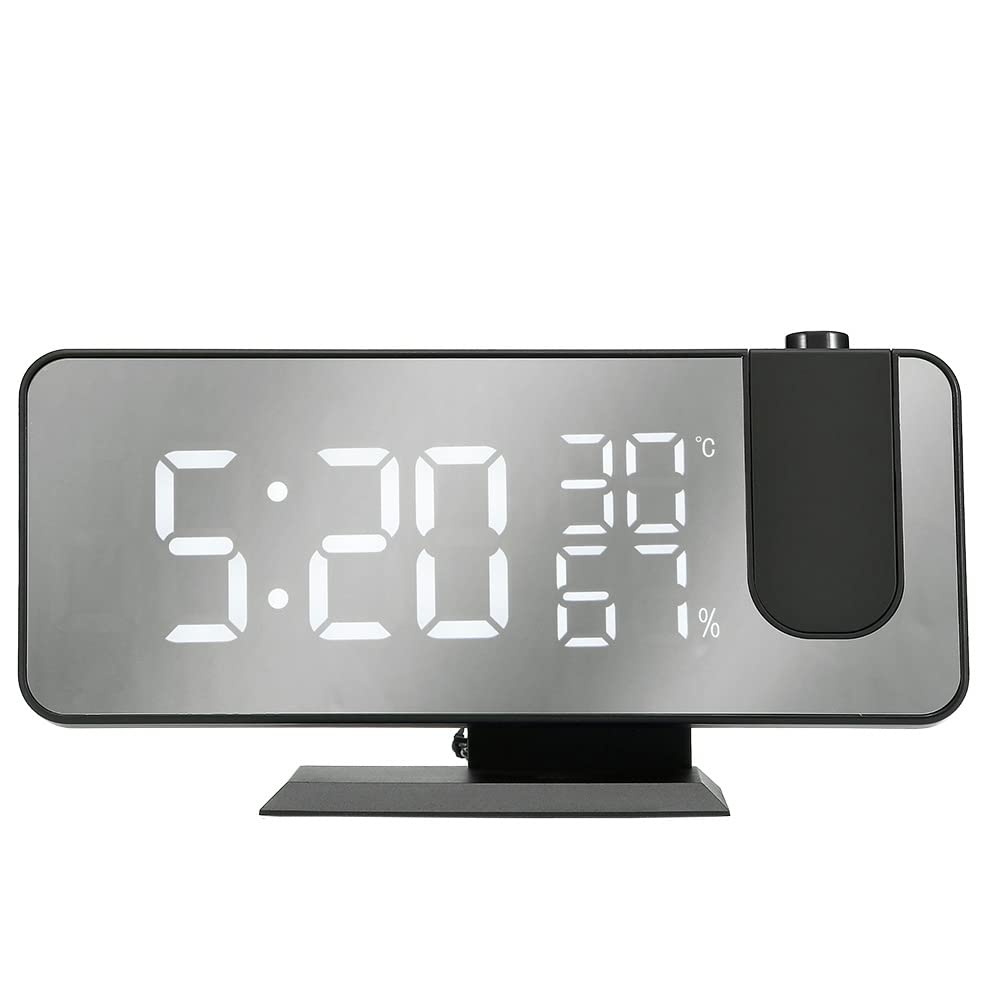
The image shows the WE Projection Alarm Clock Radio from an angled front view. The large mirror-effect LED display shows '22:59' prominently, along with '23°C' and '20%'. Above the clock, a red digital time '22:59' is projected onto a surface, originating from a projector lens on the top right of the clock. A smartphone is connected via a USB cable to the side of the clock, indicating its charging capability.
- Grand écran LED : 5-inch ultra-clear screen for easy readability.
- Projecteur rotatif à 180° : Projects time onto your ceiling or wall.
- Port de charge USB: Pour recharger des appareils externes.
- Boutons de contrôle : Various buttons for setting time, alarms, radio, and other functions (located on top/back, specific labels may vary).
- Antenne FM : Antenne extensible pour une meilleure réception radio.
Installation
- Connexion électrique : Branchez l'adaptateur secteur fourni au port d'entrée CC situé à l'arrière du réveil et branchez-le à une prise murale standard. L'écran s'allumera.
- Antenne FM : For optimal radio reception, fully extend the integrated FM antenna.
Mode d'emploi
1. Réglage de l'heure
- Appuyez sur le 'ENSEMBLE' pour accéder au mode de réglage de l'heure.
- Utilisez le 'EN HAUT' et 'VERS LE BAS' boutons pour régler les heures et les minutes.
- Presse 'ENSEMBLE' again to confirm the time and exit setting mode.
2. Réglage de l'alarme (double alarme)
- Appuyez sur le 'ALARM 1' or 'ALARM 2' bouton permettant de sélectionner l'alarme que vous souhaitez régler.
- Utilisez le 'EN HAUT' et 'VERS LE BAS' boutons pour régler l'heure de l'alarme souhaitée.
- Select from 5 available alarm sounds: Chord music, bird song, waves, beep, or FM radio.
- Adjust the alarm volume to one of the 3 available levels.
- Appuyez sur la touche correspondante. 'ALARME' button again to confirm your settings.
3. Fonction Snooze
- Lorsque l'alarme sonne, appuyez sur la 'SNOOZE' button to temporarily silence the alarm and get an additional 9 minutes of sleep.
4. Fonctionnement de la radio FM
- Appuyez sur le 'RADIO' bouton pour allumer ou éteindre la radio FM.
- Utilisez le 'SCAN' or 'TUNE' buttons to manually find radio stations within the 87.5-108.0 MHz frequency range.
- Appuyez longuement sur le 'SCAN' button to automatically scan and save up to 30 preset FM stations.
5. Sleep Timer (for Radio)
- Pendant que la radio FM est allumée, appuyez sur 'SLEEP' bouton.
- Adjust the sleep timer duration between 5 and 90 minutes. The radio will automatically turn off after the specified time.
6. Fonction de projection
- Appuyez sur le 'PROJECTION' bouton permettant d'activer ou de désactiver la projection de l'heure.
- Rotate the projector lens (-90° to 90°) to adjust the projection angle on your ceiling or wall.
- Appuyez longuement sur le 'PROJECTION' button to rotate the projected display 180° for optimal viewing.
- Adjust the projection brightness using the dedicated button (4 adjustable brightness levels). Optimal projection distance is 0.5-5 meters.
7. Variateur d'intensité lumineuse
- Use the dimmer slider or button to adjust the screen brightness from 0% (off) to 100% (brightest). This allows for a brighter display during the day and a softer display at night.
8. Port de chargement USB
- Connect your smartphone or other USB-powered device to the USB port on the side of the alarm clock for convenient charging.
Entretien
- Nettoyage: Wipe the device with a soft, dry cloth. Do not use abrasive cleaners, solvents, or chemical sprays.
- Stockage: When not in use for extended periods, store the alarm clock in a cool, dry place, away from direct sunlight and moisture.
Dépannage
- Pas d'alimentation :
- Ensure the power adapter is securely connected to both the alarm clock and a functional wall outlet.
- Mauvaise réception radio :
- Déployez complètement l'antenne FM.
- Try repositioning the alarm clock to a different location for better signal reception.
- Effectuez à nouveau une recherche automatique de stations.
- Projection Unclear or Upside Down:
- Adjust the focus of the projector lens.
- Long press the 'PROJECTION' button to rotate the projected display 180°.
- Ensure the projection distance is within the optimal range of 0.5-5 meters.
- L'alarme ne sonne pas :
- Verify that the alarm is enabled and the alarm volume is set to an audible level.
- Vérifiez que l'heure de l'alarme est correctement réglée.
- Chargement USB non fonctionnel :
- Ensure your device is properly connected to the USB port.
- Effectuez un test avec un autre câble USB pour éliminer tout problème lié au câble.
Caractéristiques
| Marque | WE |
| Numéro de modèle | WERADREVPROJECT2 |
| Couleur | Noir |
| Caractéristiques | Large screen, Radio, Snooze |
| Poids de l'article | 450 g |
| Type d'affichage | Numérique |
| Style | Moderne |
| Dossier spécial | Large screen, Radio, Snooze |
| Source d'énergie | Câble électrique |
| Forme | Rectangulaire |
| Utilisation intérieure/extérieure | Intérieur |
| Matériau du cadre | Acrylonitrile butadiène styrène |
| Piles incluses | Non |
Garantie et assistance
WE products are guaranteed for 2 years from the date of purchase. For any inquiries, technical assistance, or warranty claims, please contact our customer service. Our support team aims to respond to all requests within 24 hours, Monday through Friday.