Introduction
This user manual provides detailed instructions for the installation, operation, maintenance, and troubleshooting of your Xprinter XP-K200L 80mm Thermal Receipt Printer. Please read this manual thoroughly before using the printer to ensure proper function and to extend the product's lifespan. Keep this manual for future reference.
Consignes de sécurité
- Utilisez toujours l'adaptateur secteur fourni avec l'imprimante.
- N’exposez pas l’imprimante à l’eau ou à l’humidité.
- Évitez de placer l'imprimante en plein soleil ou à proximité de sources de chaleur.
- Assurez une ventilation adéquate autour de l’imprimante.
- N’essayez pas de démonter ou de réparer l’imprimante vous-même. Contactez un technicien qualifié.
- Tenir hors de portée des enfants.
Contenu du colis
Veuillez vérifier le contenu du colis à la réception. Si des articles sont manquants ou endommagés, veuillez contacter votre fournisseur.
- Xprinter XP-K200L Thermal Receipt Printer
- Adaptateur secteur
- Cordon d'alimentation
- Câble USB
- Thermal Paper Roll (starter roll)
- Câble de tiroir-caisse
- Manuel de l'utilisateur (ce document)
Produit terminéview
Familiarize yourself with the main components of your Xprinter XP-K200L thermal receipt printer.

Figure 1 : Côté view of the Xprinter XP-K200L thermal receipt printer. On the right, the power switch is visible, and on the left, a button to open the paper cover is present.
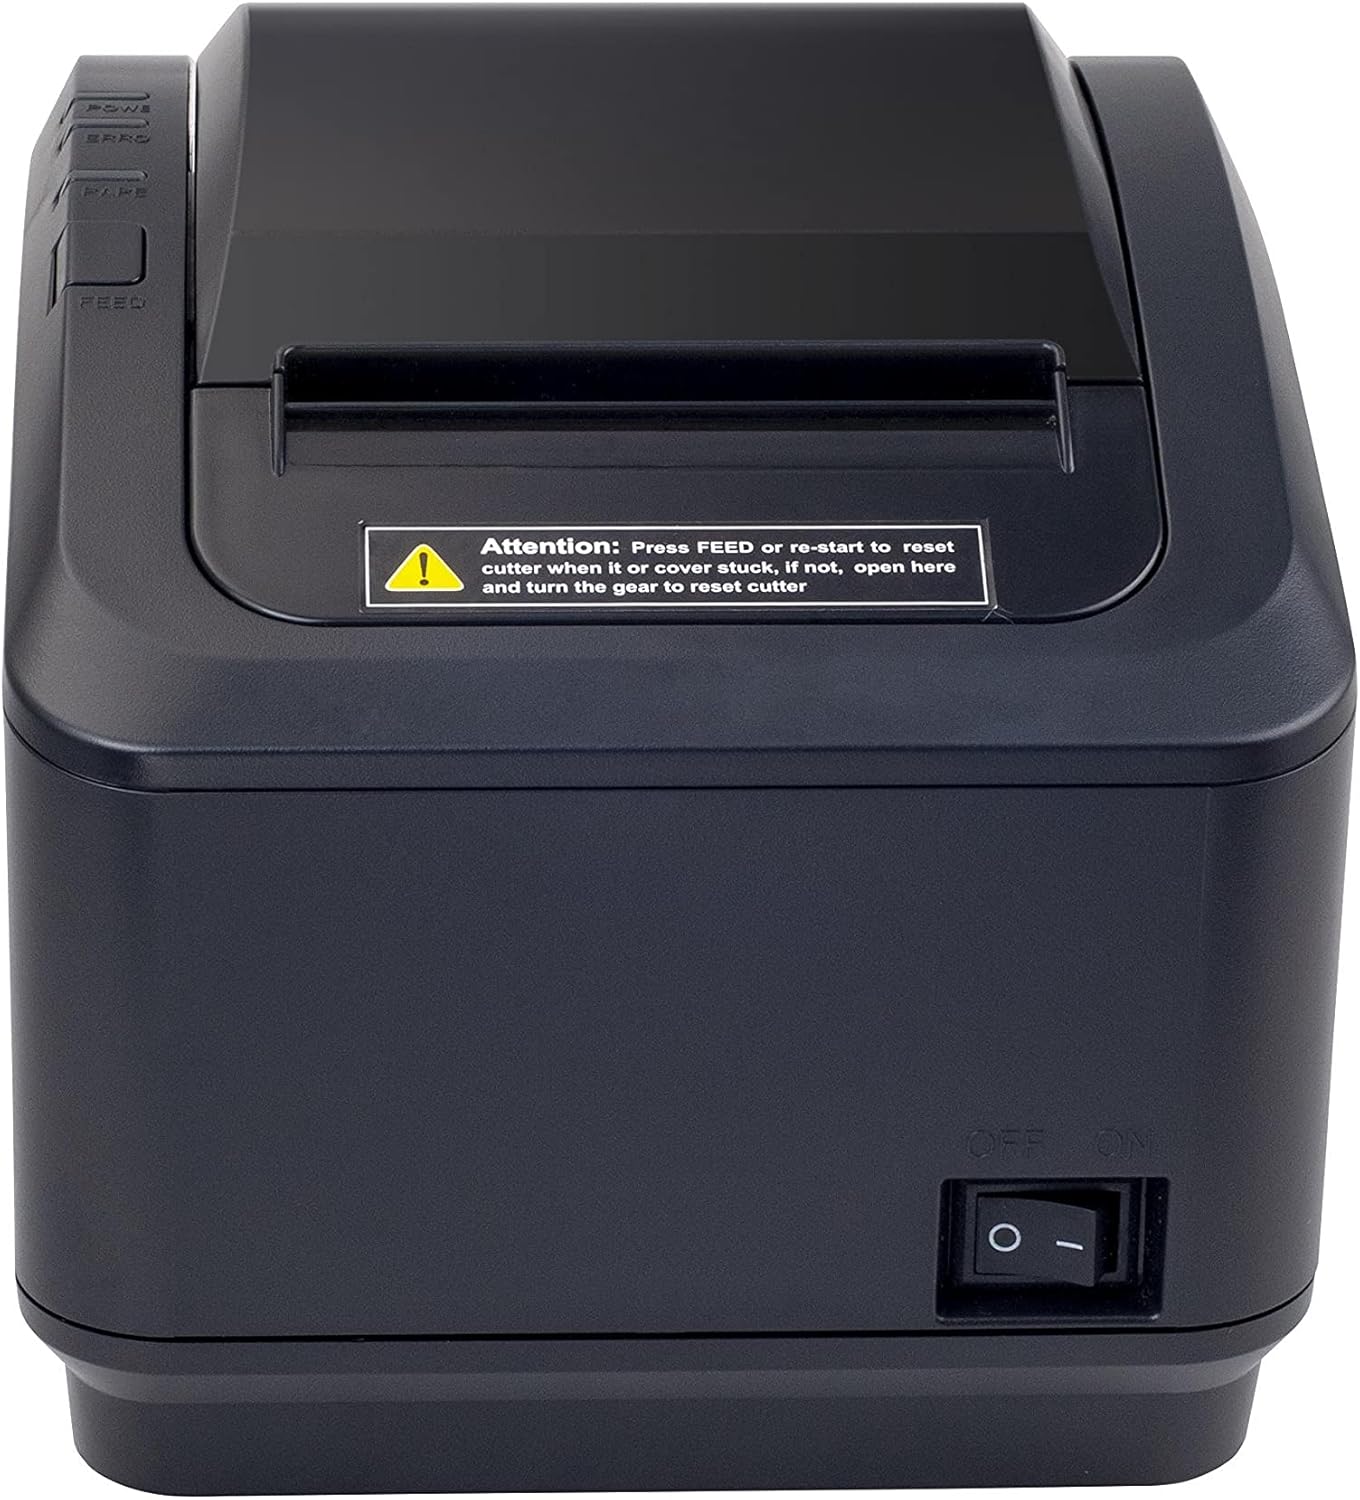
Figure 2 : Un front view of the Xprinter XP-K200L thermal receipt printer. The paper output slot is at the top, and below it are control buttons for functions like feed and error reset. A warning label is also visible.

Figure 3: This image displays the Xprinter XP-K200L thermal receipt printer with its top cover open, showing the internal compartment where the thermal paper roll is loaded. The print head mechanism is also visible.
Installation
1. Connexion de l'alimentation
- Ensure the printer's power switch is in the DÉSACTIVÉ position.
- Branchez l'adaptateur secteur au port d'alimentation de l'imprimante.
- Branchez le cordon d’alimentation sur une prise électrique adaptée.
2. Chargement du papier thermique
- Press the cover open button (refer to Figure 1) to open the top cover of the printer.
- Insert a new 80mm thermal paper roll into the compartment, ensuring the paper feeds from the bottom and the leading edge extends slightly out of the printer.
- Close the top cover firmly until it clicks into place. Ensure there is no slack in the paper roll.
3. Connexion à un ordinateur/réseau
The XP-K200L printer supports both USB and LAN (Ethernet) connectivity.
Connexion USB :
- Connectez une extrémité du câble USB au port USB de l'imprimante.
- Connectez l’autre extrémité du câble USB à un port USB disponible sur votre ordinateur.
- Install the printer drivers. Drivers are typically provided on a CD or can be downloaded from the manufacturer's website. Suivez les instructions à l'écran pour l'installation.
Connexion LAN (Ethernet) :
- Connect one end of an Ethernet cable to the printer's LAN port.
- Connectez l'autre extrémité du câble Ethernet à votre routeur ou commutateur réseau.
- Configure the printer's network settings (e.g., IP address) if necessary. This usually involves printing a self-test page to get the current IP address and then accessing the printer's web interface or using a utility tool provided by the manufacturer.
- Install the printer drivers on your computer, selecting the network connection option during setup.
4. Connecting a Cash Drawer
- Connect the cash drawer cable to the dedicated cash drawer port on the printer.
- Ensure your POS software is configured to send commands to open the cash drawer via the printer.
Mode d'emploi
Mise sous/hors tension
- To power on the printer, flip the power switch (refer to Figure 1) to the ON position.
- To power off the printer, flip the power switch to the DÉSACTIVÉ position.
Impression de base
Once the printer is connected and drivers are installed, you can print receipts from your POS software or any application that supports printing.
- Ensure the printer is powered on and has paper loaded.
- From your application, select the print option.
- Choose the "Xprinter XP-K200L" from the list of available printers.
- Confirm print settings and click "Print".
Self-Test Page
To print a self-test page, which provides information about the printer's settings and status:
- Ensure the printer is powered off and the paper roll is loaded.
- Appuyez et maintenez enfoncé le ALIMENTATION bouton.
- Tout en tenant le ALIMENTATION button, turn the power switch to ON.
- Relâchez le ALIMENTATION button after the printer starts printing.
Entretien
Nettoyage de l'imprimante
- Tête d'impression: Utilisez un coton-tige légèrement dampened with isopropyl alcohol to gently wipe the thermal print head. Allow it to dry completely before use. Clean regularly to ensure print quality.
- Coupeur: If the cutter becomes jammed or dirty, carefully clean it with a soft brush or cloth.
- Extérieur: Essuyez l'extérieur de l'imprimante avec un chiffon doux et sec. N'utilisez pas de nettoyants abrasifs ni de solvants.
Replacing Thermal Paper
When the paper roll is depleted or near its end, replace it following the steps in the "Loading Thermal Paper" section under Setup.
Dépannage
| Problème | Cause possible | Solution |
|---|---|---|
| L'imprimante ne s'allume pas. | Power cord or adapter not connected properly; power outlet issue. | Vérifiez toutes les connexions électriques. Essayez une autre prise de courant. |
| Impression interdite. | No paper; paper loaded incorrectly; printer offline; driver issue; incorrect connection. | Load paper correctly. Check printer status. Reinstall drivers. Verify USB/LAN connection. |
| Mauvaise qualité d'impression. | Dirty print head; low quality thermal paper. | Clean the print head (see Maintenance). Use recommended thermal paper. |
| Paper jam or cutter error. | Paper loaded incorrectly; debris in cutter mechanism. | As per printer label: Presse ALIMENTATION or re-start to reset cutter. If the issue persists, open the top cover and carefully turn the gear to reset the cutter mechanism. Ensure paper is loaded correctly and remove any obstructions. |
| Cash drawer does not open. | Cable not connected; POS software not configured. | Check cash drawer cable connection. Verify POS software settings for cash drawer trigger. |
Caractéristiques
| Fonctionnalité | Détail |
|---|---|
| Marque | Imprimante X |
| Nom du modèle | XP-K200L |
| Technologie d'impression | Thermique |
| Technologie de connectivité | USB, LAN (Ethernet) |
| Caractéristiques spéciales | Prêt pour le réseau |
| Couleur | Noir |
| Sortie de l'imprimante | Monochrome |
| Poids de l'article | 1.5 kg |
| Dimensions du produit (PxLxH) | 19.5 cm x 14 cm x 13.8 cm |
| Compatible OS/Controller Type | Android (and typically Windows/Linux via drivers) |
| Presse écrite | Plain Thermal Paper |
| Imprimer Couleur | Noir |
| Résolution | 576 x 512 dots per inch (or dots per line) |
| Max Print Resolution B/W | 576 ppp |
| Fonctions d'imprimante supplémentaires | Imprimer uniquement |
| Méthode de contrôle | Télécommande |
| Taille maximale du support | 80 mm |
| Format du papier | 79.5 mm |
| Pouvoir | 60 watts |
| Composants inclus | Power adapter, Cash drawer cable |
| Série | XP-K |
| Utilisations spécifiques | Restaurants, bars, cinemas, garages, transportation, hospitals, clinics |
| Nombre total de ports USB | 1 |
Garantie et assistance
For warranty information and technical support, please refer to the documentation provided with your purchase or contact your vendor directly. Keep your proof of purchase for warranty claims.
For driver downloads and further support resources, visit the official Xprinter website.