1. Consignes de sécurité importantes
Please read all instructions carefully before using your Krups OPIO XP320830 Espresso Machine. Keep this manual for future reference.
- Sécurité électrique : Assurer le voltage rating on the appliance matches your local power supply. Do not immerse the appliance, power cord, or plug in water or any other liquid.
- Surfaces chaudes : The espresso machine generates heat and steam during operation. Avoid contact with hot surfaces, especially the steam wand and portafilter. Use handles or knobs.
- Enfants et personnes vulnérables : Cet appareil n'est pas destiné à être utilisé par des personnes dont les capacités physiques, sensorielles ou mentales sont réduites, ou qui manquent d'expérience et de connaissances, à moins qu'elles ne soient sous la surveillance d'une personne responsable de leur sécurité ou qu'elles n'aient reçu des instructions quant à son utilisation. Les enfants doivent être surveillés afin d'éviter qu'ils ne jouent avec l'appareil.
- Placement: Place the appliance on a stable, heat-resistant, and level surface, away from edges and heat sources.
- Entretien: Unplug the appliance from the power outlet before cleaning and when not in use. Allow it to cool completely before cleaning or storing.
- Dommage: Do not operate any appliance with a damaged cord or plug, or after the appliance malfunctions or has been damaged in any manner. Contact customer service for repair.
2. Produit terminéview
Familiarize yourself with the components of your Krups OPIO XP320830 Espresso Machine.
2.1 Composants principaux
- Réservoir d'eau (amovible)
- Control Dial (for espresso and steam functions)
- Lance vapeur avec buse
- Poignée du porte-filtre
- Paniers-filtres (simple et double dose)
- Bac d'égouttage et grille
- Cup Warming Plate (on top)
2.2 Produit Views
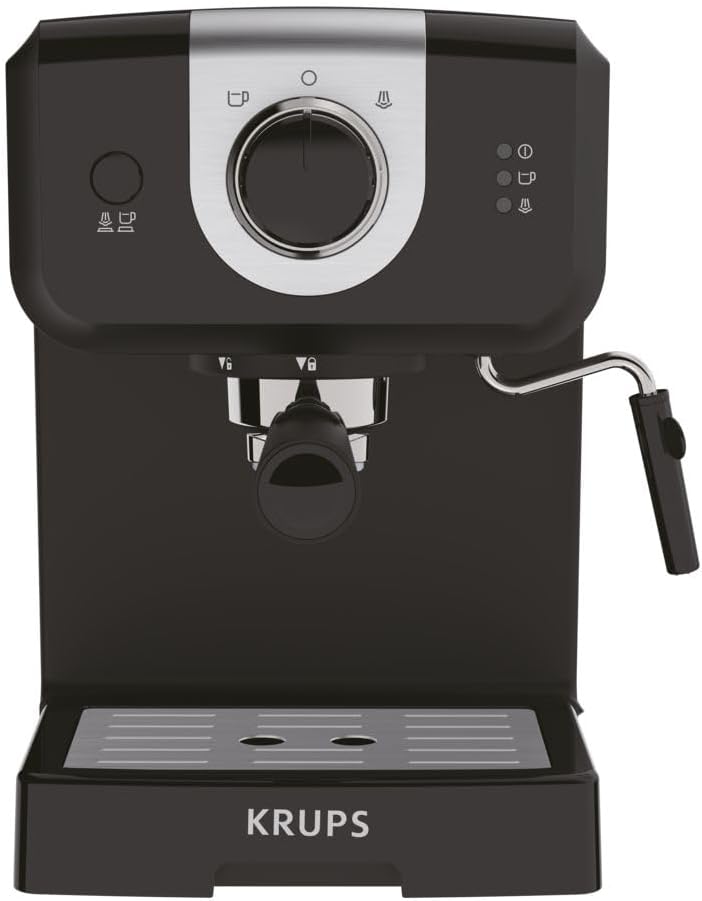
Figure 1 : Devant view of the espresso machine, showing the control dial, portafilter attachment point, steam wand, and drip tray.

Figure 2 : Côté view of the espresso machine, highlighting the transparent, removable water tank on the left side.
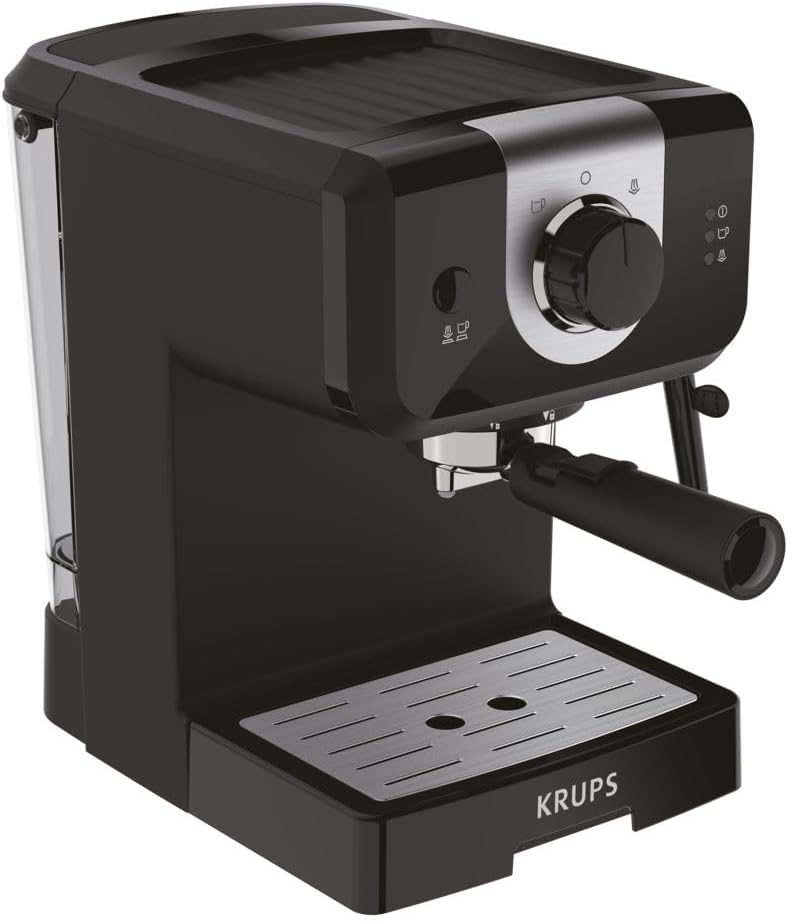
Figure 3 : face avant inclinée view of the espresso machine, providing a comprehensive look at its design and main operational parts.

Figure 4 : Haut view of the espresso machine, showing the cup warming plate and overall compact design.
3. Installation
3.1 Déballage
- Carefully remove all packaging materials and protective films from the appliance.
- Vérifiez que toutes les pièces sont présentes et non endommagées.
- Clean the water tank, portafilter, and filter baskets with warm soapy water, then rinse thoroughly.
3.2 Première utilisation et amorçage
- Fill the water tank with fresh, cold water up to the 'MAX' level. Ensure the tank is properly seated.
- Place a large cup or container under the portafilter spout (without coffee).
- Branchez la machine sur une prise de courant appropriée.
- Turn the control dial to the 'Espresso' position and allow water to flow through until the tank is nearly empty. This primes the pump and cleans the internal system.
- Repeat this process once or twice with fresh water.
- La machine est maintenant prête à l'emploi.
4. Utilisation de la machine à expresso
4.1 Préparer un expresso
- Assurez-vous que le réservoir d'eau soit rempli d'eau fraîche et froide.
- Sélectionnez le panier-filtre approprié (simple ou double) et placez-le dans le porte-filtre.
- Moudre les grains de café frais jusqu'à obtenir une consistance fine adaptée à l'espresso.
- Fill the filter basket with ground coffee. Do not overfill.
- Tamp the coffee evenly and firmly using a tamper (not included). Wipe any excess coffee from the rim of the portafilter.
- Attach the portafilter to the group head by aligning it and twisting firmly to the right until it is secure.
- Placez une ou deux tasses à expresso sur le plateau égouttoir directement sous les becs du porte-filtre.
- Turn the control dial to the 'Espresso' position. The machine will begin to dispense espresso.
- Once the desired amount of espresso is brewed, turn the control dial back to the 'Off' or 'Standby' position to stop the flow.
- Retirez délicatement le porte-filtre et jetez le marc de café usagé.

Figure 5 : The portafilter handle with a filter basket inserted, alongside two additional filter baskets for different serving sizes.

Figure 6 : Two glass cups filled with freshly brewed espresso, positioned on the machine's drip tray.
4.2 Using the Steam Wand (Milk Frothing)
- Remplissez un pichet à mousser en acier inoxydable avec du lait froid (lait de vache ou lait végétal) jusqu'au tiers.
- Turn the control dial to the 'Steam' position. Wait for the steam indicator light to illuminate, indicating the machine has reached steaming temperature.
- Purgez la buse vapeur en ouvrant brièvement la vanne de vapeur pour évacuer toute trace d'eau condensée. Refermez la vanne.
- Immerse the steam wand nozzle just below the surface of the milk. Open the steam valve.
- Angle the pitcher to create a swirling motion in the milk. Move the wand slightly up and down to incorporate air for froth.
- Once the milk has reached the desired temperature and froth, close the steam valve and remove the pitcher.
- Essuyez immédiatement la buse à vapeur avec de l'eau.amp un tissu pour empêcher les résidus de lait de sécher.
5. Entretien
5.1 Nettoyage quotidien
- Porte-filtre et paniers filtrants : Après chaque utilisation, retirez le porte-filtre, jetez le marc de café et rincez le porte-filtre et le panier-filtre à l'eau chaude.
- Bac de récupération: Videz et nettoyez régulièrement le bac de récupération et la grille. Lavez-les à l'eau chaude savonneuse et rincez abondamment.
- Baguette à vapeur : Always wipe the steam wand immediately after frothing milk. Periodically, remove the nozzle and clean any milk residue with a small brush or pin.
- Extérieur: Essuyez l'extérieur de la machine avec un chiffon doux.amp chiffon. N'utilisez pas de nettoyants abrasifs ou de tampons à récurer.
5.2 Détartrage
Regular descaling is essential to maintain the performance and longevity of your espresso machine, especially in areas with hard water. The frequency depends on water hardness and usage.
- Use a descaling solution specifically designed for espresso machines. Follow the instructions provided with the descaling product.
- Fill the water tank with the descaling solution and water mixture as per the descaler's instructions.
- Placez un grand récipient sous le porte-filtre et la buse vapeur.
- Run half of the solution through the espresso function, then run the other half through the steam wand function.
- After descaling, rinse the water tank thoroughly and fill it with fresh water. Run several full tanks of fresh water through both the espresso and steam functions to flush out any remaining descaling solution.
6. Dépannage
Consultez ce tableau pour connaître les problèmes courants et leurs solutions.
| Problème | Cause possible | Solution |
|---|---|---|
| Pas de distributeurs de café | No water in tank; machine not primed; clogged filter; pump issue. | Fill water tank; prime the machine; clean filter; contact support. |
| Le café coule trop lentement | Café moulu trop finement ; trop de café dans le filtre ; la machine a besoin d'être détartrée. | Utilisez une mouture plus grossière ; réduisez la quantité de café ; détartrez la machine. |
| Coffee flows too quickly | Coffee ground too coarse; not enough coffee; tamptrop clair. | Utilisez une mouture plus fine ; augmentez la quantité de café ;amp plus fermement. |
| Pas de vapeur provenant de la baguette | Wand clogged; machine not at steaming temperature; water tank empty. | Clean steam wand nozzle; wait for steam indicator; fill water tank. |
| La machine fuit de l'eau | Water tank not seated correctly; seals damaged; drip tray full. | Reseat water tank; check seals (contact support if damaged); empty drip tray. |
7. Spécifications techniques
| Spécification | Détail |
|---|---|
| Numéro de modèle | XP320830 |
| Marque | KRUPS |
| Dimensions du produit (L x l x H) | 29.7 x 20.1 x 29 cm |
| Poids | 3 kilogramme |
| Capacité | 1.2 litres |
| Type de cafetière | Machine à expresso |
| Matériel | Acier inoxydable |
| Utilisations recommandées du produit | Utilisation à domicile |
| Finition extérieure | Metallic and Matte |
| Mode de fonctionnement | Manual Control (Dial) |
| Pouvoir | 1140 watts |
| Voltage | 220 Volts (CA) |
| Human-Machine Interface Input | Cadran |
| Type de café | Café moulu |
| Type de filtre | Réutilisable |
| Code UPC | 010942225393 |
| Code GTIN | 010942225393 |
8. Garantie et assistance
For information regarding warranty coverage, product registration, or technical support, please refer to the warranty card included with your product or visit the official KRUPS webConsultez le site. Conservez votre preuve d'achat pour toute réclamation au titre de la garantie.
Vous pouvez également visiter le KRUPS Brand Store pour plus d'informations sur les produits et les ressources d'assistance.