
Introduction
This manual provides comprehensive instructions for the Vivitar Podcast and Social Media Microphone MIC918. This high-quality condenser microphone is designed for clear audio capture for various applications, including podcasting, live streaming, gaming, voice-overs, and vocal recording. It features a simple plug-and-play USB connection, integrated volume control, and a stable tripod stand for optimal positioning.
Consignes de sécurité
- N’exposez pas le microphone à l’eau ou à une humidité excessive.
- Évitez les températures extrêmes et l'exposition directe au soleil.
- Ne tentez pas de démonter ou de modifier le microphone. Cela annulera la garantie.
- Gardez le microphone éloigné des champs magnétiques puissants.
- Utilisez uniquement un chiffon doux et sec pour le nettoyage.
Produit terminéview
Contenu du colis
- Vivitar MIC918 Microphone Unit
- Support trépied
- Integrated USB Connection Cable
Microphone Components
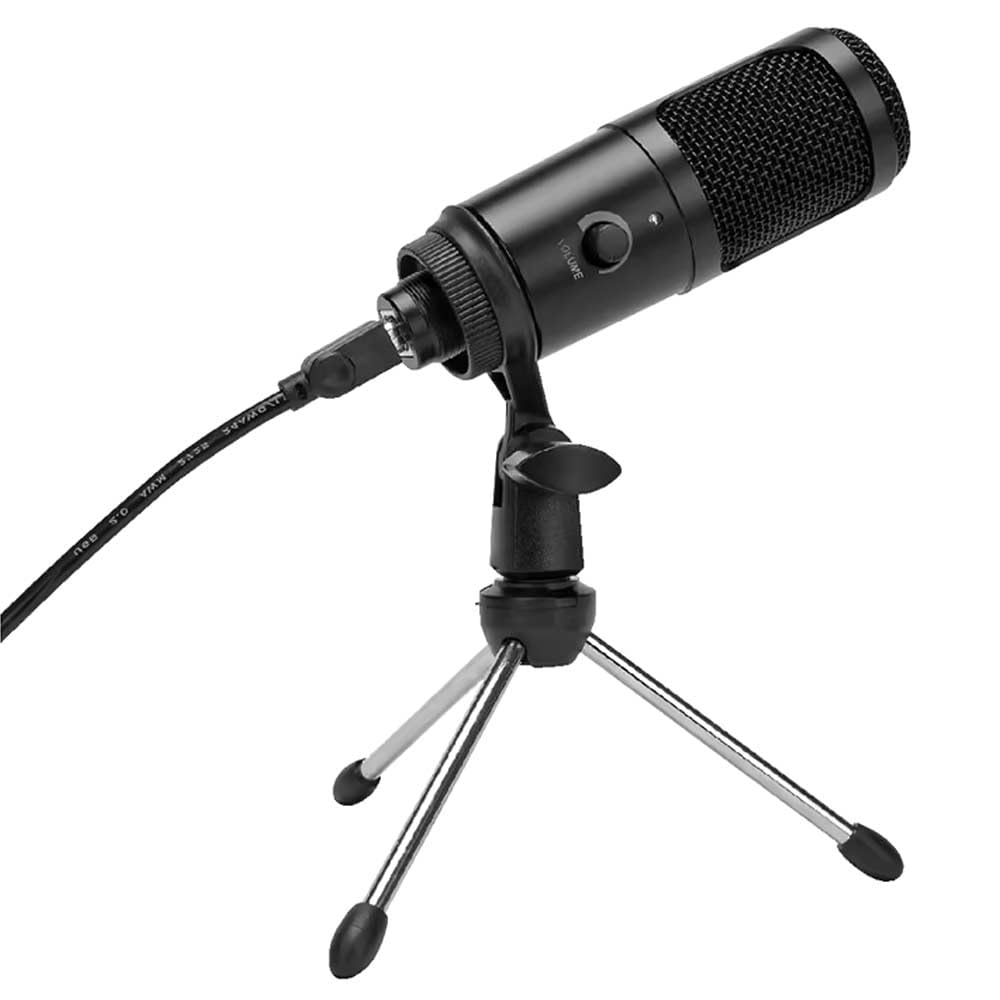
Figure 1 : Vivitar MIC918 Microphone unit attached to its tripod stand, showing the integrated USB cable.

Figure 2 : Côté view of the Vivitar MIC918 Microphone, highlighting the volume control knob and the Vivitar brand logo.
The microphone unit features a durable metal construction. The front side includes a volume control knob for easy audio level adjustments. The microphone is designed with a unidirectional polar pattern to focus on sound directly in front of it, reducing background noise.
Installation
Connexion du microphone
- Assemblez le support : If not already assembled, unfold the tripod stand and ensure it is stable on a flat surface. Securely attach the microphone unit to the stand's mounting point. The rotating shaft ring allows for angle adjustment.
- Connectez-vous à l'appareil : Plug the integrated USB cable from the microphone into an available USB port on your computer, laptop, or compatible gaming console.
- Prêt à l'emploi : The Vivitar MIC918 is a plug-and-play device. Your operating system (Windows, macOS, etc.) should automatically detect and install the necessary drivers. No additional software installation is typically required.
- Sélectionner comme périphérique d'entrée : After connecting, navigate to your device's sound settings or the audio settings within your recording/streaming software. Select the "Vivitar MIC918" or similar USB audio device as your primary input (microphone) device.
Opérationnel
Réglage du volume
The microphone features a built-in volume control knob located on its side (refer to Figure 2). Rotate this knob clockwise to increase the microphone's input sensitivity (volume) and counter-clockwise to decrease it. Adjust this to achieve the desired recording level without distortion.
Positionnement du microphone
For optimal audio capture, position the microphone directly in front of the sound source (e.g., your mouth for speaking or singing). The tilting tripod stand allows you to adjust the microphone's angle to best suit your needs. Due to its unidirectional polar pattern, the microphone is most sensitive to sounds coming from the front and less sensitive to sounds from the sides or rear, helping to minimize ambient noise.
Entretien
- Nettoyage: Use a soft, dry, lint-free cloth to wipe the microphone's exterior. Do not use liquid cleaners, aerosols, or solvents.
- Stockage: Lorsqu'il n'est pas utilisé, rangez le microphone dans un endroit propre et sec, à l'abri de la poussière et des températures extrêmes.
- Manutention: Manipulez le microphone avec précaution. Évitez de le faire tomber ou de le soumettre à des chocs violents.
Dépannage
| Problème | Cause possible | Solution |
|---|---|---|
| Aucun son n'est émis par le microphone. | Microphone mal connecté. Périphérique d'entrée incorrect sélectionné. Volume du microphone trop faible. | Ensure USB cable is securely plugged into both the microphone and the device. Verify that "Vivitar MIC918" is selected as the input device in your system's sound settings or recording software. Increase the volume using the knob on the microphone and check system input levels. |
| Poor sound quality (e.g., muffled, too quiet, background noise). | Incorrect microphone positioning. Niveau sonore ambiant élevé. Input level too high or too low. | Position the microphone closer to the sound source and ensure it's facing directly towards it. Enregistrez dans un environnement plus calme. Adjust the microphone's volume knob and system input levels to an optimal range, avoiding clipping or being too faint. |
| Microphone non reconnu par l'ordinateur. | Faulty USB port or cable. System driver issue. | Essayez de connecter le microphone à un autre port USB de votre ordinateur. Restart your computer. If the issue persists, check your operating system's device manager for any driver conflicts or updates. |
Caractéristiques
| Fonctionnalité | Spécification |
|---|---|
| Marque | Vivitar |
| Numéro de modèle | MIC918 |
| Connectivité | USB (Plug and Play) |
| Type de microphone | Condenseur |
| Diagramme polaire | Unidirectionnel |
| Signal-to-Noise Ratio | 78 dB |
| Matériau de l'enceinte | Métal |
| Poids de l'article | 0.95 livre (environ 0.43 kg) |
| Dimensions de l'article (L x l x H) | 8.86 x 5.36 x 2.49 pouces (environ 22.5 x 13.6 x 6.3 cm) |
| Source d'énergie | Électrique filaire (via USB) |
| Appareils compatibles | Computers, Laptops, Gaming Consoles |
Informations sur la garantie
The Vivitar Podcast and Social Media Microphone MIC918 comes with a 3-Year USA Warranty. For specific terms, conditions, and to register your product, please refer to the official Vivitar webConsultez leur site web ou contactez directement leur service client. Conservez votre preuve d'achat pour toute réclamation au titre de la garantie.
Assistance clientèle
For further assistance, technical support, or inquiries regarding your Vivitar MIC918 microphone, please visit the official Vivitar website or contact their customer service department. Contact information can typically be found on the Vivitar website sous les sections « Assistance » ou « Nous contacter ».