
Comgrow LD-002H
Creality LD-002H Resin 3D Printer User Manual
Guide complet pour l'installation, le fonctionnement et la maintenance
1. Introduction
The Creality LD-002H Resin 3D Printer is an advanced resin printer designed for high-precision 3D printing. Featuring a 6.08-inch 2K monochrome LCD and an upgraded UV integrated light source, it offers fast printing speeds and exceptional detail. This manual provides essential information for setting up, operating, and maintaining your LD-002H printer to ensure optimal performance and longevity.

Figure 1: Creality LD-002H Resin 3D Printer.
Caractéristiques principales :
- Fast Printing and Longer Lifespan: Utilizes a 6-inch 2K HD monochrome LCD for rapid curing (1-4s/layer) and extended screen life.
- Ultra Accuracy Printing: Equipped with a UV integrated light source module and upgraded transmission system for improved precision and detail.
- Système de filtration de l'air : Built-in activated carbon filter absorbs resin fumes for a more pleasant printing experience.
- CHITUBOX Slicing Software: Compatible with CHITUBOX for easy model support addition and size adjustment.
- Interface conviviale : 3.5-inch full-color touch screen for real-time monitoring and easy operation.
2. Guide de configuration
2.1 Déballage et assemblage initial
Carefully remove all components from the packaging. Ensure all accessories listed in the 'What's in the Box' section are present. The printer comes largely pre-assembled, requiring minimal setup.
Video 1: Creality LD-002H Unboxing and Operation. This video demonstrates the unboxing process, component identification, and initial setup steps for the printer.
2.2 Installing the Build Platform and Resin Vat
- Remove the red plastic cover from the printer.
- Carefully remove the resin vat by loosening its screws and lifting it out.
- Install the build platform onto the Z-axis arm and tighten its securing screws.

Figure 2: Manually Leveling System. The image shows the build platform and the adjustment knobs for leveling.
2.3 Leveling the Build Platform
Un nivellement précis est essentiel pour des impressions réussies. Suivez ces étapes :
- Desserrez les vis de la plateforme de construction.
- Placez une feuille de papier A4 sur l'écran LCD.
- On the touch screen, navigate to 'Tools' and select 'Manual Auto-Home' to lower the platform until it presses against the paper.
- Gently pull the paper to feel slight resistance. If needed, adjust the platform height using the on-screen controls (up/down arrows) until the paper can be pulled with slight friction.
- Tighten the build platform screws securely while maintaining the paper's position.
- Retirez le papier.
2.4 Pouring Resin
Before pouring resin, ensure you are wearing appropriate personal protective equipment, including gloves and a mask, and working in a well-ventilated area.
- Bien agiter le flacon de résine avant ouverture.
- Carefully pour the photosensitive resin into the resin vat, ensuring it does not exceed the maximum fill line.
- Replace the red plastic cover on the printer.

Figure 3: Pouring Photosensitive Resin. Always wear gloves and ensure proper ventilation.
3. Mode d'emploi
3.1 Mise sous tension et interface utilisateur
Connect the power supply and press the ON/OFF button. The 3.5-inch full-color touch screen provides an intuitive interface for controlling the printer.
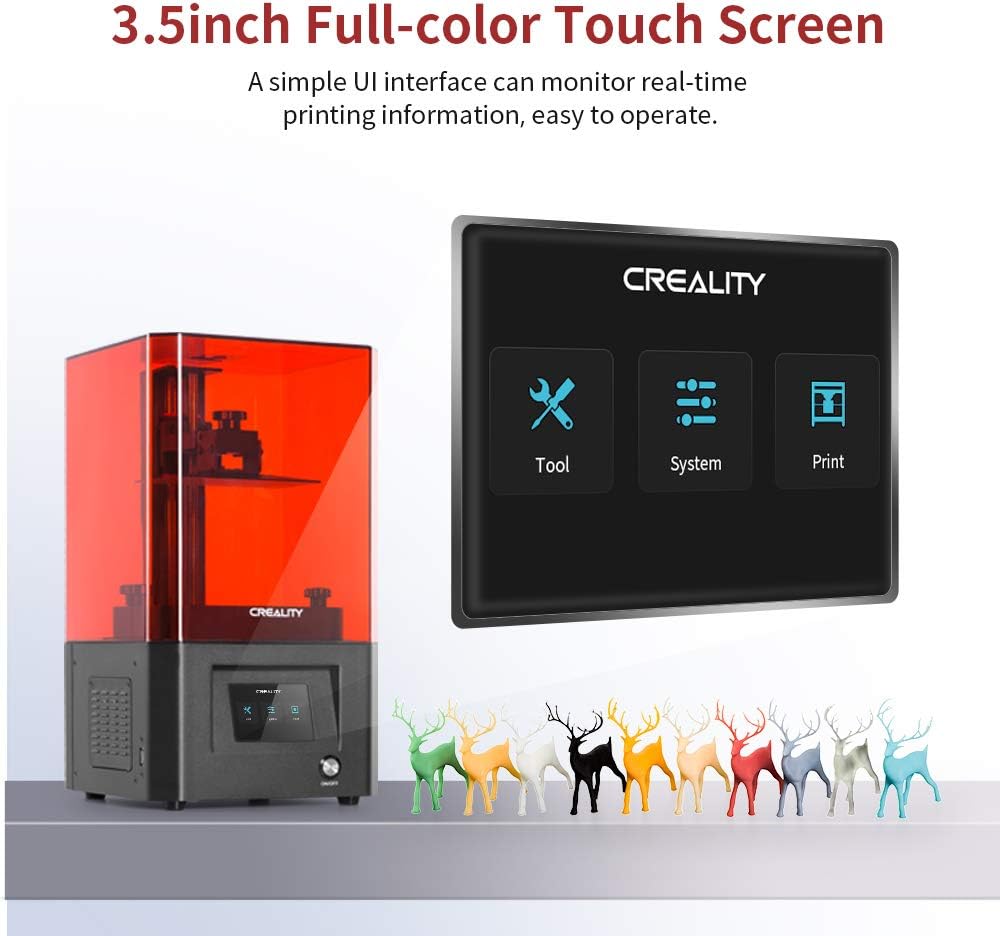
Figure 4: 3.5-inch Full-color Touch Screen. The user interface allows for easy navigation and control.
3.2 Préparation de l'impression Files with CHITUBOX
The LD-002H printer is compatible with CHITUBOX slicing software. Use CHITUBOX to prepare your 3D models, add necessary supports, and slice them into a printable format (.ctb file(s).

Figure 5: Powerful Slicer Software. CHITUBOX allows for model preparation and support generation.
3.3 Démarrage d'une impression
- Save your sliced .ctb file onto the provided USB disk.
- Insert the USB disk into the printer's USB port.
- On the touch screen, select 'Print'.
- Browse and select your desired print file à partir du disque USB.
- Confirm the print parameters (Bottom Layer, Bottom Exposure, Normal Exposure, Exposure Off) and adjust if necessary.
- Press 'Play' to begin the printing process.
Video 2: LD002H 3D Printer in Operation. This video showcases the printer in action, demonstrating the printing process and the quality of the output.
4. Entretien
Regular maintenance ensures the longevity and consistent performance of your Creality LD-002H printer.
4.1 Cleaning the Build Platform and Printed Models
After each print, carefully remove the build platform. Use a scraper to detach the printed model. Clean the build platform and the printed model with isopropyl alcohol (IPA) to remove any uncured resin. Allow them to dry completely before re-use or post-curing.
4.2 Resin Vat and FEP Film Care
Inspect the FEP film at the bottom of the resin vat regularly for damage or cloudiness. If there are cured resin bits, carefully remove them. If the FEP film is significantly damaged or cloudy, it should be replaced to prevent print failures.
Système de filtration d'air 4.3
The printer features a built-in air filtration system with activated carbon to absorb resin fumes. Periodically check and replace the activated carbon filter as needed to maintain effective fume absorption.

Figure 6: Air Filtering System. The integrated fan and activated carbon filter help manage resin odors.
5. Dépannage
This section addresses common issues you might encounter with your LD-002H printer.
5.1 Grinding Noise During Printing
If the printer produces a grinding noise during operation, especially when the build platform is lowering, it may indicate that the Z-axis is attempting to move beyond its physical limit or is encountering resistance. This can happen if the build platform is not correctly leveled or if there is an obstruction in the resin vat or on the LCD screen. Ensure the build platform is properly leveled as per Section 2.3 and that there are no foreign objects in the resin vat or on the LCD screen. If the issue persists after re-leveling and checking for obstructions, contact customer support.
5.2 Print Failures (e.g., models not sticking, partial prints)
- Model not sticking to platform: Re-level the build platform (Section 2.3). Increase bottom exposure time in slicing software. Ensure the build platform is clean and free of grease.
- Impressions partielles ou couches manquantes : Check the FEP film for damage or cloudiness. Ensure the resin is well-mixed and at an appropriate temperature. Verify that the sliced file n'est pas corrompu.
- Resin cured on LCD screen: Immediately clean the LCD screen. This often indicates a damaged FEP film or incorrect print settings.
6. Spécifications
| Fonctionnalité | Spécification |
|---|---|
| Numéro de modèle | LD-002H |
| Dimensions du produit | 17.32 x 17.32 x 18.31 pouces (44 x 44 x 46.5 cm) |
| Poids de l'article | 15.43 livres (7 kg) |
| Matériel | Aluminium |
| Écran LCD | 6.08 Inch 2K Monochrome LCD (2560x1620 resolution) |
| Délai d'exposition | 1-4 seconds per layer |
| Volume de construction | 5.12 x 3.23 x 6.3 pouces (130 x 82 x 160 mm) |
| Consommation d'énergie en mode marche | 350 watts |

Figure 7 : Dimensions du produit.

Figure 8: Build Volume.
7. Garantie et assistance
Comgrow, as the first agency and largest strategic partner of Creality 3D, is dedicated to providing high-quality and economical 3D printers. Our products are exported to over 200 countries and regions. We are committed to improving product quality and ensuring customer satisfaction.
Contenu de la boîte :
- Creality LD-002H 3D Printer
- Manuel d'utilisation
- Film de démoulage pour imprimante 3D
- Masque
- Gants en plastique
- Entonnoir en papier
- Carte de garantie
- Tools (scrapers, Allen wrench)
- U disk (USB drive)
- Cordon d'alimentation
Support technique :
For any further questions or technical assistance, please feel free to contact us via Amazon message. Our team of over 20 professional technical staff is ready to assist you.

Figure 9 : Informations de support technique.
Vous pouvez également visiter le Magasin Comgrow Pour plus d'informations et de ressources sur les produits.
Documents connexes - LD-002H
 |
Manuel d'utilisation du COMGROW T-500 : Guide d'installation, d'utilisation et de maintenance Un manuel d'utilisation complet pour l'imprimante 3D COMGROW T-500, détaillant les instructions de montage, les paramètres techniques, la navigation dans l'interface tactile, les procédures d'impression et des conseils de dépannage. |
 |
COMGO Z1 Laser Engraver: LightBurn Beginner's Guide - User Manual V1.1 Comprehensive beginner's guide for the COMGO Z1 Laser Engraver, covering installation of LightBurn software, device setup, operation, engraving parameters, and troubleshooting. Learn to use your COMGO Z1 laser engraver effectively. |
 |
Guide du débutant pour le laser COMGO Z1 - Manuel d'utilisation V1.1 Un guide complet pour débutants et un manuel d'utilisation pour la graveuse laser COMGO Z1, détaillant ses paramètres, l'installation du logiciel (LaserGRBL), la connexion, le fonctionnement, les paramètres de gravure et les étapes de dépannage. |
 |
Manuel d'utilisation et guide du graveur laser COMGO Z1 Manuel d'utilisation complet pour la graveuse laser COMGO Z1, couvrant l'assemblage, l'installation du logiciel (LaserGRBL, LightBurn), l'utilisation de l'application, le dépannage et les spécifications techniques. |
 |
Manuel d'utilisation de la graveuse laser COMGO Z1 V1.1 - Guide d'assemblage, de logiciel et d'utilisation Ce manuel d'utilisation fournit des instructions complètes pour le graveur laser COMGO Z1, notamment l'assemblage, l'installation du logiciel (LaserGRBL, LightBurn), l'utilisation de l'application, les mises à jour du firmware, les paramètres de gravure et les étapes de dépannage. |
 |
Routeur CNC et graveur laser Comgrow 3018 : Instructions d’utilisation et de mode Guide complet d'utilisation de la fraiseuse CNC et graveuse laser Comgrow 3018, couvrant le déverrouillage du commutateur de fin de course, l'utilisation de l'arrêt d'urgence, le câblage du cordon d'alimentation et les configurations de mode de la carte mère pour l'outil et la gravure laser. |
Ask a question about this manual
Ask about setup, troubleshooting, compatibility, parts, safety, or missing instructions. Manuals+ will review the question and use this page’s manual context to help answer it.