
1. Introduction
Merci pour votre achatasing the Gravity Audio G12BD1 12-inch 1000W Powered Subwoofer Enclosure. This manual provides essential information for the proper installation, operation, and maintenance of your new subwoofer. To ensure optimal performance and safety, please read this manual thoroughly before attempting to install or use the product. Keep this manual for future reference.
2. Consignes de sécurité
Respectez les consignes de sécurité suivantes afin d'éviter les blessures ou les dommages au produit et au véhicule :
- Sécurité électrique : Always disconnect the vehicle's negative battery terminal before beginning any electrical work. Ensure all wiring is correctly routed and secured to prevent pinching or damage. Use appropriate gauge wiring for power and ground connections.
- Environnement d'installation : Install the subwoofer in a dry, well-ventilated area, away from direct sunlight, heat sources, and moisture. Ensure the enclosure is securely mounted to prevent movement during vehicle operation.
- Protection auditive : Prolonged exposure to high sound pressure levels can cause permanent hearing damage. Operate the subwoofer at comfortable listening levels.
- Installation professionnelle : If you are unsure about any aspect of the installation, it is recommended to seek assistance from a qualified professional car audio installer.
3. Contenu du colis
Vérifiez que tous les éléments sont présents dans le colis :
- 1 x Gravity Audio G12BD1 Powered Subwoofer Enclosure
4. Configuration et installation
Proper installation is crucial for the performance and longevity of your subwoofer. The G12BD1 is designed for universal fit in vehicles, typically in the trunk or a large cargo area.
4.1. Considérations relatives au placement
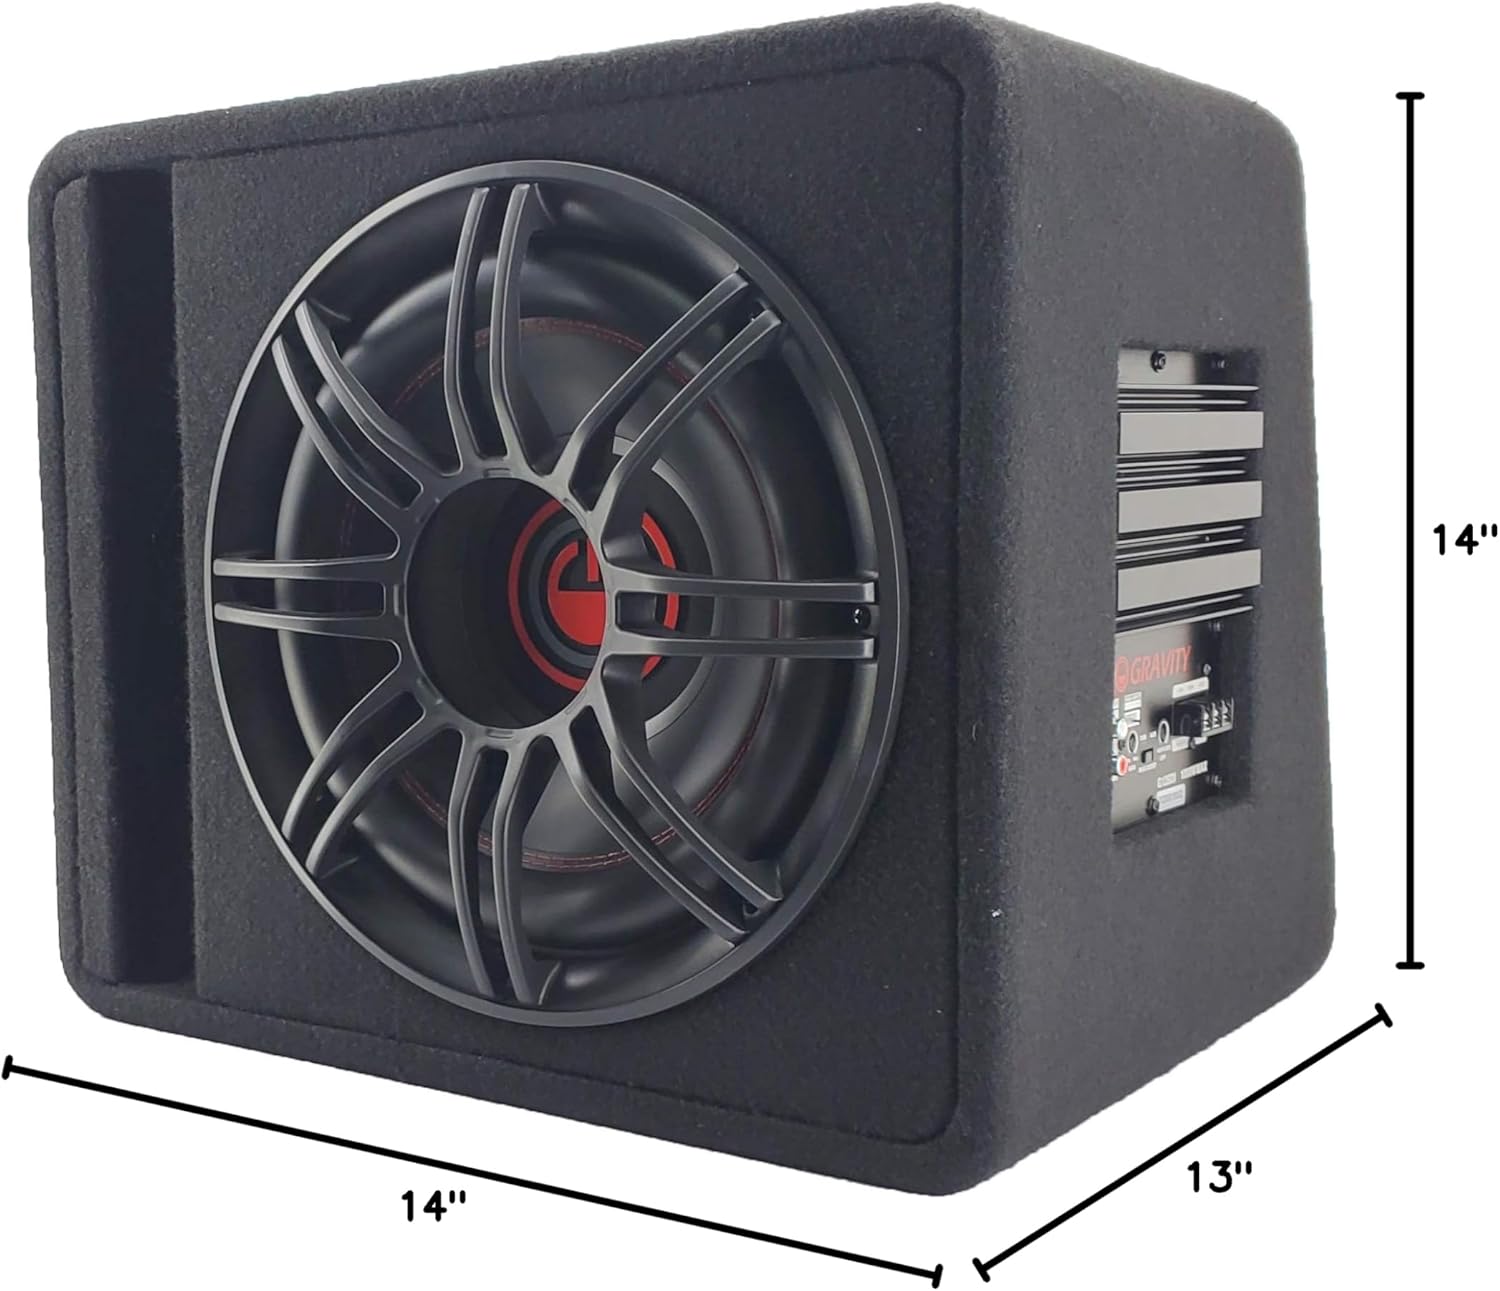
Consider the available space in your vehicle. The dimensions of the enclosure are approximately 13"D x 14"W x 14"H. Ensure there is adequate clearance for air circulation around the ampsection lifier.
4.2. Connexions de câblage
The G12BD1 features an integrated amplifier, simplifying the wiring process. You will need to connect power, ground, a remote turn-on signal, and an audio input signal.

- Connexion d'alimentation (+12V): Connect a heavy-gauge power cable (e.g., 8-gauge or 4-gauge, depending on total system power) directly from the vehicle's positive battery terminal to the +12V terminal on the subwoofer's amplifier. Install an in-line fuse holder (with an appropriately rated fuse) within 18 inches of the battery.
- Connexion à la terre (GND) : Connectez un câble de terre de forte section à la borne GND sur le ampRaccordez le connecteur à une surface métallique propre et non peinte du châssis du véhicule. Assurez-vous d'une connexion solide et à faible résistance.
- Mise en marche à distance (REM) : Connect a remote turn-on wire from your head unit's remote output (typically a blue/white wire) to the REM terminal on the ampamplificateur. Ce signal active le ampL'amplificateur s'allume et s'éteint avec votre autoradio.
- Entrée audio :
- Entrée RCA de faible niveau : If your head unit has RCA pre-outs, connect RCA cables from the head unit's subwoofer or rear pre-outs to the RCA input jacks on the G12BD1 amplifier.
- Entrée haut-parleur de niveau élevé : If your head unit does not have RCA pre-outs, use the high-level speaker inputs. Connect the speaker wires from your head unit's rear speaker outputs to the high-level input terminals on the amplifier.
After all connections are made, double-check them for polarity and security before reconnecting the vehicle's negative battery terminal.

5. Mode d'emploi
Une fois installé, vous pouvez ajuster les paramètres du caisson de basses pour obtenir des performances sonores optimales.
5.1. Control Panel Adjustments
Reportez-vous à la figure 2 pour connaître l'emplacement de ces commandes :
- GAIN: This control matches the output level of your head unit to the input sensitivity of the subwoofer amplifier. Start with the gain set to minimum. Gradually increase it until you hear distortion, then back it off slightly. Do not use the gain control as a volume knob.
- RENFORCEMENT DES BASSES: This control allows you to increase the bass output at a specific frequency. Use sparingly to avoid distortion and potential damage to the subwoofer.
- LPF (filtre passe-bas) : This control sets the upper frequency limit for the subwoofer. Frequencies above this setting will be filtered out. A common starting point is between 80Hz and 120Hz. Adjust to blend smoothly with your main speakers.
5.2. Mise sous tension initiale
After all connections are secure and settings are initially adjusted:
- Mettez le contact de votre véhicule et allumez l'autoradio.
- The power indicator on the subwoofer amplifier should illuminate.
- Play some music with a good bass range.
- Carefully adjust the GAIN, BASS BOOST, and LPF controls to achieve balanced and clear bass output without distortion.
6. Entretien
Un entretien régulier garantit la longévité et les performances de votre caisson de basses.
- Nettoyage: Utilisez un chiffon doux et sec pour essuyer l'enceinte et amplifier. Évitez d'utiliser des produits chimiques agressifs ou des nettoyants abrasifs.
- Inspection: Periodically check all wiring connections for tightness and signs of wear or corrosion. Ensure the enclosure remains securely mounted.
- Ventilation: Assurez-vous que amplifier's heat sink is not obstructed to allow for proper cooling.
7. Dépannage
If you experience issues with your G12BD1 subwoofer, consult the following table before contacting support.
| Problème | Cause possible | Solution |
|---|---|---|
| Aucune puissance / Amplifier ne s'allume pas |
|
|
| Aucun son provenant du caisson de basses |
|
|
| Son déformé |
|
|
| Bruit de bourdonnement ou de bourdonnement |
|
|
8. Spécifications
| Fonctionnalité | Spécification |
|---|---|
| Nom du modèle | Powered Car Subwoofer |
| Type de haut-parleur | Caisson de basses, haut-parleur de graves |
| Diamètre du caisson de basses | 12 pouces |
| Impédance | 4 ohms |
| Puissance de sortie maximale du haut-parleur | 1000 watts |
| Dimensions du produit (P x L x H) | 13"P x 14"L x 14"H |
| Poids de l'article | 37 livres |
| Technologie de connectivité | Câblé |
| Type de garantie | 1 an |
9. Garantie et assistance
The Gravity Audio G12BD1 comes with a 1-year warranty. For warranty claims or technical support, please contact the retailer where the product was purchased or the manufacturer directly. Keep your proof of purchase for warranty validation.