
1. Introduction
Thank you for choosing the Wilfa VS-0812S Vacuum Sealer. This appliance is designed to extend the freshness of your food by removing air and sealing it in specialized bags. Vacuum sealing can preserve food up to five times longer, retaining flavors and vitamins, and preventing freezer burn. This manual provides essential information for the safe and effective use of your new vacuum sealer. Please read it thoroughly before first use and keep it for future reference.
2. Consignes de sécurité
Pour garantir un fonctionnement sûr et éviter d'endommager l'appareil ou de se blesser, veuillez respecter les consignes de sécurité suivantes :
- Branchez toujours l'appareil à une prise de courant mise à la terre.
- Ne plongez pas l'appareil, le cordon d'alimentation ou la prise dans l'eau ou tout autre liquide.
- Gardez l’appareil hors de portée des enfants.
- N’utilisez pas l’appareil si le cordon ou la fiche est endommagé, ou s’il est tombé ou a été endommagé de quelque manière que ce soit.
- Ensure the sealing area is clean and dry before each use to achieve a proper seal.
- Avoid vacuum sealing liquids directly without pre-freezing, as liquids can be drawn into the vacuum pump and damage the appliance.
- Do not overfill vacuum bags; leave sufficient space for sealing.
- Allow the appliance to cool down between multiple sealing cycles to prevent overheating.
- Use only Wilfa-approved vacuum bags and accessories.
3. Produit terminéview
The Wilfa VS-0812S is a compact and powerful vacuum sealer. Familiarize yourself with its components and control panel.
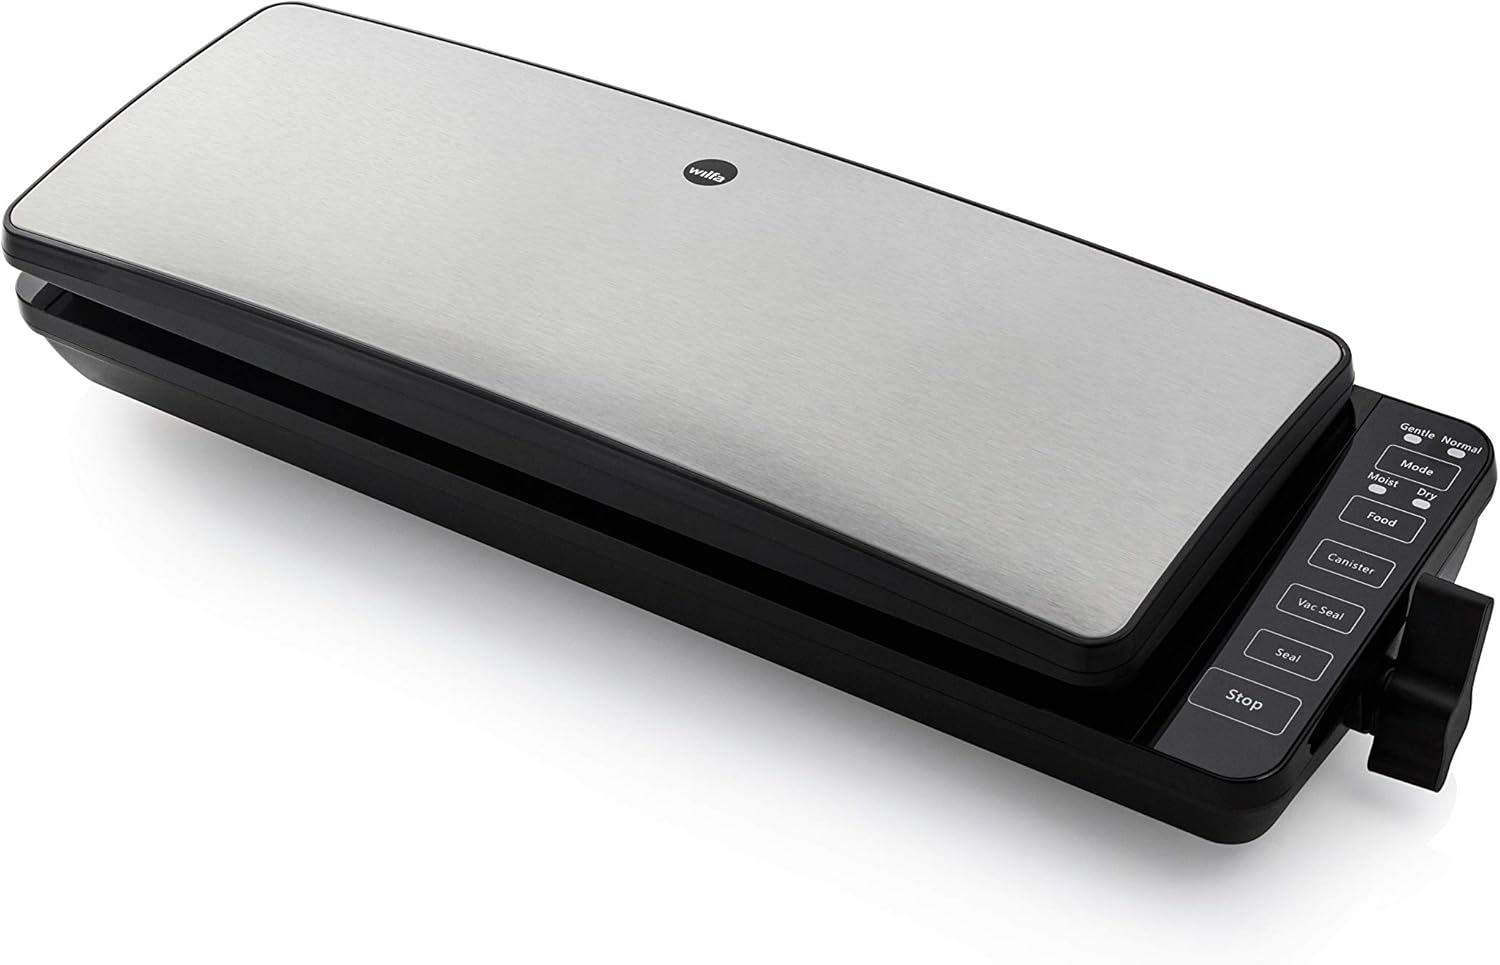
Figure 1 : Haut view of the Wilfa VS-0812S Vacuum Sealer, showcasing its sleek aluminum finish and control panel on the right side.

Figure 2: The vacuum sealer actively sealing a bag containing a piece of salmon, demonstrating its primary function.

Figure 3 : Intérieur view of the vacuum sealer with the lid open, showing the vacuum channel and sealing bar.

Figure 4: Close-up of the control panel, displaying buttons for Mode (Gentle/Normal, Moist/Dry), Food, Canister, Vac Seal, Seal, and Stop functions.
Fonctions du panneau de contrôle :
- Mode: Toggles between Gentle and Normal vacuum pressure, and Moist and Dry food settings.
- Nourriture: Selects the food type (e.g., for specific vacuum levels).
- Boîte: For vacuum sealing external canisters (requires an accessory hose, not included).
- Vac Seal: Initiates the vacuuming process followed by automatic sealing.
- Joint: Seals the bag without vacuuming, useful for creating custom-sized bags from rolls or sealing delicate items.
- Stop: Interrompt toute opération en cours.
4. Installation
- Déballer: Carefully remove the vacuum sealer from its packaging. Retain packaging for storage or transport.
- Inspecter: Vérifiez que l'appareil ne présente aucun signe de dommage. Ne l'utilisez pas s'il est endommagé.
- Faire le ménage: Essuyez l'extérieur de l'appareil avec de l'eau.amp cloth. Ensure the sealing bar and vacuum channel are clean and dry.
- Placement: Place the vacuum sealer on a flat, stable, and dry surface. Ensure adequate ventilation around the unit.
- Connexion électrique : Branchez le cordon d’alimentation sur une prise électrique adaptée.
5. Mode d'emploi
5.1. Préparation du sac
- Use only approved vacuum sealer bags or rolls.
- Cut the bag to the desired length from a roll, ensuring enough space (at least 7-10 cm) at the open end for sealing.
- If using a roll, seal one end of the bag using the "Seal" function to create a bottom seam.
- Place the food item into the bag. Ensure the open end of the bag is clean, dry, and free from food particles or moisture, as this can prevent a proper seal.
- Do not overfill the bag. Leave sufficient space at the top.
5.2. Mise sous vide des aliments
- Ouvrez le couvercle : Soulevez le couvercle de la machine sous vide.
- Positionnez le sac : Place the open end of the bag into the vacuum channel, ensuring it lies flat over the sealing bar. The bag opening should be fully within the vacuum chamber.
- Ferme la couverture: Firmly press down on both sides of the lid until it clicks into place, indicating it is securely locked.
- Sélectionnez Paramètres :
- Presse Mode to select between "Gentle" (for delicate items) or "Normal" vacuum pressure.
- Presse Mode again to select between "Moist" (for foods with some liquid) or "Dry" (for solid, dry foods) sealing settings.
- Presse Nourriture if specific food type settings are available (refer to appliance indicators).
- Démarrer le vide et sceller : Appuyez sur le Joint d'étanchéité sous vide Appuyez sur le bouton. L'appareil retirera automatiquement l'air du sac puis le scellera.
- Moniteur: Observe the vacuum process. If sealing delicate items, you can press Arrêt at any time to halt vacuuming and then press Joint to manually seal the bag.
- Libérer: Once the sealing process is complete, the indicator light will turn off. Press the release buttons (if present, usually on the sides) or lift the lid handle to open the appliance.
- Retirer le sac : Carefully remove the sealed bag. Check the seal for completeness.

Figure 5: A bag filled with roasted vegetables positioned near the vacuum sealer, ready for the sealing process.

Figure 6: Two fish perfectly vacuum-sealed in a bag, surrounded by fresh dill and coarse salt, illustrating effective food preservation.
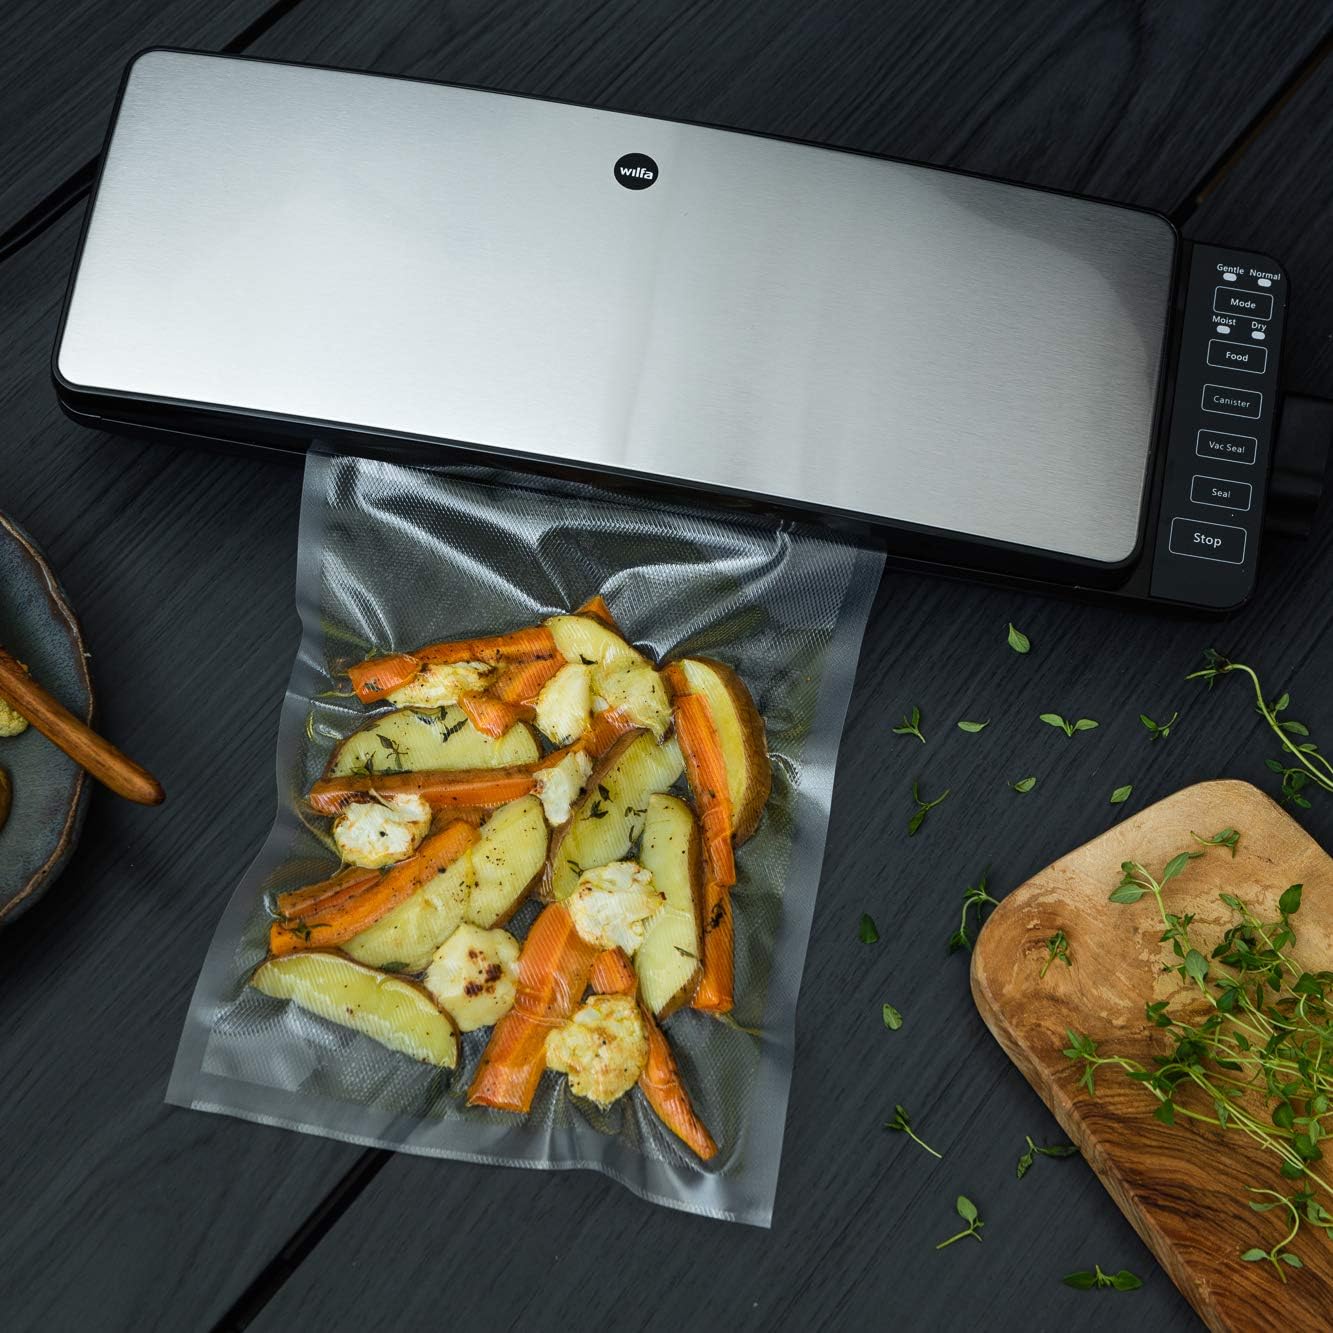
Figure 7: A single fish vacuum-sealed in a bag, with scattered peppercorns and herbs, ready for storage or cooking.
5.3. Scellement uniquement
Use the "Seal" function to create a seal without vacuuming. This is useful for:
- Creating bags from a roll.
- Sealing bags of delicate items that do not require vacuuming.
- Resealing original snack bags or other packaging.
To use: Place the open end of the bag over the sealing bar (not in the vacuum channel). Close the lid firmly. Press the Joint button. The appliance will heat and seal the bag.
5.4. Aspirateur traîneau
The Wilfa VS-0812S can also vacuum seal external canisters (sold separately).
- Connect one end of the accessory hose (not included) to the appliance's canister port and the other end to the canister's port.
- Ensure the canister lid is properly closed and sealed.
- Appuyez sur le Boîte button. The appliance will vacuum air from the canister.
- Once vacuuming is complete, the appliance will stop automatically. Remove the hose.
5.5. Sous-Vide Cooking
This vacuum sealer is suitable for preparing food for sous-vide cooking. Sous-vide involves sealing food in a vacuum bag and cooking it gently in a temperature-controlled water bath. This method helps preserve vitamins, nutrients, and flavors.
- Prepare your food (e.g., meat, fish) and place it in a vacuum bag.
- Vacuum seal the bag following the "Vacuum Sealing Food" instructions (Section 5.2).
- Proceed with your sous-vide cooking process according to your recipe and sous-vide equipment instructions.
6. Entretien et nettoyage
Regular cleaning and maintenance will ensure the longevity and optimal performance of your Wilfa VS-0812S Vacuum Sealer.
- Débrancher: Débranchez toujours l'appareil de la prise de courant avant de le nettoyer.
- Extérieur: Essuyez les surfaces extérieures avec un chiffon doux, damp chiffon. N'utilisez pas de nettoyants abrasifs ou de solvants.
- Barre d'étanchéité : Carefully wipe the sealing bar with a damp cloth to remove any residue. Ensure it is completely dry before storage or next use.
- Canal d'aspiration : Clean the vacuum channel and gaskets with a damp cloth. Ensure no food particles or liquids remain, as this can affect sealing performance.
- Stockage: Store the appliance in a dry place with the lid unlatched to prevent compression of the gaskets, which can lead to poor seals over time.
7. Dépannage
Si vous rencontrez des problèmes avec votre machine sous vide, consultez les problèmes et solutions courants suivants :
| Problème | Cause possible | Solution |
|---|---|---|
| L'appareil ne s'allume pas. | Non branché ; dysfonctionnement de la prise électrique. | Assurez-vous que le cordon d’alimentation est correctement branché dans une prise qui fonctionne. |
| Le sac n'aspire pas correctement. | Lid not properly closed; bag not positioned correctly; vacuum channel or gaskets are dirty/damaged; bag has a leak. | Ensure the lid is firmly latched. Reposition the bag so the opening is fully within the vacuum channel. Clean the vacuum channel and gaskets. Inspect the bag for holes or tears. |
| Le sac ne se ferme pas correctement. | Sealing bar is dirty or wet; bag opening is wet or has food particles; sealing bar is overheated. | Clean and dry the sealing bar and the inside of the bag opening. Allow the appliance to cool down for a few minutes if multiple seals have been made consecutively. |
| Liquid is drawn into the vacuum channel. | Food contains too much liquid. | For moist foods, use the "Moist" setting if available. For very wet foods, pre-freeze them partially or place a paper towel strip at the top of the bag to absorb excess moisture before vacuuming. Clean the vacuum channel immediately. |
| L'étanchéité sous vide se détériore avec le temps. | Bag puncture; improper seal; food with sharp edges. | Inspect the bag for punctures. Ensure the seal is complete and even. For foods with sharp edges (e.g., bones), pad them with a paper towel before sealing. |
8. Spécifications
| Marque | Wilfa |
| Numéro de modèle | VS-0812S |
| Couleur | Argent |
| Matériel | Aluminium |
| Dimensions du produit (L x l x H) | 20.4 x 47.1 x 12.1 cm |
| Poids de l'article | 2.23 kilogrammes |
| Pouvoir | 110 watts |
| Capacité de vide | 12 liters per minute at 0.8 bar |
| Mode de fonctionnement | Automatique |
| Code international d'article (EAN/UPC) | 07044876039873 |
9. Garantie et assistance
The Wilfa VS-0812S Vacuum Sealer comes with a Garantie de 5 ans, reflecting Wilfa's commitment to quality and durability.

Figure 8: The Wilfa 5-year warranty logo, indicating extended product assurance.
For warranty claims, technical support, or inquiries about spare parts, please contact your retailer or visit the official Wilfa webVeuillez conserver votre preuve d'achat pour la validation de la garantie.