1. Introduction
This manual provides instructions for the Norifon CGA-S002 USB Charger. This compact and lightweight charger is designed for convenient charging of compatible camera batteries via a USB power source. Please read this manual thoroughly before use to ensure proper operation and safety.

Image: Norifon CGA-S002 USB Charger. This image shows the compact design of the charger.
2. Compatibilité
The Norifon CGA-S002 USB Charger is compatible with a range of Panasonic camera batteries. To ensure correct usage, verify that your battery model is listed below. The battery model number is typically found on the battery's label, not the camera itself.
Compatible Battery Models:
- BP-DC5 J, BP-DC5 U
- CGA-S002, CGA-S002A, CGA-S002A/1B, CGA-S002E, CGA-S002E/1B
- CGA-S006, CGA-S006A, CGA-S006E, CGA-S006E/1B
- CGR-S002, CGR-S002E
- CGR-S006, CGR-S006A/1B, CGR-S006E, CGR-S006E/1B, CGR-S006GK
- DMW-BM7, DMW-BMA7
Modèles d'appareils photo compatibles :
- Panasonic Lumix DMC-FZ1, DMC-FZ2, DMC-FZ3, DMC-FZ4, DMC-FZ5, DMC-FZ7, DMC-FZ8, DMC-FZ10, DMC-FZ15, DMC-FZ18, DMC-FZ20, DMC-FZ28, DMC-FZ30, DMC-FZ35, DMC-FZ38, DMC-FZ50

Image: Guide on how to identify the battery code on your battery to ensure compatibility with the charger.
Video: This video demonstrates how to select the correct charger for a CGA-S002 battery and provides a visual guide for compatibility.
3. Installation
The Norifon USB Charger is designed for versatile power input, allowing you to charge your batteries from various USB sources.
Connexion du chargeur :
- Ensure the battery and charger contacts are aligned correctly (+ to + and - to -).
- Insert the battery into the charger slot.
- Connect the charger to a USB power source using a compatible USB cable. The charger features a Type-C USB port for input.

Image : Gros plan view of the USB Type-C port on the charger, indicating the connection point.

Image: Illustration showing the charger being powered by a PC, AC charger, car charger, or power bank.
4. Fonctionnement
Once the battery is correctly inserted and the charger is connected to a power source, the charging process will begin automatically. The charger features an LED indicator to display the charging status.
Indicateur d'état de charge :
- Feu rouge : Indique que la batterie est en cours de charge.
- Lumière bleue : Indicates that the battery is fully charged or no battery is inserted (no load).

Image: The charger's LED indicator showing a red light when charging and a blue light when charging is complete or no battery is present.
Video: This video demonstrates the process of inserting a battery into the charger and observing the LED indicator change from red (charging) to blue (fully charged).
5. Entretien
To ensure the longevity and optimal performance of your Norifon USB Charger, follow these simple maintenance guidelines:
- Veillez à ce que le chargeur reste propre et exempt de poussière et de débris. Utilisez un chiffon doux et sec pour le nettoyer.
- Rangez le chargeur dans un endroit sec lorsqu'il n'est pas utilisé.
- Évitez d'exposer le chargeur à des températures extrêmes ou à la lumière directe du soleil.
- Ne plongez pas le chargeur dans l'eau ou tout autre liquide.
6. Dépannage
Si vous rencontrez des problèmes avec votre chargeur, tenez compte des étapes de dépannage courantes suivantes :
- Charger not lighting up: Vérifiez que le câble USB est bien branché au chargeur et à la source d'alimentation. Essayez un autre câble USB ou une autre source d'alimentation.
- Battery not charging (blue light immediately): Verify that the battery is correctly inserted and its contacts are clean. Confirm that the battery model is compatible with the charger.
- Charge lente : Ensure your USB power source provides sufficient current (e.g., a wall adapter rather than a low-power USB port on an older computer).
If problems persist, please refer to the support information provided with your purchase.
7. Spécifications
Technical details for the Norifon CGA-S002 USB Charger:
| Marque | Norifon |
| Modèle | CGA-S002 |
| Vol d'entréetage | 5 V CC |
| Volume de sortietage | DC 4.2V / 8.4V (500mA) |
| Type de connecteur | USB Type-C |
| Nombre de ports | 1 |
| Poids du produit | 20 gramme |
| Conformité | Conforme UL |

Image: The back label of the Norifon USB Charger, displaying input and output specifications.
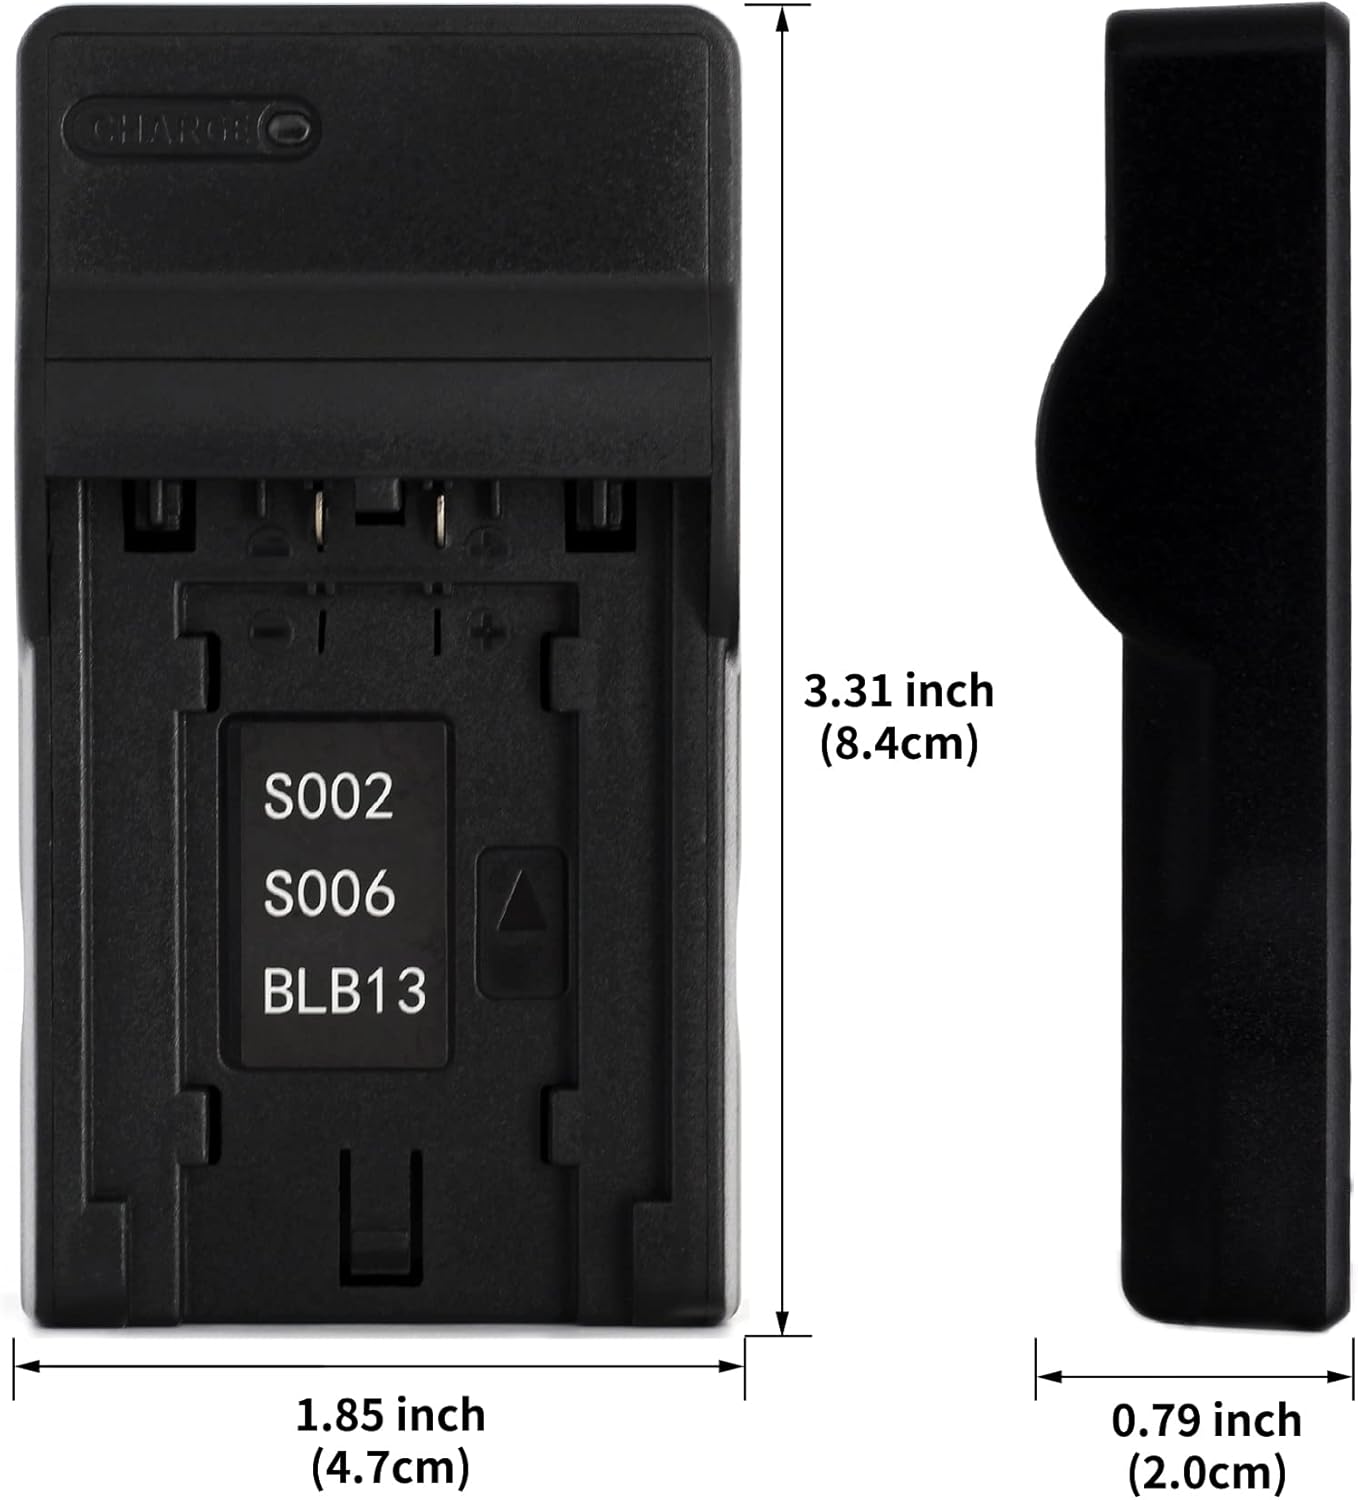
Image: Dimensions of the Norifon USB Charger, showing its compact size (3.31 inches height, 1.85 inches width, 0.79 inches thickness).
8. Consignes de sécurité
Please observe the following safety precautions to prevent damage to the charger, battery, or personal injury:
- N'ouvrez pas et ne modifiez pas le chargeur.
- Do not immerse the charger in water or expose it to rain or moisture.
- Use the charger only in dry locations.
- Use only compatible batteries with this charger.
- Tenir hors de portée des enfants.
- Débranchez le chargeur de la source d'alimentation lorsqu'il n'est pas utilisé.
9. Garantie et assistance
Norifon products are designed for reliability and performance. For warranty information or technical support, please refer to the documentation included with your purchase or contact Norifon customer service through the retailer where the product was purchased.