1. Introduction
This manual provides detailed instructions for the setup, operation, and maintenance of your ELECROW 7 Inch 1024x600 IPS Capacitive Touchscreen Monitor. This display is designed for broad compatibility with devices such as Raspberry Pi (5/4/3B+/3B/2B+), BB Black, Banana Pi, Jetson Nano, and Windows 11/10/8/7 systems.
Caractéristiques principales :
- Visuels HD : 7-inch IPS screen with 1024x600 resolution and 170° wide viewing angle for consistent colors and clear viewing.
- Tactile capacitif : Supports up to 5-point touch functionality without requiring driver installation for most compatible systems.
- Prêt à l'emploi : Simple connectivity via HD (HDMI) and Micro USB ports for immediate use.
- Application polyvalente : Suitable for use as a Raspberry Pi display, mini PC monitor, gaming console screen, or a computer temperature monitor.
2. Contenu de la boîte
Veuillez vérifier que tous les composants sont présents avant de procéder à l'installation.
- 7 Inch Capacitive Display x 1
- Câble HD x 1
- Câble USB x 1
- Micro HD Adapter x 1
- Copper Screws Pack (4pcs) x 1
- DVD x 1 (Contains drivers and documentation)
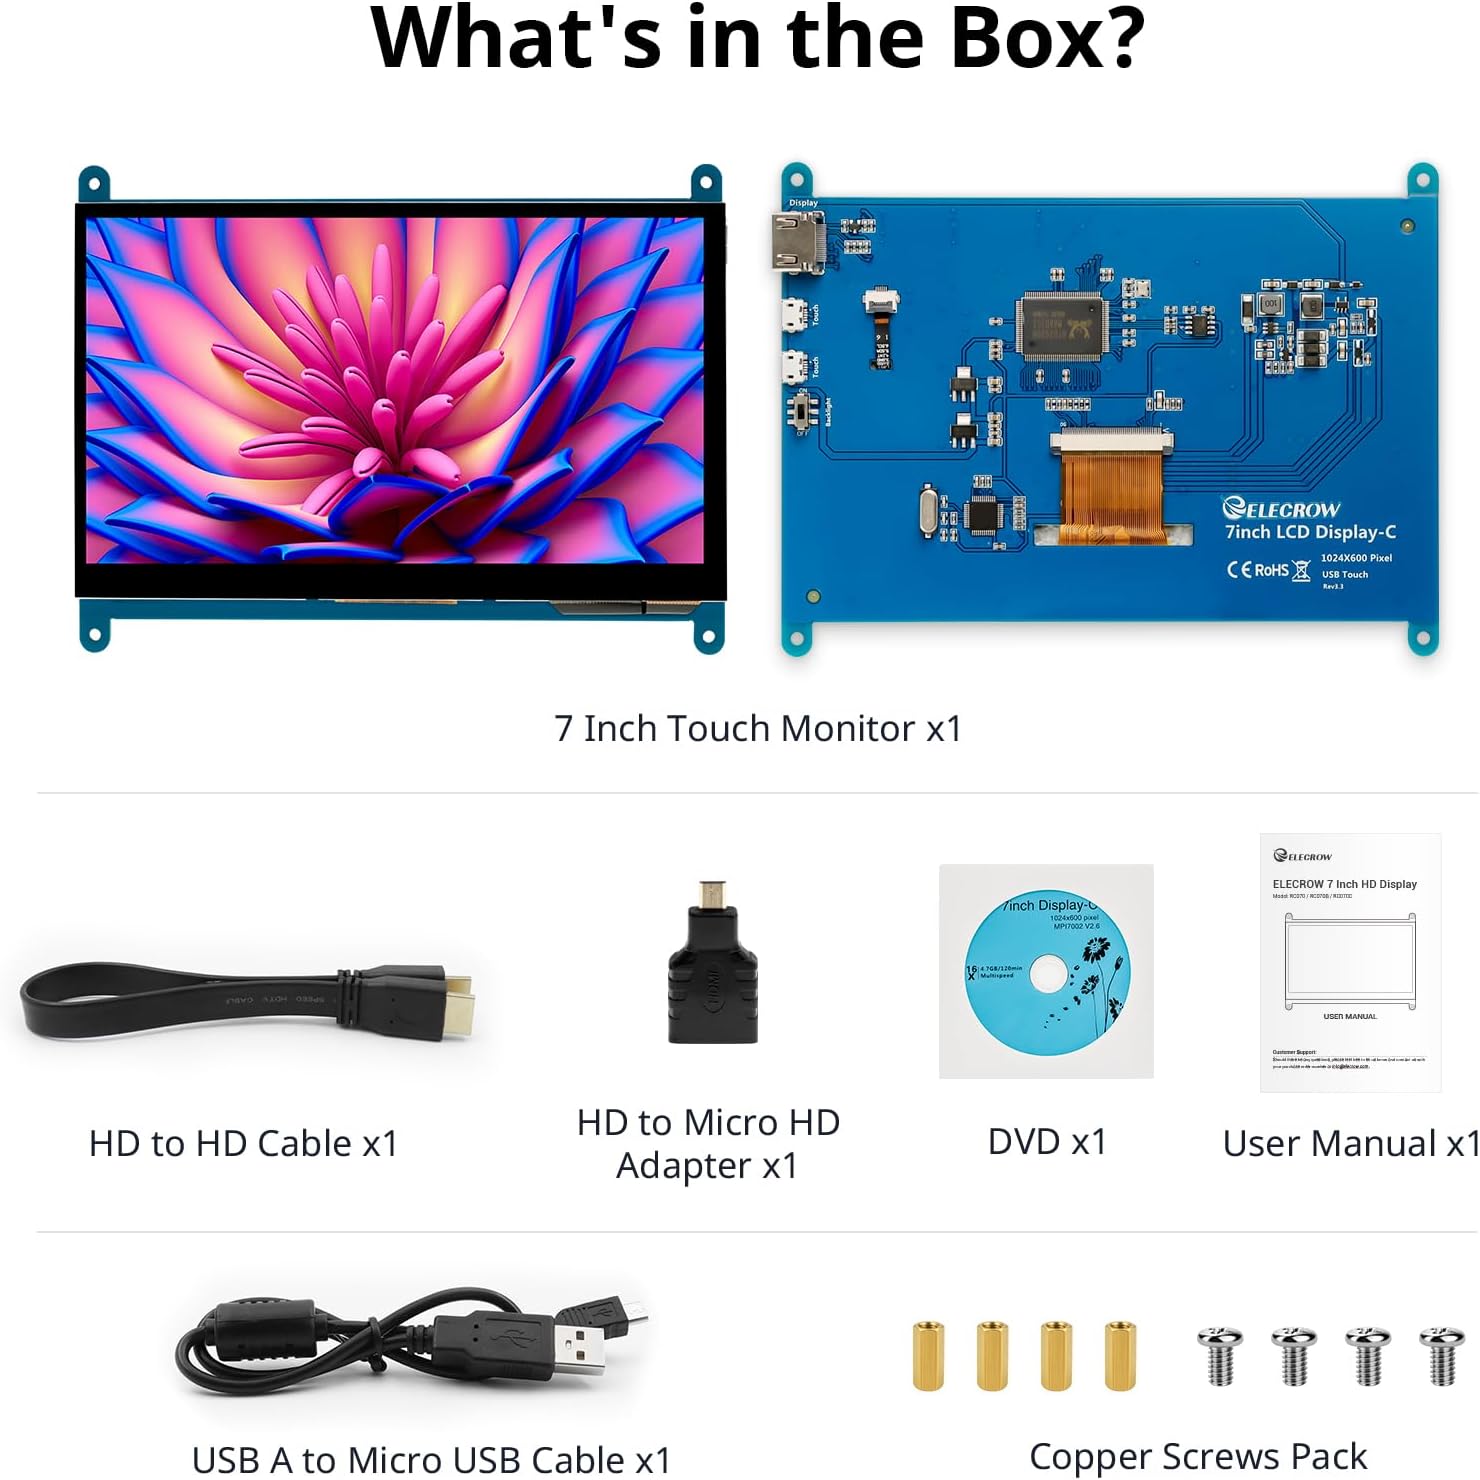
Image : Tous les composants inclus dans l'emballage du produit.
3. Installation et connexions
Follow these steps to connect your ELECROW 7 Inch Touchscreen Monitor to your device.
3.1 Matériel terminéview

Image : Arrière view of the monitor highlighting the Standard HD Port, Micro USB Port for touch and power, and Backlight switch.
- Standard HD Port: For video data transfer.
- Port micro-USB : Pour la fonctionnalité tactile et l'alimentation électrique.
- Commutateur de rétroéclairage : To turn the display backlight on or off.
3.2 Connexion à Raspberry Pi
To connect the monitor to a Raspberry Pi, you will need both the HD cable for video and the USB cable for touch and power.
- Connect one end of the HD cable to the Standard HD Port on the monitor and the other end to the HDMI port on your Raspberry Pi. Use the Micro HD adapter if necessary for your Raspberry Pi model.
- Connect the Micro USB cable to the Micro USB Port on the monitor. Connect the other end of the USB cable to a USB port on your Raspberry Pi for power and touch data.
- Ensure the backlight switch on the monitor is in the 'On' position.
- Power on your Raspberry Pi. The display should automatically detect and show the output.
For touch functionality with Raspberry Pi, power can be supplied via the Raspberry Pi's USB port. If using an external power source for the Raspberry Pi, ensure it is sufficient. For optimal performance, especially with older Raspberry Pi models, an external power supply for the monitor might be beneficial if the Pi cannot provide enough current.
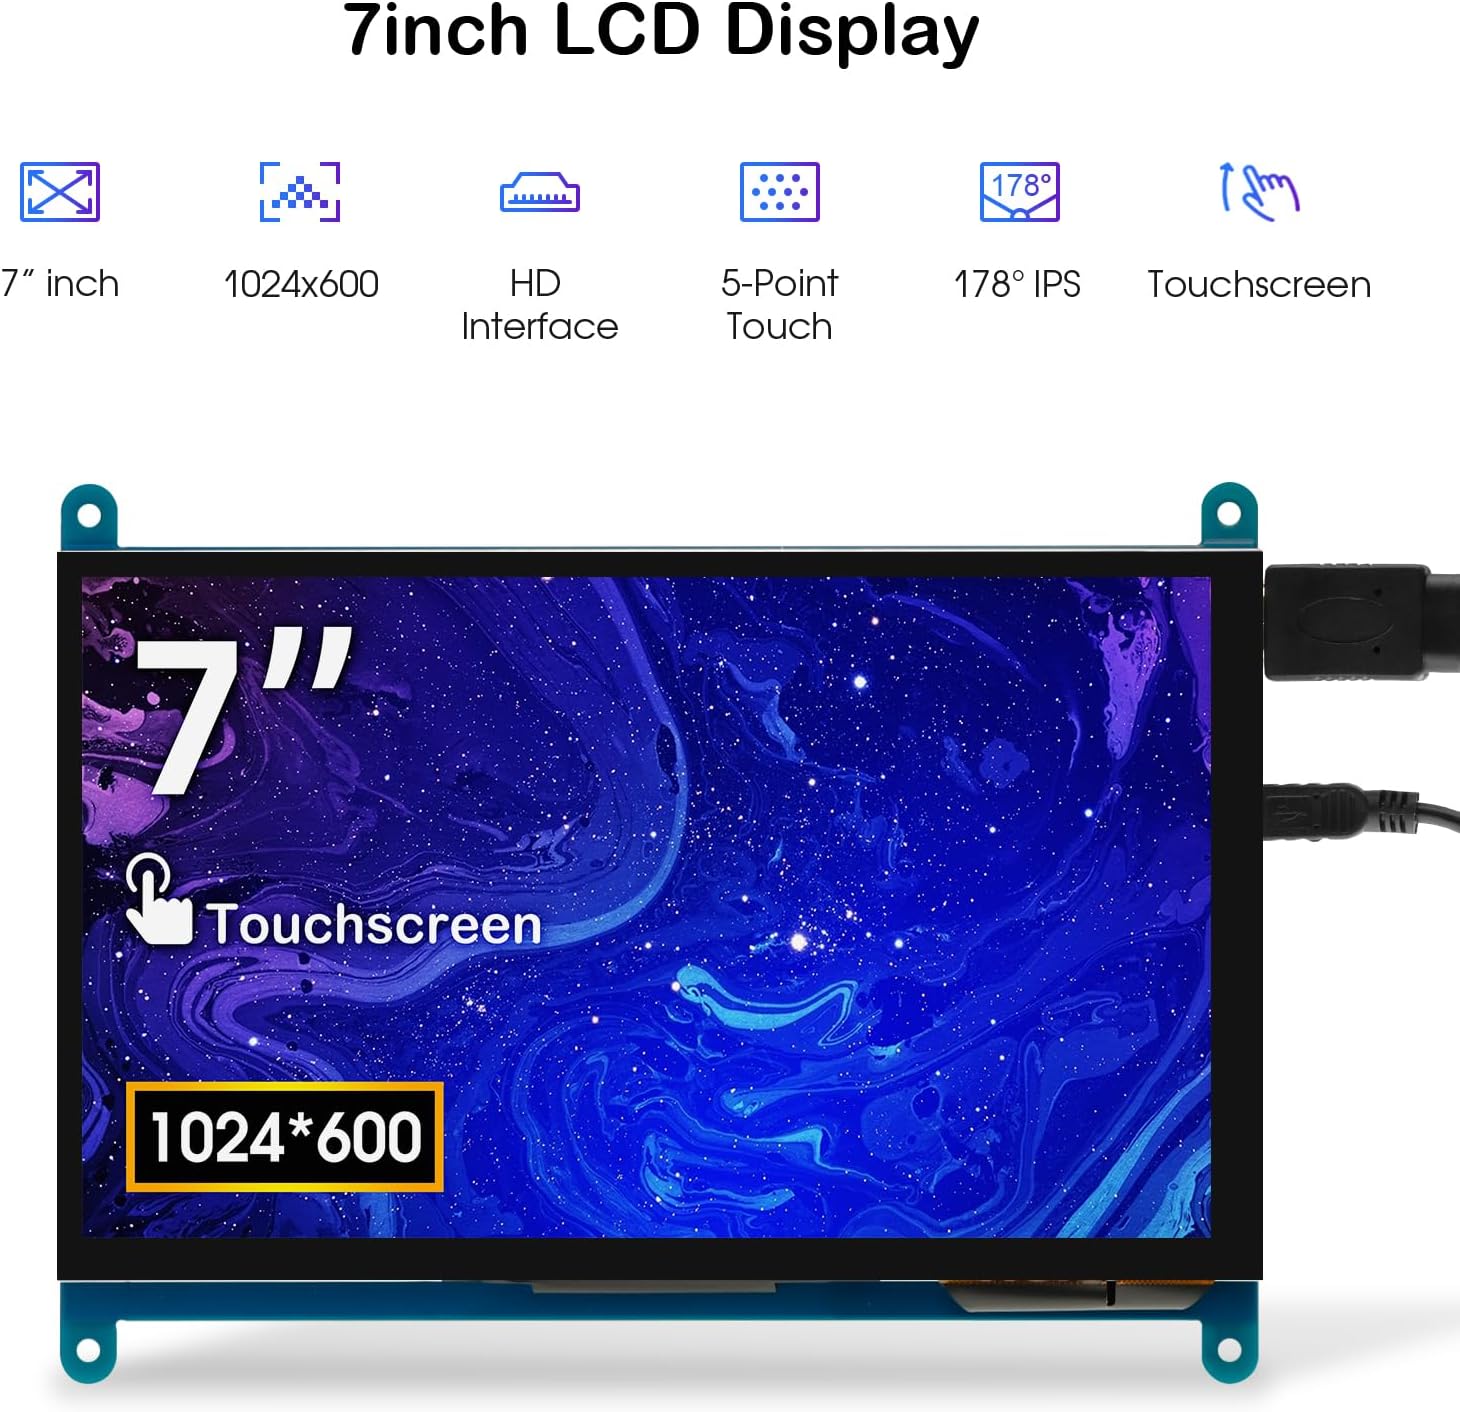
Image: The 7-inch touchscreen connected to a Raspberry Pi board, displaying a graphical user interface.
3.3 Connecting to Windows PC/Laptop
For Windows systems, the monitor functions as a plug-and-play display and touchscreen.
- Connect the HD cable from the monitor's Standard HD Port to an HDMI port on your PC or laptop.
- Connect the Micro USB cable from the monitor's Micro USB Port to a USB-A port on your PC or laptop. This provides power and enables touch functionality.
- Ensure the backlight switch is 'On'.
- Your Windows system should automatically detect the display and touchscreen. No additional drivers are typically required for Windows 7/8/10/11 for basic display and 5-point touch.

Image: The 7-inch touchscreen connected to a laptop, demonstrating seamless connectivity with various operating systems including Windows.
4. Mode d'emploi
4.1 Fonctionnalité tactile
The monitor supports 5-point capacitive touch, allowing for various gestures.
- Robinet: Une simple pression pour sélectionner ou activer.
- Presse: Sustained touch for context menus or drag operations.
- Zoom avant/arrière : Pincer avec deux doigts.
- Clic de souris : A single tap typically registers as a left-click.
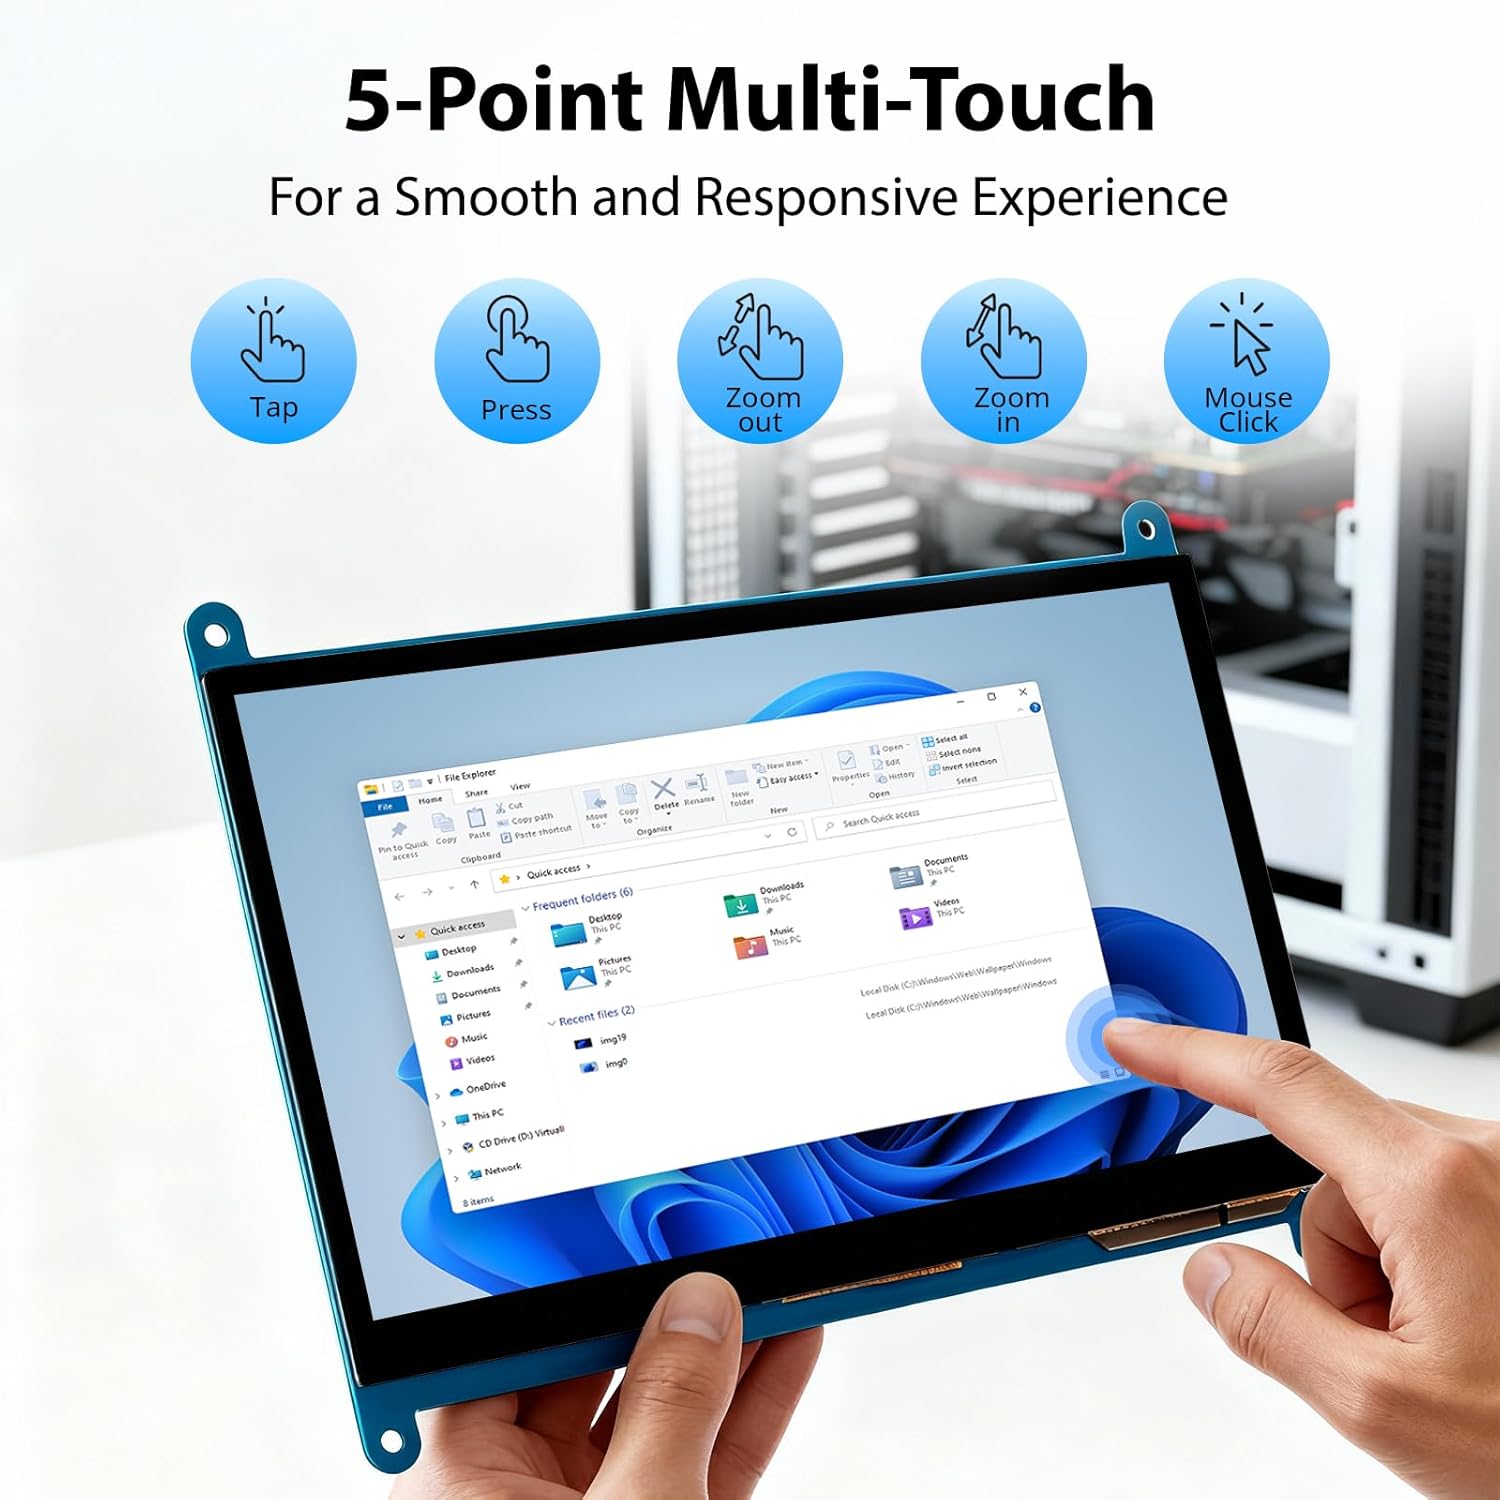
Image: Visual guide to the 5-point multi-touch capabilities of the screen, showing common gestures.
4.2 Modes d'affichage
When connected to a computer, the monitor can operate in several display modes:
- Mode de duplication : Le moniteur reproduit le contenu de votre écran principal.
- Mode étendu : The monitor acts as an extension of your primary display, providing additional screen space.
- Mode second écran : The monitor functions as the sole display, with the primary display turned off.
Ces modes peuvent généralement être configurés via les paramètres d'affichage de votre système d'exploitation.

Image: Illustrations demonstrating the three display modes: Duplicate, Extend, and Second Screen, showing how the monitor can be used with a laptop.
Contrôle du rétroéclairage 4.3
The monitor features a physical switch to control the backlight. This allows you to turn the display illumination on or off without disconnecting power. Note that there is no granular brightness control; it is an on/off function only.
Video: This video demonstrates the backlight control switch on the ELECROW 7 Inch Touchscreen, showing how to turn the display illumination on and off.
5. Entretien
Un entretien approprié garantit la longévité et les performances optimales de votre moniteur.
- Nettoyage de l'écran : Utilisez un chiffon doux et non pelucheux légèrement dampTerminez le nettoyage à l'eau ou avec une solution nettoyante pour écrans. Évitez les produits chimiques agressifs ou les matériaux abrasifs qui pourraient endommager la surface de l'écran.
- Soins généraux: Keep the monitor in a clean, dry environment. Avoid exposing it to extreme temperatures, direct sunlight, or high humidity.
- Manutention: Handle the monitor by its edges. Avoid applying excessive pressure to the screen.
6. Dépannage
Si vous rencontrez des problèmes avec votre moniteur, consultez la section suivante consacrée aux problèmes courants et à leurs solutions.
| Problème | Cause possible | Solution |
|---|---|---|
| Aucun affichage/Écran noir |
|
|
| L'écran tactile ne répond pas |
|
|
| Display resolution incorrect |
|
|
| Pas de contrôle de la luminosité | The monitor only has an on/off switch for the backlight, not adjustable brightness. | This is expected behavior. The monitor does not support adjustable brightness. |
7. Spécifications
Detailed technical specifications for the ELECROW 7 Inch Touchscreen Monitor.
| Fonctionnalité | Détail |
|---|---|
| Marque | ÉLECTROCROÛTE |
| Nom du modèle | RC070 |
| Taille de l'écran | 7 pouces |
| Résolution d'affichage maximale | 1024 x 600 |
| Résolution native | 1024x600 |
| Type d'affichage | Écran LCD |
| Technologie d'affichage | IPS |
| Rapport hauteur/largeur | 1.71:1 |
| Taux de rafraîchissement | 60 Hz |
| Temps de réponse | 8 millisecondes |
| Rapport de contraste | 800:1 |
| Luminosité | 300 XNUMX lm |
| ViewAngle d'attaque | 170 degrés |
| Description de la surface de l'écran | Brillant |
| Technologie de connectivité | HDMI |
| Connectivité Hardware | HDMI, USB |
| Total Number of HDMI Ports | 1 |
| Nombre total de ports USB | 2 (Micro USB for power/touch, USB-A for power/touch) |
| Consommation d'énergie | 12.5 watts |
| Voltage | 5 volts |
| Dimensions de l'article (P x L x H) | 0.3"P x 6.1"L x 4.8"H |
| Poids de l'article | 7.36 onces |
| Appareils compatibles | Raspberry Pi, BB Black, Banana Pi, Jetson Nano, Computers, Laptops, Gaming Consoles |
8. Garantie et assistance
Your ELECROW 7 Inch Touchscreen Monitor comes with a manufacturer's warranty.
- Type de garantie : Garantie constructeur de 1 ans
- Description de la garantie : 1 an Fabricant
For technical support or warranty claims, please contact ELECROW customer service through their official website ou plateforme où le produit a été acheté.