Monitor Audio Apex AW-12-BK
Manuel d'utilisation du caisson de basses Monitor Audio Apex AW-12
Model: Apex AW-12-BK
Introduction
Thank you for choosing the Monitor Audio Apex AW-12 Subwoofer. This compact, high-performance subwoofer is designed to deliver powerful and precise bass, enhancing your home audio experience. Featuring a 12-inch C-CAM driver, a 500-watt Class D amplifier, and a high-efficiency switched-mode power supply, the Apex AW-12 integrates seamlessly into any compatible A/V system. This manual provides essential information for safe installation, optimal operation, and proper maintenance of your subwoofer.
Consignes de sécurité
Please read all safety instructions before operating the subwoofer. Keep this manual for future reference.
- Source d'alimentation : Branchez le caisson de basses uniquement à une source d'alimentation secteur comme indiqué sur l'appareil.
- Ventilation: Assurez une ventilation adéquate autour de l'appareil. Ne bloquez pas les ouvertures de ventilation.
- Eau et humidité : N’exposez pas l’appareil à la pluie, à l’humidité ou à une humidité excessive.
- Chaleur: Tenez l'appareil éloigné des sources de chaleur telles que les radiateurs, les bouches de chauffage, les poêles ou tout autre appareil produisant de la chaleur.
- Entretien: N'essayez pas de réparer vous-même ce produit. Confiez tous les travaux d'entretien à du personnel de service qualifié.
- Nettoyage: Débranchez l'appareil avant de le nettoyer. Utilisez un chiffon doux et sec.
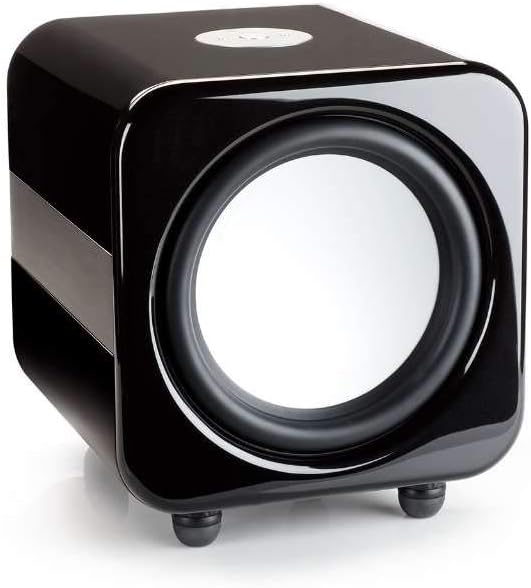
Produit terminéview
The Monitor Audio Apex AW-12 Subwoofer is designed for robust audio performance and aesthetic integration.


Installation
1. Placement
The Apex AW-12 is designed as a floor-standing subwoofer. For optimal performance, place the subwoofer on a solid, level surface. Experiment with different positions in your room to find the best bass response, typically in a corner or along a wall.
2. Connexions
Ensure all audio equipment is turned off before making connections.
- Entrée audio : Connect the subwoofer to your A/V receiver or processor's subwoofer output (LFE) using a high-quality RCA cable.
- Entrée de déclenchement 12 V : If your A/V receiver or processor has a 12V trigger output, connect it to the subwoofer's 12V trigger input. This allows for automatic power activation/deactivation with your main system.
- Connexion électrique : Once all audio connections are made, connect the supplied AC power cord to the subwoofer's power inlet and then to a suitable wall outlet.
Opérationnel
Mise sous/hors tension
If using the 12V trigger input, the subwoofer will power on automatically when your connected A/V receiver or processor is turned on. Otherwise, locate the power switch on the subwoofer and set it to the 'ON' position.
Volume and EQ Controls
The Apex AW-12 features top-mounted controls for volume and EQ settings. Adjust the volume to blend seamlessly with your main speakers. The EQ settings allow you to fine-tune the bass response to suit your room acoustics and personal preference. Refer to your A/V receiver's manual for initial setup and calibration of subwoofer levels.
Entretien
To ensure the longevity and optimal performance of your Monitor Audio Apex AW-12 Subwoofer, follow these maintenance guidelines:
- Nettoyage: Regularly wipe the cabinet with a soft, dry, lint-free cloth. Avoid using abrasive cleaners, waxes, or solvents, as these can damage the finish.
- Poussière: Use a soft brush or a vacuum cleaner with a brush attachment to gently remove dust from the driver and ventilation areas.
- Environnement: Keep the subwoofer in a stable environment, away from direct sunlight, extreme temperatures, and high humidity.
- Inspections : Vérifiez régulièrement toutes les connexions des câbles pour vous assurer qu'elles sont bien fixées.
Dépannage
If you experience issues with your Apex AW-12 Subwoofer, consult the following table for common problems and solutions.
| Problème | Cause possible | Solution |
|---|---|---|
| Aucun son provenant du caisson de basses | Alimentation non connectée ou non activée Câble audio desserré ou défectueux Receiver/processor settings incorrect | Vérifiez le cordon d'alimentation et l'interrupteur d'alimentation. Ensure audio cable is securely connected at both ends; try a different cable Verify subwoofer output is enabled and volume is up on your receiver/processor |
| Basses distordues ou faibles | Subwoofer volume too high/low Réglages d'égalisation incorrects Mauvais placement | Adjust subwoofer volume on the unit and/or receiver Experiment with EQ settings Try repositioning the subwoofer in the room |
| Subwoofer does not turn on with receiver (12V trigger) | 12V trigger cable loose or faulty Receiver's 12V trigger output not active | Check 12V trigger cable connection Consult your receiver's manual to ensure 12V trigger output is enabled |
If the problem persists after trying these solutions, please contact Monitor Audio customer support.
Caractéristiques
Key technical specifications for the Monitor Audio Apex AW-12 Subwoofer:
| Fonctionnalité | Spécification |
|---|---|
| Modèle | Apex AW-12-BK |
| Type de haut-parleur | Caisson de basses |
| Diamètre du caisson de basses | 12 pouces (30.48 cm) |
| AmpType de lificateur | Classe D |
| Quoitage / Max Output Power | 500 watts |
| Source d'énergie | AC |
| Matériel | Métallique |
| Couleur | Noir métallisé |
| Dimensions (L x P x H) | 49.5 cm x 47.5 cm x 47.2 cm (19.5 po x 18.7 po x 18.6 po) |
| Type de montage | Debout au sol |
Informations sur la garantie
Monitor Audio products are manufactured to the highest quality standards. For detailed warranty terms and conditions, please refer to the warranty card included with your product or visit the official Monitor Audio webConsultez le site. Conservez votre preuve d'achat pour toute réclamation au titre de la garantie.
Assistance clientèle
If you require further assistance or have questions not covered in this manual, please contact Monitor Audio customer support or your authorized dealer. Contact information can typically be found on the official Monitor Audio websur votre site ou sur l'emballage de votre produit.