1. Introduction
The Elinchrom D-Lite RX 4/4 Studio Flash to Go Kit (EL20839.2) is a versatile two-light system designed for studio photography. This kit provides robust and reliable lighting solutions for various applications, from portraiture to product photography. The D-Lite RX 4 units feature integrated Skyport remote control for convenient power adjustment and triggering. This manual provides essential information for the safe and effective use of your Elinchrom studio flash kit.

Figure 1.1: Elinchrom D-Lite RX 4/4 Studio Flash Unit. This image shows the main flash unit with its modeling lamp et réflecteur.
2. Consignes de sécurité
- Always connect the flash unit to a grounded power outlet.
- Do not operate the flash unit in wet or damp conditions.
- Évitez de toucher le tube flash ou la lentille pilote.amp immédiatement après utilisation, car elles peuvent être extrêmement chaudes.
- Ensure proper ventilation around the flash unit to prevent overheating.
- Débranchez le câble d'alimentation avant tout nettoyage ou opération de maintenance.
- Gardez l'équipement hors de portée des enfants.
- Use only Elinchrom approved accessories and replacement parts.
3. Contenu du kit
The Elinchrom D-Lite RX 4/4 Studio Flash to Go Kit includes the following components:
- 2x D-Lite RX 4 Flash Units (including 100 W modeling lamp, protective cap, sync cord, and mains cable)
- 1x Portalite Square 66 cm Softbox
- 1x Portalite Octa 56 cm Softbox
- 1x Translucent Deflector
- 1x EL-Skyport Transmitter Plus
- 1x Tripod Set 2 (2x 88 – 235 cm light stands with bag)
- 1x Tube Case for D-Lite 2/4

Figure 3.1: Light stands and their carry bag, essential for positioning your flash units.
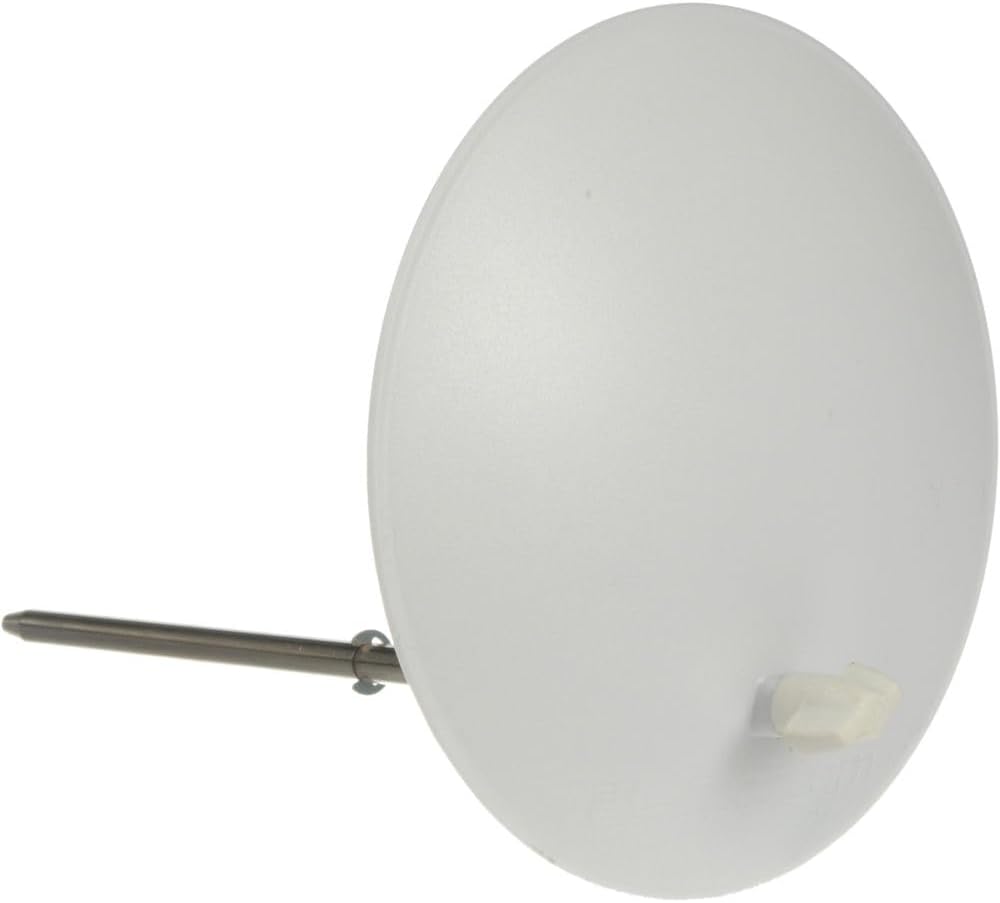
Figure 3.2: Translucent deflector, used to modify light output.
4. Installation
4.1 Assemblage des trépieds d'éclairage
- Remove the light stands from the carry bag.
- Extend the legs of each stand until they are fully spread and stable.
- Adjust the height of the stand by loosening the locking collars, extending the sections, and then tightening the collars securely.
4.2 Mounting the D-Lite RX 4 Unit
- Carefully place the D-Lite RX 4 unit onto the top stud of a light stand.
- Secure the unit by tightening the mounting screw on the flash unit's bracket.
- Ensure the unit is stable and balanced on the stand.

Figure 4.1 : Face avant view of the D-Lite RX 4 flash unit, showing the flash tube and modeling lamp.
4.3 Attaching Softboxes
The kit includes a Portalite Square 66 cm and a Portalite Octa 56 cm softbox. Follow these general steps for attachment:
- Open the softbox and insert the metal rods into the speedring.
- Align the speedring with the front of the D-Lite RX 4 unit.
- Push the speedring firmly onto the flash unit until it clicks into place.
- Attach the inner and outer diffusers to the softbox as desired.

Figure 4.2: Elinchrom Portalite Square 66 cm softbox.
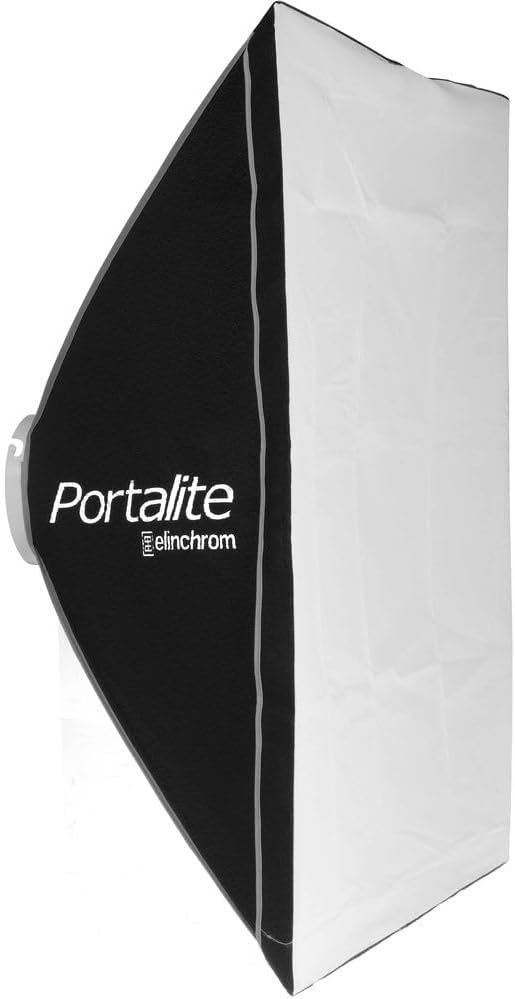
Figure 4.3: Elinchrom Portalite Octa 56 cm softbox.
4.4 Connexion d'alimentation
- Connect the mains cable to the power input on the rear of the D-Lite RX 4 unit.
- Plug the other end of the mains cable into a suitable grounded power outlet.
5. Mode d'emploi
5.1 D-Lite RX 4 Control Panel Overview
The rear panel of the D-Lite RX 4 unit provides access to all controls and settings.

Figure 5.1: Rear control panel of the D-Lite RX 4 unit, showing power adjustments, modeling lamp controls, and sync port.
5.2 Powering On and Adjusting Flash Power
- Flip the main power switch (red switch) on the rear panel to the 'ON' position.
- Use the 'UP' and 'DOWN' arrow buttons to adjust the flash power output. The current power level will be displayed on the digital screen.
5.3 Modélisation Lamp Contrôle
La modélisation lamp button (light bulb icon) allows you to control the modeling lamp's behavior:
- Proportionnel: La modélisation lamp brightness adjusts proportionally to the flash power.
- Complet: La modélisation lamp stays at full brightness regardless of flash power.
- Désactivé: La modélisation lamp est éteint.
5.4 Using the EL-Skyport Transmitter Plus
The EL-Skyport Transmitter Plus allows for wireless triggering and power control of your D-Lite RX 4 units from your camera.

Figure 5.2: Elinchrom EL-Skyport Transmitter Plus, used for wireless flash control.
- Mount the EL-Skyport Transmitter Plus onto your camera's hot shoe.
- Ensure the D-Lite RX 4 units are powered on and set to a compatible Skyport channel and group.
- Use the buttons on the transmitter to select the desired group and channel, and to adjust the power output of the connected flash units.
- The transmitter will trigger the flash units when your camera's shutter is released.
6. Entretien
- Nettoyage: Use a soft, dry cloth to clean the exterior of the flash units and accessories. Do not use abrasive cleaners or solvents.
- Tube flash/Modèle Lamp Remplacement: Refer to the specific instructions provided with replacement parts. Always ensure the unit is unplugged and cooled down before attempting replacement.
- Stockage: Store the kit in a cool, dry place, protected from dust and extreme temperatures. Use the provided carry cases for transport and storage.
7. Dépannage
| Problème | Cause possible | Solution |
|---|---|---|
| Le flash ne s'allume pas. | Power cable not connected; power switch off; no power from outlet. | Check power cable connection; ensure power switch is ON; test outlet with another device. |
| Le flash ne se déclenche pas. | Skyport not paired/incorrect channel; sync cable loose; flash in standby mode; flash tube faulty. | Verify Skyport channel/group settings; check sync cable connection; wake flash from standby; contact support if flash tube is suspected faulty. |
| Modélisation lamp ne fonctionne pas. | Modélisation lamp off in settings; lamp brûlé. | Vérifier la modélisation lamp settings on control panel; replace modeling lamp en cas d'épuisement. |
| Sortie flash irrégulière. | Low battery in Skyport transmitter; flash unit overheating; power fluctuations. | Replace Skyport batteries; allow flash unit to cool down; ensure stable power supply. |
8. Spécifications
- Modèle: D-Lite RX 4
- Numéro de modèle de l'article : EL20839.2
- Puissance de sortie : 400Ws (Watt-seconds)
- Temps de recyclage : 0.35-1.6 seconds (at 115V)
- Integrated Trigger: EL-Skyport (up to 200m / 656ft range with EL-Skyport Transmitter Plus)
- Dimensions du produit : 34.6 x 11.6 x 6.5 pouces (87.9 x 29.5 x 16.5 cm)
- Poids de l'article : 22 livres (10 kg)
- Matériel: Métal
- Couleur: Noir
- Fabricant: Élinchrome
9. Garantie et assistance
Elinchrom products are designed for reliability and performance. This kit typically includes a 2-year warranty from the date of purchase, covering manufacturing defects. For warranty claims, technical support, or service inquiries, please contact your authorized Elinchrom dealer or visit the official Elinchrom website pour les coordonnées du service client.
Veuillez conserver votre preuve d'achat pour la validation de la garantie.