1. Introduction
This manual provides essential instructions for the safe and efficient operation, installation, and maintenance of your Hatco GR2AHL-66D3 Designer Infrared High Watt Foodwarmer. Please read this manual thoroughly before installation and use to ensure proper function and to prevent potential hazards.
The Hatco GR2AHL-66D3 is a 69.5-inch wide Glo-Ray Designer Dual Strip Heater with lights, designed for holding food at safe serving temperatures. It features a high-wattage infrared heating system, tubular metal heater rods, and a durable aluminum construction.
2. Informations importantes sur la sécurité
Respectez toujours les consignes de sécurité de base lors de l'utilisation d'appareils électriques afin de réduire les risques d'incendie, d'électrocution ou de blessure.
- Read all instructions before operating the foodwarmer.
- Assurez-vous que l'appareil est correctement mis à la terre.
- Ne faites pas fonctionner l'appareil avec un cordon ou une prise endommagés.
- Tenez vos mains et vos vêtements éloignés des éléments chauffants pendant le fonctionnement. Les surfaces seront chaudes.
- N'immergez pas l'appareil dans l'eau ou dans d'autres liquides.
- Débranchez l'appareil avant de le nettoyer ou de l'entretenir.
- Cet appareil est destiné à un usage commercial uniquement.
3. Déballage et inspection
Upon receiving your Hatco GR2AHL-66D3 foodwarmer, carefully unpack the unit and inspect it for any shipping damage. If damage is found, contact the carrier immediately and retain all packaging materials for inspection.
Vérifiez que tous les composants sont présents :
- Hatco GR2AHL-66D3 Foodwarmer unit
- 14-inch high legs (if applicable to your model configuration)
- Manuel d'instructions (ce document)
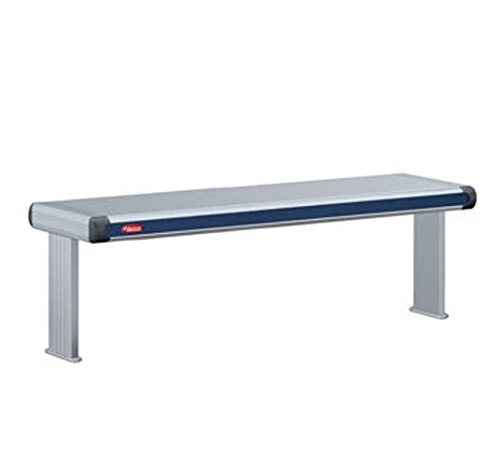
Figure 1: Hatco GR2AHL-66D3 Designer Infrared High Watt Foodwarmer. This image displays the overall structure of the foodwarmer, highlighting its dual strip heating elements and integrated lighting.
4. Configuration et installation
4.1. Localisation
Place the foodwarmer on a stable, level, non-combustible surface. Ensure adequate clearance around the unit for proper ventilation and safe operation. Avoid placing near flammable materials.
4.2. Leg Installation (if applicable)
If your model includes 14-inch high legs, securely attach them to the designated mounting points on the foodwarmer chassis using the provided hardware. Ensure all legs are tightened firmly before placing the unit on a surface.
4.3. Connexion électrique
The Hatco GR2AHL-66D3 is a high-wattage appliance (3420 watts). It requires a dedicated electrical circuit with the correct voltaget amperage. Consult a qualified electrician to ensure your electrical supply meets the unit's requirements and local electrical codes. Do not use extension cords.
- Vérifiez le voltage rating on the unit's nameplate matches your power supply.
- Plug the power cord directly into a grounded electrical outlet.
5. Mode d'emploi
5.1. Mise sous/hors tension
Locate the power switch(es) on the unit. Typically, there will be separate switches for the infrared heating elements and the lights.
- To turn on the heating elements, flip the designated switch to the "ON" position.
- To turn on the lights, flip the designated light switch to the "ON" position.
- To turn off, flip the switches to the "OFF" position.
5.2. Food Holding
The infrared heating system is designed to maintain pre-heated food at safe serving temperatures. Place food in appropriate pans or containers directly under the heating elements. The 3-inch spacing between elements ensures even heat distribution.
Note: This unit is not designed to cook food or reheat cold food. Always ensure food is at the desired serving temperature before placing it in the foodwarmer.
6. Nettoyage et entretien
Regular cleaning and maintenance will extend the life of your foodwarmer and ensure sanitary operation.
6.1. Nettoyage quotidien
- ALWAYS UNPLUG THE UNIT AND ALLOW IT TO COOL COMPLETELY BEFORE CLEANING.
- Wipe down all exterior surfaces with a damp chiffon et nettoyant doux non abrasif.
- Clean the heating elements and light fixtures carefully to remove any food debris. Avoid spraying water directly onto electrical components.
- Dry all surfaces thoroughly before plugging the unit back in.
6.2. Light Bulb Replacement
If a light bulb burns out, ensure the unit is unplugged and cool. Carefully remove the old bulb and replace it with a new bulb of the same type and wattage. Refer to the unit's label for specific bulb requirements.
7. Dépannage
Avant de contacter le service, review Voici les problèmes courants et leurs solutions :
| Problème | Cause possible | Solution |
|---|---|---|
| L'unité ne s'allume pas. | Prise de courant défectueuse ; cordon d'alimentation débranché ; disjoncteur déclenché. | Vérifiez la prise de courant ; assurez-vous que le cordon est bien branché ; réenclenchez le disjoncteur. |
| Heating elements not working. | Heating element switch off; faulty element. | Ensure heating switch is ON. If still not working, contact qualified service personnel. |
| Les lumières ne fonctionnent pas. | Light switch off; burned-out bulb. | Ensure light switch is ON. Replace bulb if necessary (refer to Section 6.2). |
| Les aliments ne restent pas chauds. | Food placed cold into unit; unit not preheated; improper pan usage. | Ensure food is preheated. Allow unit to warm up. Use appropriate food pans. |
If problems persist after attempting these solutions, contact Hatco customer service or a qualified service technician.
8. Spécifications
- Modèle: GR2AHL-66D3
- Taper: Glo-Ray Designer Dual Strip Heater with Lights
- Largeur: 69.5 pouces (69-1/2")
- Espacement: 3 inches between heating elements
- Technologie de chauffage : Infrared, High Wattage, Tubular Metal Heater Rod
- Construction: Designer Aluminum
- Tarif Electrique: 3420 Watts (Voltage dependent on specific configuration, refer to unit's nameplate)
- Hauteur des jambes : 14 inches (if equipped)
- Certifications: cULus, UL EPH Classified
- Origine: Fabriqué aux États-Unis
9. Garantie et assistance
Hatco Corporation provides a limited warranty for its products. Specific warranty terms and conditions are available on the official Hatco website or by contacting Hatco customer service. Please retain your proof of purchase for warranty claims.
For technical assistance, parts, or service inquiries, please contact Hatco customer support. Contact information can typically be found on the manufacturer's website or on the product's nameplate.