1. Introduction
Merci pour votre achatasing the Ivation LED Lighted 2X Magnifier with Helping Hands. This versatile tool is designed to assist with intricate tasks, hobbies, and detailed work by providing clear magnification and bright LED illumination. Its flexible design allows for both freestanding and clip-on use, making it suitable for various environments. Please read this manual thoroughly before use to ensure proper operation and to maximize the product's lifespan.
2. Consignes de sécurité
- Do not expose the lens to direct sunlight. Concentrated sunlight through the lens can cause fire or damage to eyes.
- Tenez l'appareil éloigné de l'eau ou de tout autre liquide afin d'éviter tout choc électrique ou dommage.
- Ne tentez pas de démonter ou de modifier le produit. Cela annulera la garantie et pourrait causer des dommages ou des blessures.
- Veillez à insérer les piles en respectant la polarité. Retirez les piles si l'appareil n'est pas utilisé pendant une période prolongée.
- Tenir hors de portée des enfants. Ce n'est pas un jouet.
- Utilisez uniquement le type de pile spécifié (3 piles AAA).
3. Contenu du colis
Vérifiez que tous les éléments sont présents dans votre colis :
- LED Lighted Magnifier Unit (with 2x main lens and 5x inset lens)
- Multifunction Base (for freestanding or clip-on use)
- 2 Flexible Gooseneck Helping Hand Clamps
- 3 piles AAA
- Microfiber Cloth Case
- Manuel d'instructions
4. caractéristiques du produit
- Dual Strength Magnification: Features a 4.25-inch 2x main lens with a 5x inset spot lens for detailed work.
- Éclairage LED intégré : Two super-bright 'daylight' LEDs provide clear illumination.
- Versatile Base: Unique multifunction base allows for freestanding use with two metal stability bars or clip-on use on tabletops, desktops, or countertops.
- Col de cygne flexible : Positions the magnifier at precisely the desired height and angle.
- Helping Hand Clamps: Includes two screw-in flexible gooseneck clamps for truly hands-free function, ideal for holding small objects.
- Fonctionne sur batterie : Fonctionne avec 3 piles AAA (incluses).
5. Assemblage et configuration
5.1. Installation de la batterie
- Repérez le compartiment à piles sous l'unité de base.
- Ouvrez le couvercle du compartiment à piles.
- Insérez 3 piles AAA en veillant à respecter la polarité (+/-) indiquée à l'intérieur du compartiment.
- Fermez soigneusement le couvercle du compartiment à piles.
The device works with 3 AAA batteries, which are included.

Video: Demonstrates battery installation and various product features.
5.2. Attaching Helping Hand Clamps
- Identify the two small threaded holes on the side of the base unit.
- Take one flexible gooseneck helping hand clamp.
- Screw the threaded end of the clamp into one of the holes until secure.
- Repeat for the second helping hand clamp si désiré.

Image: The magnifier with one helping hand clamp attached to the base, holding a small red card.

Image: The magnifier with both helping hand clamps attached to the base, ready for use.
5.3. Positioning the Magnifier
The magnifier offers two primary positioning options:
Utilisation autonome :
- Unfold the two metal stability bars from the base to create a stable tripod-like stand.
- Placez l'appareil sur une surface plane et stable.
- Adjust the flexible gooseneck to position the magnifier and LED lights over your work area.
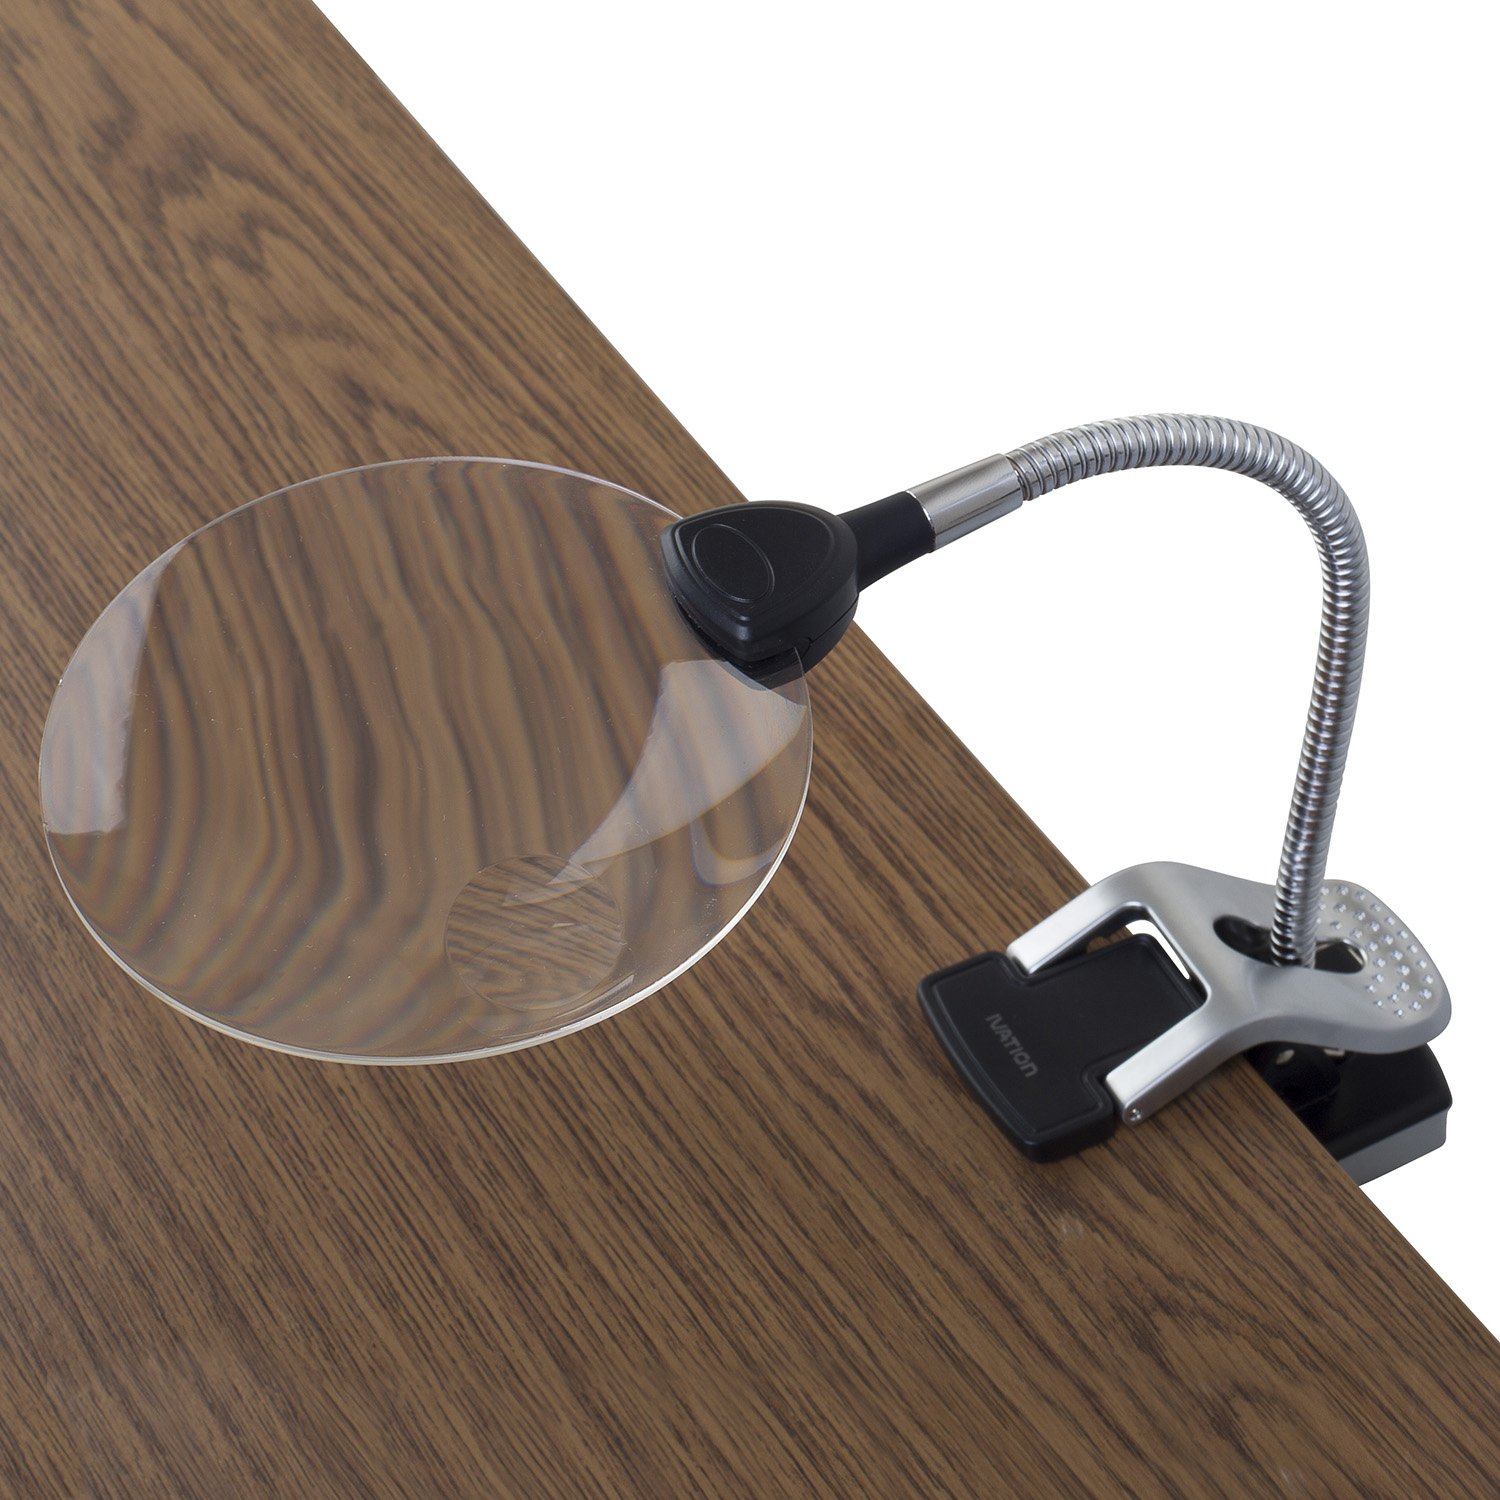
Image: The magnifier in its freestanding configuration on a wooden surface.
Utilisation avec clip :
- Ensure the metal stability bars are folded back into the base.
- Press the clip mechanism on the base to open the jaws.
- Attach the clip securely to the edge of a table, desk, or countertop. Ensure it is firmly gripped.
- Adjust the flexible gooseneck to position the magnifier and LED lights over your work area.
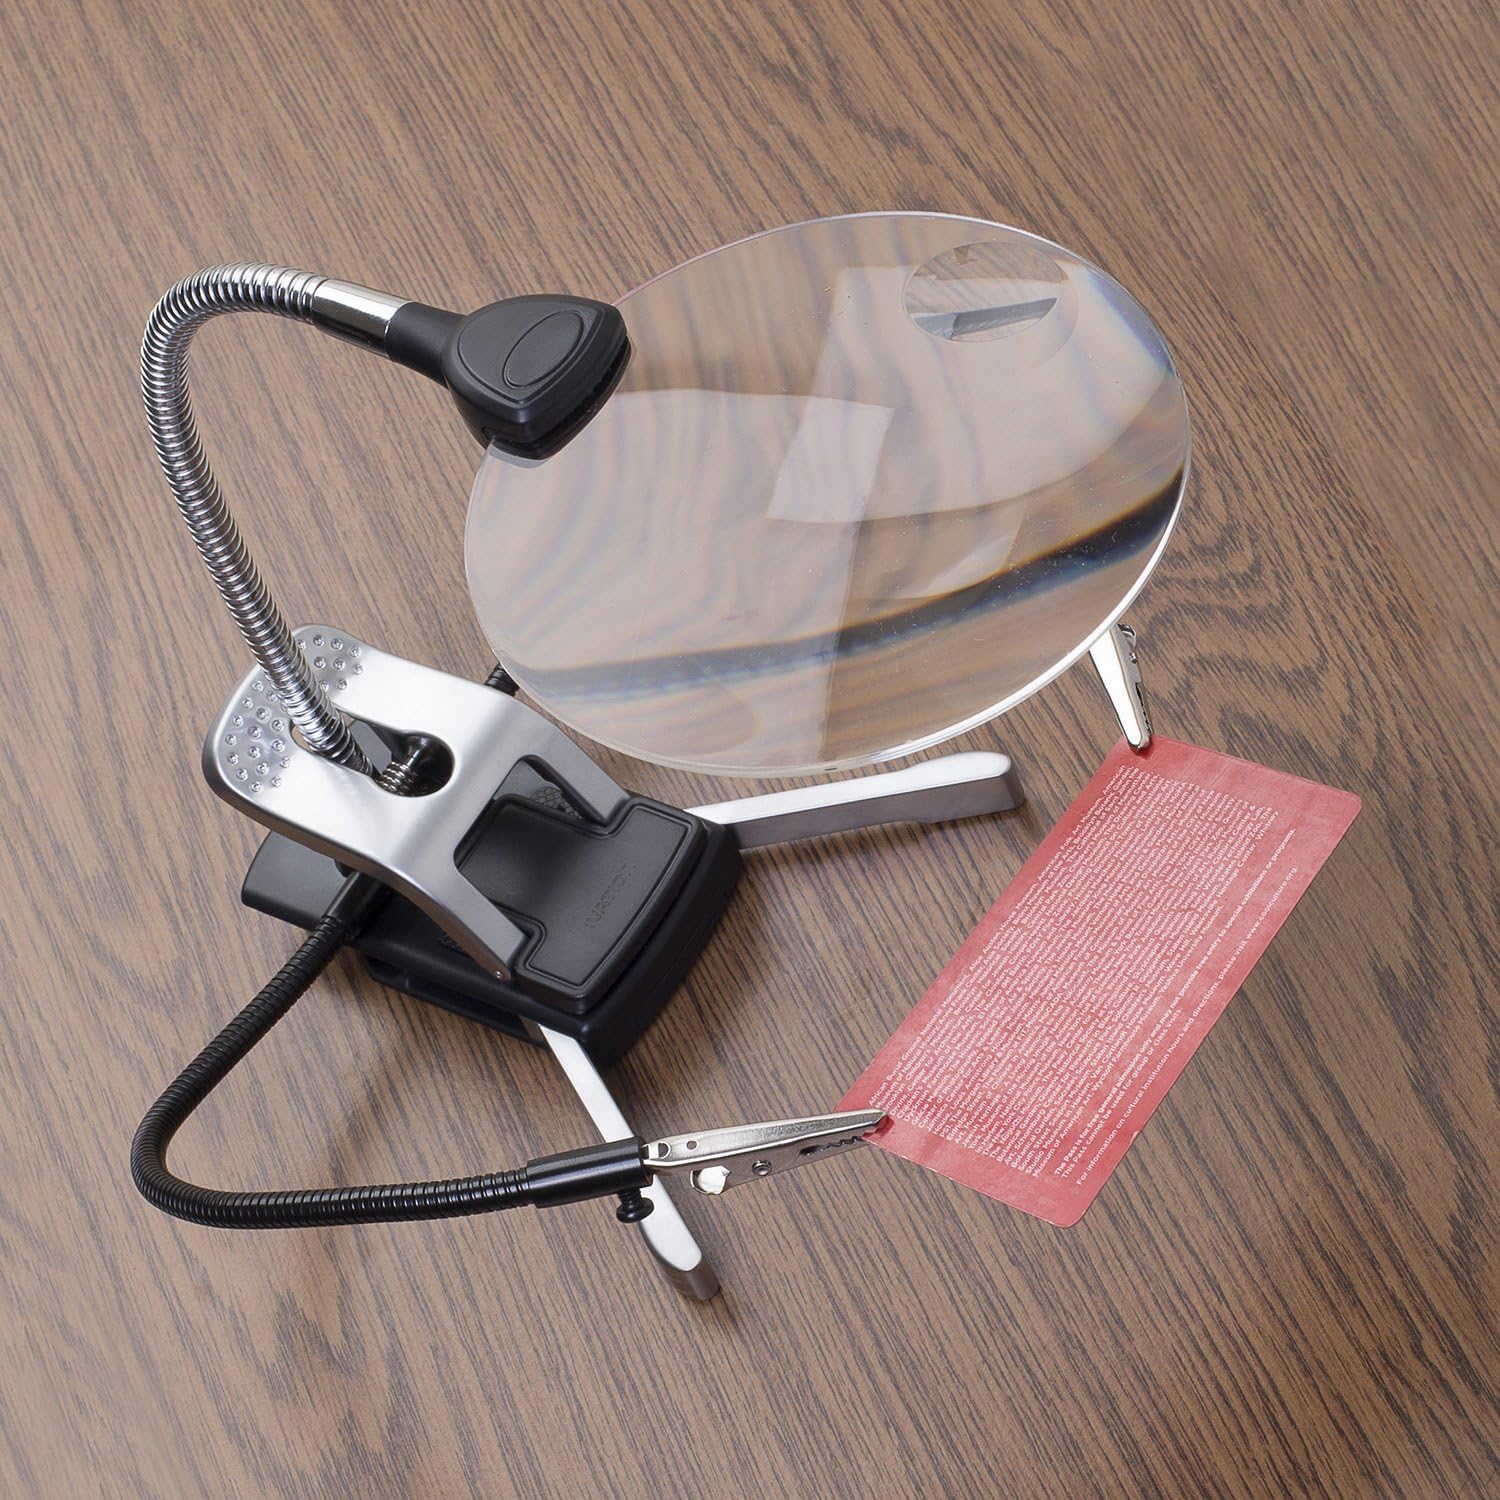
Image: The magnifier clipped to a desk, providing light and magnification over a computer keyboard.

Image: The magnifier clipped to a desk, providing light and magnification for reading a newspaper.

Image: A composite image illustrating the clip mechanism, LED lights, and both clip-on and freestanding base configurations.
6. Fonctionnement
6.1. Turning On/Off the LED Lights
The LED lights are controlled by a single button located on the magnifier head. Press the button once to turn the lights on, and press it again to turn them off.
6.2. Utilisation de la loupe
- Position the magnifier over the object you wish to view.
- Adjust the flexible gooseneck to bring the lens to the optimal viewing distance and angle for clarity.
- For general magnification, use the large 2x lens. For extremely fine details, use the smaller 5x inset lens.
- Turn on the LED lights for enhanced visibility, especially in low-light conditions.
6.3. Utilizing Helping Hands
The two flexible helping hand clamps are designed to hold small components or objects, freeing your hands for other tasks.
- Once attached to the base, adjust the gooseneck of each clamp to position the alligator clips as needed.
- Gently open the alligator clips and secure the object you need to hold.
- Ensure the object is held firmly but not damaged by excessive pressure from the clips.

Image: The magnifier with a helping hand clamp holding a small circuit board, demonstrating its utility for detailed work.
7. Entretien
- Nettoyage de la lentille : Use the included microfiber cloth to gently wipe the lens. For stubborn smudges, slightly dampen the cloth with lens cleaning solution. Avoid abrasive cleaners or paper towels, which can scratch the lens.
- Nettoyage général : Wipe the base and gooseneck with a soft, dry cloth. Do not use harsh chemicals.
- Remplacement de la batterie : Replace all 3 AAA batteries when the LED lights dim or stop working. Ensure proper polarity during replacement.
- Stockage: When not in use, store the magnifier in a clean, dry place, preferably in its microfiber cloth case, to protect the lens from dust and scratches.
8. Dépannage
- LED lights do not turn on:
- Vérifiez que les piles sont insérées en respectant la polarité.
- Remplacez les piles par des neuves.
- Assurez-vous que le couvercle du compartiment à piles est bien fermé.
- Magnification is blurry or unclear:
- Clean the lens with the provided microfiber cloth.
- Adjust the distance between the lens and the object until a clear image is achieved.
- Magnifier unit is unstable:
- For freestanding use, ensure the metal stability bars are fully extended and placed on a flat, level surface.
- For clip-on use, ensure the clip is firmly attached to a stable edge and fully engaged.
9. Spécifications
| Marque | Ivation |
| Numéro de modèle | IVA-LM2XSTND |
| Main Lens Magnification | 2x |
| Inset Lens Magnification | 5x |
| Matériau de la lentille | Acrylique |
| Éclairage | 2 lumières LED |
| Source d'énergie | 3 piles AAA |
| Type de base | Multifunction (Freestanding & Clip-on) |
| Coup de main | 2 Flexible Gooseneck Clamps |
10. Garantie et assistance
This Ivation product is covered by a limited warranty. For detailed warranty information, product support, or to register your product, please visit the official Ivation website or contact customer service using the information provided on your product packaging or purchase receipt.
Veuillez conserver votre preuve d'achat pour les réclamations au titre de la garantie.