NaceCare GVE 370 George
Manuel d'utilisation de l'aspirateur eau et poussière NaceCare GVE 370 « George »
Model: GVE 370 George | Brand: NaceCare
1. Produit terminéview
The NaceCare GVE 370 "George" is a versatile all-in-one machine designed for both wet and dry cleaning applications. It excels at dry vacuuming, wet vacuuming, scrubbing and drying hard floors, deep cleaning carpets, cleaning upholstery, and even unblocking sinks. Its robust design ensures professional cleaning standards and exceptional results for extensive and long-hour use.

Figure 1: NaceCare GVE 370 "George" Wet/Dry/ Extractor Vacuum.
This image displays the main unit of the NaceCare GVE 370 "George" vacuum cleaner, showcasing its green body, black top, and the attached hose with a clear extraction nozzle.
2. Contenu du colis
Avant de commencer, assurez-vous que tous les composants sont présents dans l'emballage :
- NaceCare GVE 370 "George" main unit
- 26A Accessory Kit (includes various nozzles and tools)
- Hoses for wet and dry operation
- Cordon d'alimentation
- Manuel d'instructions (ce document)

Figure 2: Included 26A Accessory Kit components.
This image shows the comprehensive 26A accessory kit, including various hoses, extension wands, floor tools, and specialized nozzles for different cleaning tasks.
3. Installation
3.1 Assemblage initial
- Déballez tous les composants de la boîte.
- Ensure the main unit is placed on a stable, level surface.
- Attach the appropriate hose for your intended use (dry or wet).
- Connect the desired accessory (e.g., floor tool, upholstery nozzle) to the end of the hose.
- Branchez le cordon d’alimentation sur une prise électrique adaptée.
3.2 Preparing for Wet Operation (Extraction/Wet Vacuuming)
- Remove the motor head from the main unit.
- Fill the clean water tank with water and appropriate cleaning solution (refer to solution manufacturer's instructions).
- Assurez-vous que le réservoir d'eau sale est vide et correctement positionné.
- Replace the motor head, ensuring it is securely latched.
- Connect the solution hose from the machine to the spray trigger on the wand.
3.3 Preparing for Dry Operation
- Remove the motor head from the main unit.
- Assurez-vous que le filtre sec est propre et correctement installé.
- Insert a new dust bag if needed.
- Replace the motor head, ensuring it is securely latched.
4. Mode d'emploi
4.1 Aspiration à sec
For general dry vacuuming of carpets and hard floors:
- Ensure the machine is set up for dry operation (dry filter and dust bag installed).
- Select the appropriate dry floor tool.
- Turn on the vacuum motor using the power switch.
- Move the floor tool slowly and steadily over the surface to be cleaned.
4.2 Wet Vacuuming (Spill Pickup)
For picking up liquid spills:
- Ensure the machine is set up for wet operation (no dry filter or dust bag, dirty water tank ready).
- Attach the wet pick-up tool.
- Turn on the vacuum motor.
- Move the wet pick-up tool over the liquid spill to suction it into the dirty water tank.
4.3 Carpet and Upholstery Extraction
For deep cleaning carpets and upholstery:
- Ensure the machine is set up for wet operation with the clean water tank filled with solution.
- Attach the carpet or upholstery extraction tool.
- Turn on both the vacuum motor and the pump switch.
- Press the spray trigger on the wand to dispense cleaning solution while simultaneously moving the tool over the surface to extract the dirty solution.
- Work in small sections, overlapping passes to ensure thorough cleaning and extraction.
Video 1: Vacuuming with Numatic Henry Wash (demonstrates similar wet cleaning functionality).
This video demonstrates the wet vacuuming and extraction process using a similar Numatic Henry Wash model. It shows the setup of the machine for wet use, including filling the solution tank and attaching the appropriate tools. The video then illustrates the technique for spraying cleaning solution and simultaneously vacuuming it up to clean surfaces.
4.4 Nettoyage des sols durs
George takes water and detergent from the clean water tank, breaks down grease and grime, and cleans the floor with his unique dual scrub brush. He then sucks-up the water into the dirty water tank, leaving your floors clean, hygienic, and touch dry.
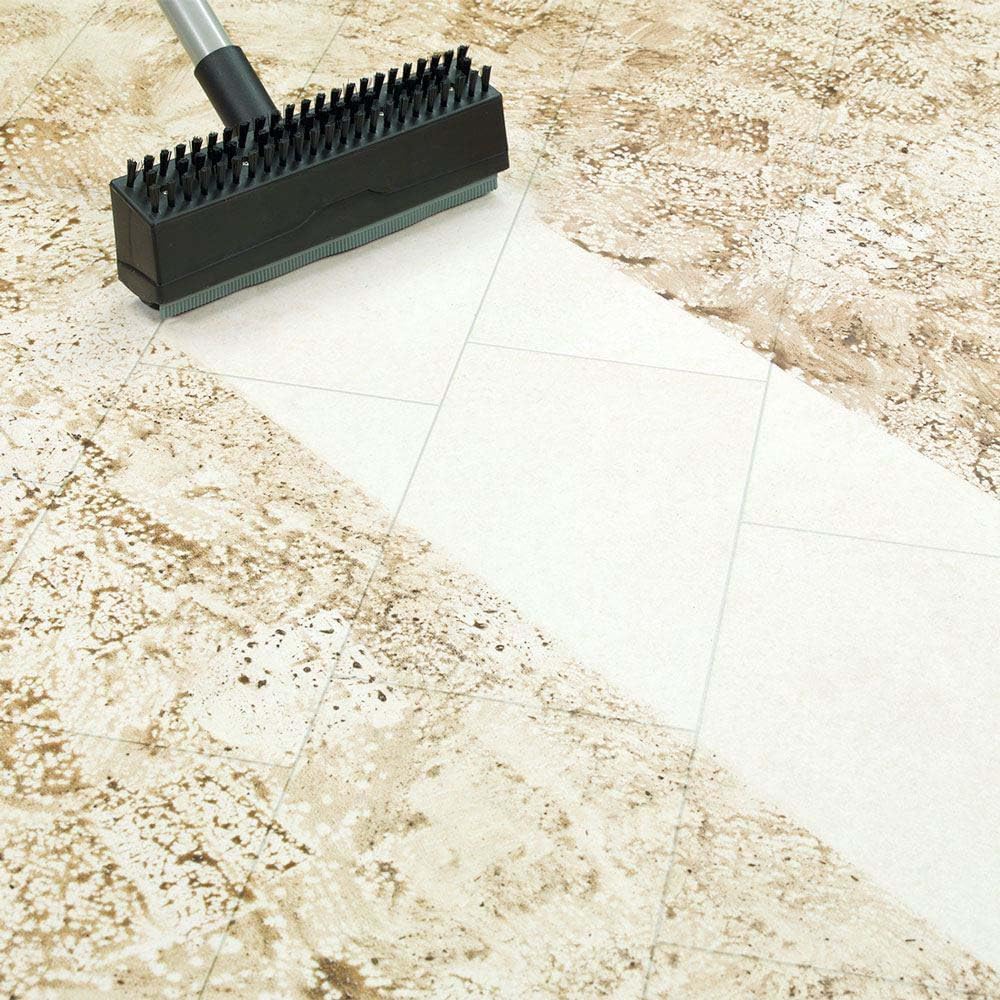
Figure 3: Hard floor cleaning in progress.
This image shows the George vacuum's floor tool actively cleaning a dirty tiled floor, with a clear distinction between the cleaned and uncleaned areas, highlighting its effectiveness.

Figure 4 : Example of hard floor cleaning with foam.
This image illustrates the hard floor cleaning process, showing the floor tool moving across a dark tiled surface with cleaning foam, indicating the scrubbing action.
5. Entretien
5.1 Vidange et nettoyage des réservoirs
- After wet use, always empty and rinse both the clean and dirty water tanks thoroughly.
- Allow tanks to air dry before storage to prevent mold and odors.
5.2 Entretien du filtre
- For dry use, regularly check and clean the disk filter. Tap off loose debris or rinse if washable (refer to specific filter instructions).
- Replace the dry filter when it shows signs of wear or reduced performance.
5.3 Entretien des tuyaux et accessoires
- Rinse hoses and accessories after wet use to remove any residue.
- Store hoses neatly to prevent kinks or damage.
- Inspect all attachments for blockages or damage before and after each use.
6. Dépannage
- Pas d'aspiration :
- Check if the hose is securely connected to the machine and the tool.
- Ensure the tanks are properly sealed and the motor head is latched.
- Verify that the filter is not clogged.
- Check for blockages in the hose or tools.
- Sprayer Not Working:
- S'assurer que le réservoir d'eau propre contient suffisamment de solution.
- Check if the pump switch is turned on.
- Inspect the solution hose for kinks or blockages.
- Clean the spray nozzle if it appears clogged.
- La machine ne s'allume pas :
- Vérifiez que le cordon d'alimentation est bien branché dans une prise de courant fonctionnelle.
- Vérifiez l'interrupteur d'alimentation de la machine.
- Ensure the motor head is correctly seated and latched.
7. Spécifications
| Fonctionnalité | Détail |
|---|---|
| Marque | NaceCare |
| Nom du modèle | GVE 370 George |
| Dossier spécial | Wet cleanup, corded |
| Type de filtre | Disque |
| Capacité | 4 gallons |
| Quoitage | 1060 watts |
| Puissance du moteur | 1.6 CV |
| Dimensions du produit | 14"L x 14"l x 20"H |
| Poids de l'article | 18 livres |
| Niveau de bruit | 61 dB |
| Code UPC | 799632475668 |
8. Garantie et assistance
The NaceCare GVE 370 "George" comes with a Garantie de 2 ans on switches, motors, and electrical parts. For warranty claims or technical support, please contact NaceCare Solutions directly or visit their official website.
Pour obtenir des informations et une assistance supplémentaires, vous pouvez consulter le site web suivant : NaceCare Store on Amazon.
Ask a question about this manual
Ask about setup, troubleshooting, compatibility, parts, safety, or missing instructions. Manuals+ will review the question and use this page’s manual context to help answer it.