1. Introduction
Merci pour votre achatasing the Lexon LR98R1 Onoff LCD Alarm Clock. This manual provides detailed instructions for the proper setup, operation, and maintenance of your device. Please read this manual thoroughly before use and retain it for future reference.
The Lexon Onoff alarm clock features a unique design where flipping the clock activates or deactivates the alarm. It includes an LCD display with a blue electroluminescent backlight for clear visibility.
2. Consignes de sécurité
- N’exposez pas l’appareil à des températures extrêmes, à la lumière directe du soleil ou à une forte humidité.
- Évitez de faire tomber l'appareil ou de le soumettre à des chocs violents.
- Do not attempt to disassemble or modify the alarm clock. This will void the warranty.
- Gardez l’appareil à l’écart de l’eau et d’autres liquides.
- Jetez les piles usagées de manière responsable conformément aux réglementations locales.
- Utilisez uniquement le type de pile spécifié (2 x AAA).
3. Contenu du colis
Vérifiez que tous les articles sont présents dans le colis :
- Lexon LR98R1 Onoff LCD Alarm Clock
- Manuel de l'utilisateur (ce document)
Remarque : les piles AAA ne sont pas incluses et doivent être achetées séparément.
4. Produit terminéview
Familiarize yourself with the components of your Lexon Onoff alarm clock.
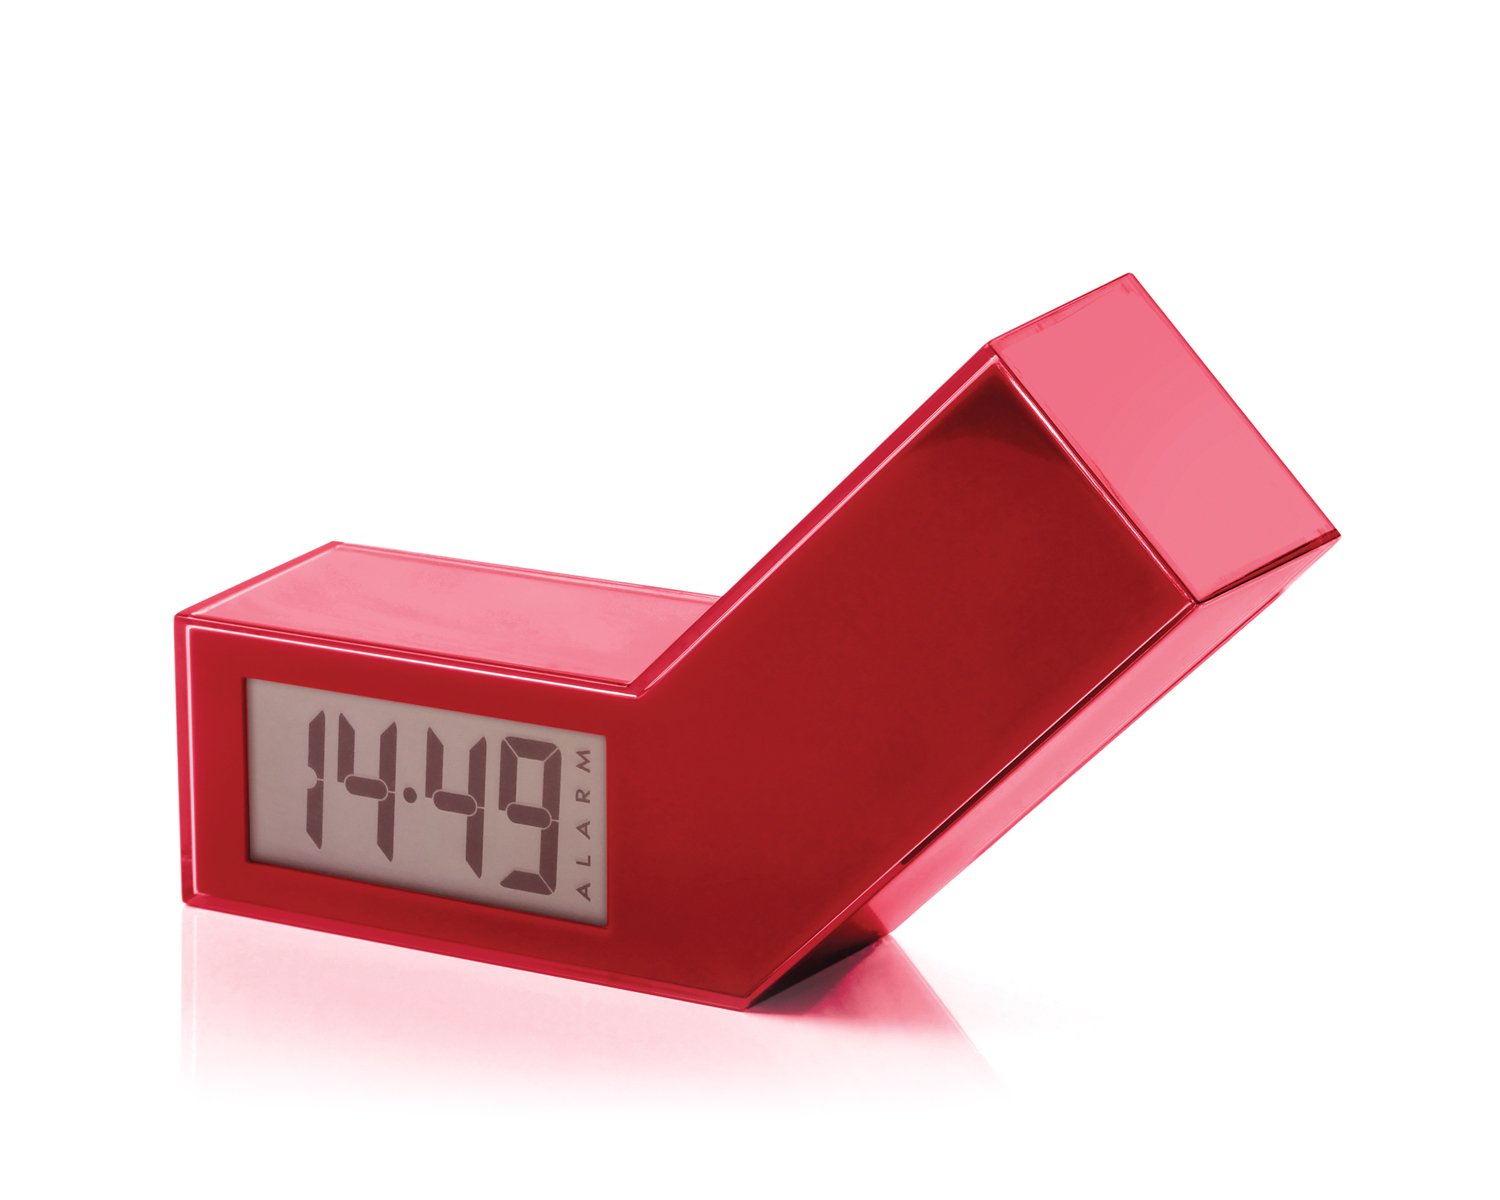
Figure 1 : Face avant view of the Lexon LR98R1 Onoff LCD Alarm Clock. The image displays the alarm clock in its red casing, with the LCD screen visible. The side labeled 'ON' is facing upwards, indicating the alarm is active. The clock has a minimalist rectangular design.
While specific button labels are not visible in the provided image, typical alarm clock controls are usually located on the back or sides. These generally include:
- Bouton de réglage de l'heure : To adjust the current time.
- Bouton de réglage de l'alarme : To adjust the alarm time.
- Hour/Minute Adjustment Buttons: To change hour and minute values.
- Bouton Snooze/Lumière : To temporarily silence the alarm or activate the backlight.
- Compartiment à piles : Located on the back or bottom.
5. Installation
5.1 Installation de la batterie
- Repérez le couvercle du compartiment à piles à l'arrière ou en dessous du réveil.
- Faites glisser ou soulevez le couvercle pour ouvrir le compartiment.
- Insérez deux (2) piles AAA, en veillant à respecter la polarité (+ et -) comme indiqué à l'intérieur du compartiment.
- Replacez soigneusement le couvercle du compartiment à piles.
Note: Batteries are not included. Please use new AAA alkaline batteries for optimal performance.
5.2 Mise sous tension initiale
Once batteries are installed, the LCD display should illuminate, and the clock will typically start at a default time (e.g., 12:00 AM). You will then need to set the current time and alarm.
6. Mode d'emploi
6.1 Réglage de l'heure actuelle
- Appuyez et maintenez enfoncé le RÉGLAGE DE L'HEURE button (or similar, refer to device markings) until the hour digits begin to flash.
- Utilisez le HEURE et MINUTE adjustment buttons to set the correct hour and minute.
- Presse RÉGLAGE DE L'HEURE à nouveau pour confirmer et quitter le mode de réglage de l'heure.
6.2 Réglage de l'heure de l'alarme
- Appuyez et maintenez enfoncé le ENSEMBLE D'ALARME button (or similar) until the alarm hour digits begin to flash.
- Utilisez le HEURE et MINUTE boutons de réglage pour définir l'heure de votre alarme.
- Presse ENSEMBLE D'ALARME à nouveau pour confirmer et quitter le mode de réglage de l'alarme.
6.3 Activating/Deactivating the Alarm (Onoff Feature)
The Lexon Onoff alarm clock features a unique flip mechanism:
- À ACTIVER the alarm, place the clock with the side labeled "ON" facing upwards. An alarm icon should appear on the LCD display.
- À DÉSACTIVER the alarm, flip the clock so the side labeled "DÉSACTIVÉ" is facing upwards. The alarm icon should disappear from the display.
6.4 Silencing the Alarm / Snooze Function
- Lorsque l'alarme sonne, appuyez sur la SNOOZE / LUMIÈRE button (usually a large button on top) to temporarily silence the alarm. The alarm will sound again after a few minutes (typically 5-10 minutes).
- To completely turn off the alarm for the day, flip the clock to the "DÉSACTIVÉ" position.
6.5 Rétroéclairage de l'affichage
Appuyez sur le SNOOZE / LUMIÈRE button to activate the blue electroluminescent backlight for a few seconds, allowing you to view the time in low-light conditions.
7. Entretien
7.1 Nettoyage
Wipe the surface of the alarm clock with a soft, dry cloth. Do not use abrasive cleaners, solvents, or chemical sprays, as these may damage the finish or electronic components.
7.2 Remplacement de la batterie
When the display dims or the alarm function becomes unreliable, it is time to replace the batteries. Follow the battery installation steps in Section 5.1. Always replace both AAA batteries at the same time.
8. Dépannage
| Problème | Cause possible | Solution |
|---|---|---|
| L'écran est vide ou sombre. | Les piles sont mortes ou mal installées. | Remplacez les piles par des piles AAA neuves, en veillant à respecter la polarité. |
| L'alarme ne sonne pas. | Alarm is not activated (clock is in "OFF" position) or alarm time is not set. | Flip the clock to the "ON" position. Verify the alarm time is set correctly (Section 6.2). Ensure batteries are not low. |
| L'heure est incorrecte. | L'heure n'était pas correctement réglée ou les piles ont été retirées/remplacées. | Reset the current time (Section 6.1). |
| Le rétroéclairage ne fonctionne pas. | Piles faibles. | Remplacer les piles. |
9. Spécifications
| Numéro de modèle | LR98R1 |
| Marque | Lexon |
| Type d'affichage | LCD with Blue Electroluminescent Backlight |
| Source d'énergie | Piles 2 x AAA (non incluses) |
| Matériel | ABS / Injected Polycarbonate |
| Dimensions (L x l x H) | 13.5 x 3.5 x 8 cm (environ 5.3 x 1.4 x 3.1 pouces) |
| Type de mouvement | Quartz |
| Caractéristiques spéciales | Onoff flip alarm activation/deactivation, Snooze function |
10. Garantie et assistance
The Lexon LR98R1 Onoff LCD Alarm Clock comes with a Garantie constructeur d'un an à compter de la date d'achat. Cette garantie couvre les défauts de matériaux et de fabrication dans des conditions normales d'utilisation.
La garantie ne couvre pas :
- Dommages causés par un accident, un abus, une mauvaise utilisation, une inondation, un incendie, un tremblement de terre ou d'autres causes externes.
- Damage caused by operating the product outside the permitted or intended uses described in this manual.
- Damage caused by service performed by anyone who is not an authorized representative of Lexon.
- Products or parts that have been modified to alter functionality or capability without the written permission of Lexon.
For warranty claims or technical support, please contact Lexon customer service through their official website or your retailer. Please have your proof of purchase and model number (LR98R1) ready.