
1. Introduction
This manual provides essential information for the safe and efficient operation, installation, and maintenance of your Steinbach SPS 100-1 self-priming filter pump. Please read all instructions carefully before installation and use. Keep this manual for future reference.
2. Consignes de sécurité
Informations importantes sur la sécurité :
- Débranchez toujours la pompe de l'alimentation électrique avant d'effectuer toute opération d'entretien ou de nettoyage.
- Ensure the electrical installation complies with local regulations and is protected by a Residual Current Device (RCD) with a tripping current not exceeding 30 mA.
- N’utilisez pas la pompe si le cordon d’alimentation ou la prise est endommagé(e). Contactez un technicien qualifié pour les réparations.
- The pump must be installed on a solid, level surface, protected from direct sunlight and rain.
- Ensure adequate ventilation around the pump motor to prevent overheating.
- Cet appareil n'est pas destiné à être utilisé par des personnes (y compris les enfants) ayant des capacités physiques, sensorielles ou mentales réduites, ou manquant d'expérience et de connaissances, à moins qu'elles ne bénéficient d'une surveillance ou d'instructions concernant l'utilisation de l'appareil par une personne responsable de leur sécurité.
- Les enfants doivent être surveillés pour s’assurer qu’ils ne jouent pas avec l’appareil.
3. Produit terminéview
The Steinbach SPS 100-1 is a self-priming filter pump designed for efficient water circulation in swimming pool filter systems, such as the Speed Clean Comfort 75. It operates without a built-in timer, offering continuous operation when powered.
Composants
- Pump body with motor
- Pre-filter basket with transparent lid
- Connexions d'entrée et de sortie
- Câble d'alimentation avec prise

Figure 1 : Plusview of the Steinbach SPS 100-1 Self-Priming Filter Pump.
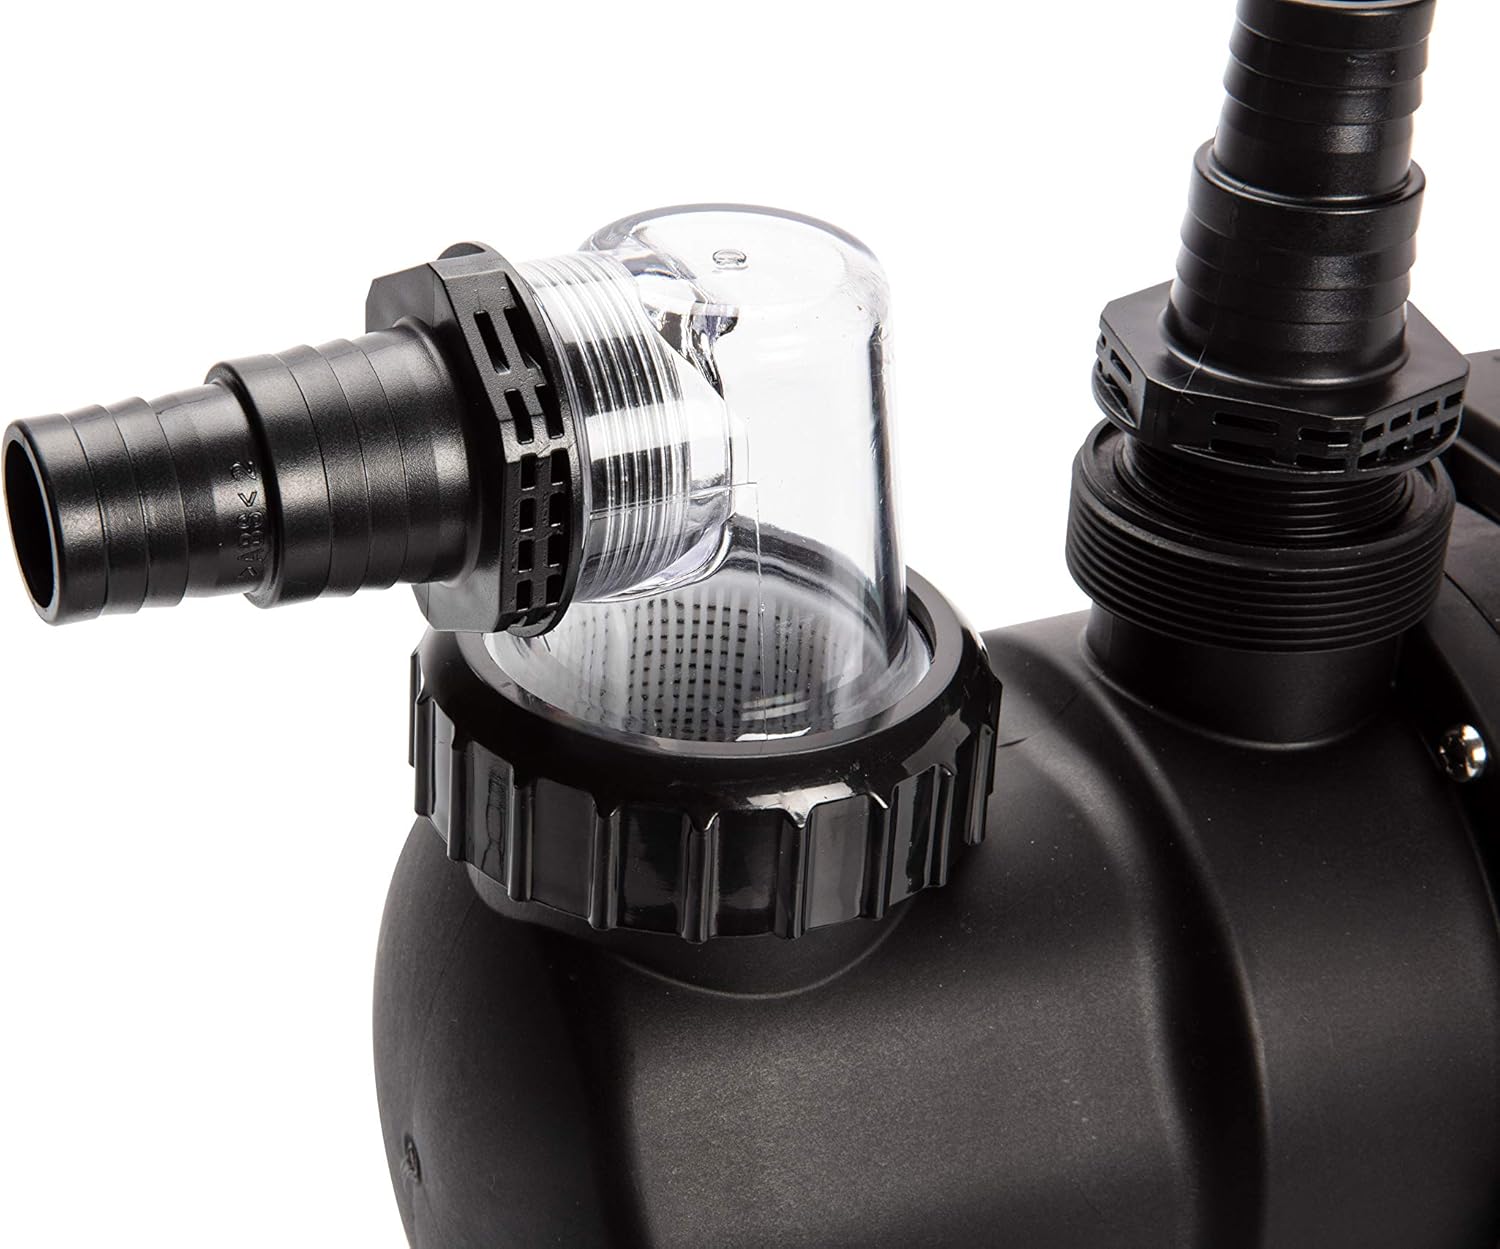
Figure 2 : Gros plan view of the pre-filter housing and the inlet connection with a hose attached. The transparent lid allows for easy inspection of the filter basket.

Figure 3 : Détaillé view of the pre-filter and the threaded inlet connection, ready for hose attachment.

Figure 4: Close-up of the pump's outlet connection with a hose securely fastened, directing filtered water.

Figure 5 : Détaillé view of the pump's threaded outlet connection, showing the port where the return hose connects.

Figure 6: Product label displaying technical specifications such as model number, voltage, power, and flow rate.
4. Configuration et installation
Proper installation is crucial for the pump's performance and longevity. Refer to your specific filter system manual for detailed plumbing instructions.
4.1 Placement
- Position the pump as close to the pool as possible, below water level if feasible, to aid in self-priming.
- Ensure the pump is on a stable, level, and dry surface.
- Protect the pump from direct weather exposure (rain, snow, direct sunlight).
- Allow sufficient space around the motor for ventilation and maintenance access.
4.2 Connexions de plomberie
- Connect the suction line from the pool skimmer/main drain to the pump's inlet (front connection).
- Connect the discharge line from the pump's outlet (top connection) to the filter system's inlet.
- Use appropriate fittings, clamps, and thread sealant (Teflon tape) to ensure watertight connections.
- Avoid kinks or sharp bends in hoses to maintain optimal flow.
4.3 Connexion électrique
- Assurez-vous que l'alimentation électrique corresponde au volume de la pompetage (230 V).
- Plug the pump into a grounded electrical outlet protected by an RCD.
- N’utilisez de rallonges électriques qu’en cas d’absolue nécessité et assurez-vous qu’elles soient adaptées à une utilisation extérieure et à la puissance requise par la pompe.
5. Mode d'emploi
5.1 Amorçage de la pompe
As a self-priming pump, the SPS 100-1 can draw water, but initial priming is recommended for faster startup:
- Ensure all valves are open, allowing water to flow from the pool to the pump.
- Remove the transparent lid of the pre-filter.
- Fill the pre-filter housing completely with water.
- Replace the lid securely, ensuring the O-ring is properly seated to prevent air leaks.
- Turn on the pump. It should begin to draw water and expel air. If it does not prime within a few minutes, turn it off, re-check connections, and repeat the priming process.
5.2 Fonctionnement normal
- Once primed, the pump will continuously circulate water through your filter system.
- Monitor the pressure gauge on your filter (if applicable) to determine when backwashing or filter cleaning is needed.
- This model does not include a timer, so you will need to manually switch it on and off or connect it to an external timer (not included).
6. Entretien
6.1 Pre-Filter Basket Cleaning
Regularly inspect and clean the pre-filter basket to prevent debris buildup and maintain pump efficiency.
- Éteignez la pompe et débranchez-la de l'alimentation électrique.
- Fermez toutes les vannes nécessaires pour empêcher l'eau de s'écouler de la piscine.
- Dévissez le couvercle transparent du préfiltre.
- Retirez le panier et videz-le des débris accumulés.
- Rincez soigneusement le panier à l'eau.
- Vérifiez que le joint torique du couvercle n'est pas endommagé et assurez-vous qu'il est propre.
- Replace the basket and securely fasten the lid.
6.2 Hivérisation
Before freezing temperatures arrive, properly winterize your pump to prevent damage:
- Débrancher la pompe de l'alimentation électrique.
- Vidangez toute l'eau de la pompe en retirant le bouchon de vidange (généralement situé au bas du boîtier de la pompe).
- Disconnect all hoses and pipes.
- Clean the pre-filter basket and housing.
- Rangez la pompe dans un endroit sec et à l'abri du gel.
7. Dépannage
| Problème | Cause possible | Solution |
|---|---|---|
| La pompe ne démarre pas | No power; tripped breaker/RCD; motor jammed | Check power connection, reset breaker/RCD; contact service if motor is jammed. |
| La pompe fonctionne mais ne s'amorce pas/pas de débit d'eau | Air leak in suction line; pre-filter basket clogged; insufficient water in pre-filter; low pool water level | Check all connections for air leaks; clean pre-filter basket; fill pre-filter with water; ensure adequate pool water level. |
| Débit d'eau réduit | Clogged pre-filter; clogged main filter; partially closed valves; debris in impeller | Clean pre-filter; backwash/clean main filter; open all valves fully; inspect impeller for debris (disconnect power first). |
| Loud noise/vibration | Air in pump; cavitation; loose mounting; worn bearings | Check for air leaks and prime pump; ensure adequate water supply; tighten mounting bolts; contact service for worn bearings. |
8. Spécifications
| Fonctionnalité | Spécification |
|---|---|
| Numéro de modèle | 040922 |
| Taper | Self-Priming Filter Pump |
| Voltage | 230 V |
| Pouvoir | 550 W |
| Débit maximal | 158 Liters Per Minute (9.400 l/h) |
| Hauteur maximale de la tête | 10 mètres |
| Matériel | Stainless Steel (motor components), Durable Plastic (pump housing) |
| Poids | 5.96 kg |
| Couleur | Noir |
| Caractéristiques | Self-priming, No integrated timer, Suitable for Speed Clean Comfort 75 sand filter systems |
9. Garantie et assistance
For warranty information and technical support, please refer to the documentation provided with your purchase or contact Steinbach customer service directly. Keep your proof of purchase for warranty claims.
Coordonnées:
- Manufacturer: Steinbach
- Website: www.steinbach.at (Please check for local support details)