Éclairage Progress P3689-44
Progress Lighting P3689-44 Two-Light Close-to-Ceiling Fixture Instruction Manual
Introduction
This manual provides detailed instructions for the safe installation, operation, and maintenance of your Progress Lighting P3689-44 Two-Light Close-to-Ceiling Fixture. Please read all instructions carefully before beginning installation and retain this manual for future reference.
The P3689-44 fixture features a clean design with elegant lines, complemented by a satin Oxford Silver finish and an etched alabaster style glass shade. Its unique twist-lock shade design allows for easy access for changing light bulbs without external hardware.
Consignes de sécurité
AVERTISSEMENT: Risque de choc électrique. Coupez l'alimentation au niveau du tableau électrique ou du disjoncteur avant toute installation ou intervention.
PRUDENCE: For your safety, read and understand the information provided in this manual completely before attempting to assemble, install, or operate this product. Failure to do so could lead to electric shock, fire, or other injuries that could be hazardous or even fatal.
- Tous les raccordements électriques doivent être conformes aux codes, ordonnances ou au Code national de l'électricité (NEC) locaux.
- Consultez un électricien qualifié si vous avez des doutes sur les procédures de câblage.
- Utilisez uniquement des connecteurs de câbles homologués UL/cUL.
- Ne pas dépasser la puissance maximaletage spécifié pour les ampoules.
- Assurez-vous que le luminaire est solidement fixé à un élément structurel du plafond.
Contenu du colis
Carefully unpack your fixture and check that all parts are included. If any parts are missing or damaged, contact Progress Lighting customer service before proceeding.
- Corps de luminaire (1)
- Abat-jour en verre (1)
- Mounting hardware kit (1)
- Manuel d'instructions (1)
Configuration et installation
Outils requis (non inclus) :
- Tournevis cruciforme
- Tournevis à tête plate
- Pinces à dénuder
- Ruban électrique
- Lunettes de sécurité
Étapes d'installation :
- Éteignez l'alimentation : Before starting installation, ensure the power to the circuit is turned off at the main fuse box or circuit breaker.
- Prepare mounting: Attach the mounting bracket to the junction box in the ceiling using the screws provided in the hardware kit. Ensure the bracket is securely fastened.
- Câblage : Raccordez les fils du luminaire aux fils de la maison comme suit :
- Connectez le noir fil du luminaire au noir (fil électrique sous tension) du réseau électrique domestique.
- Connectez le blanc fil du luminaire au blanc fil de maison (neutre).
- Connectez le cuivre nu (mise à la terre) fil de fixation au cuivre vert ou nu (Terre) fil électrique domestique.
- Mount fixture body: Carefully push the wired fixture body up to the ceiling, aligning the screw holes on the fixture with the screws on the mounting bracket. Secure the fixture body in place with the decorative nuts or screws provided.
- Installer les ampoules : Insert two (2) 60-watt maximum medium base bulbs (not included) into the sockets. Do not exceed the recommended wattage.
- Attach glass shade: Align the glass shade with the fixture body and twist it clockwise until it locks securely into place. The unique twist-lock design ensures the shade is held firmly without visible hardware.
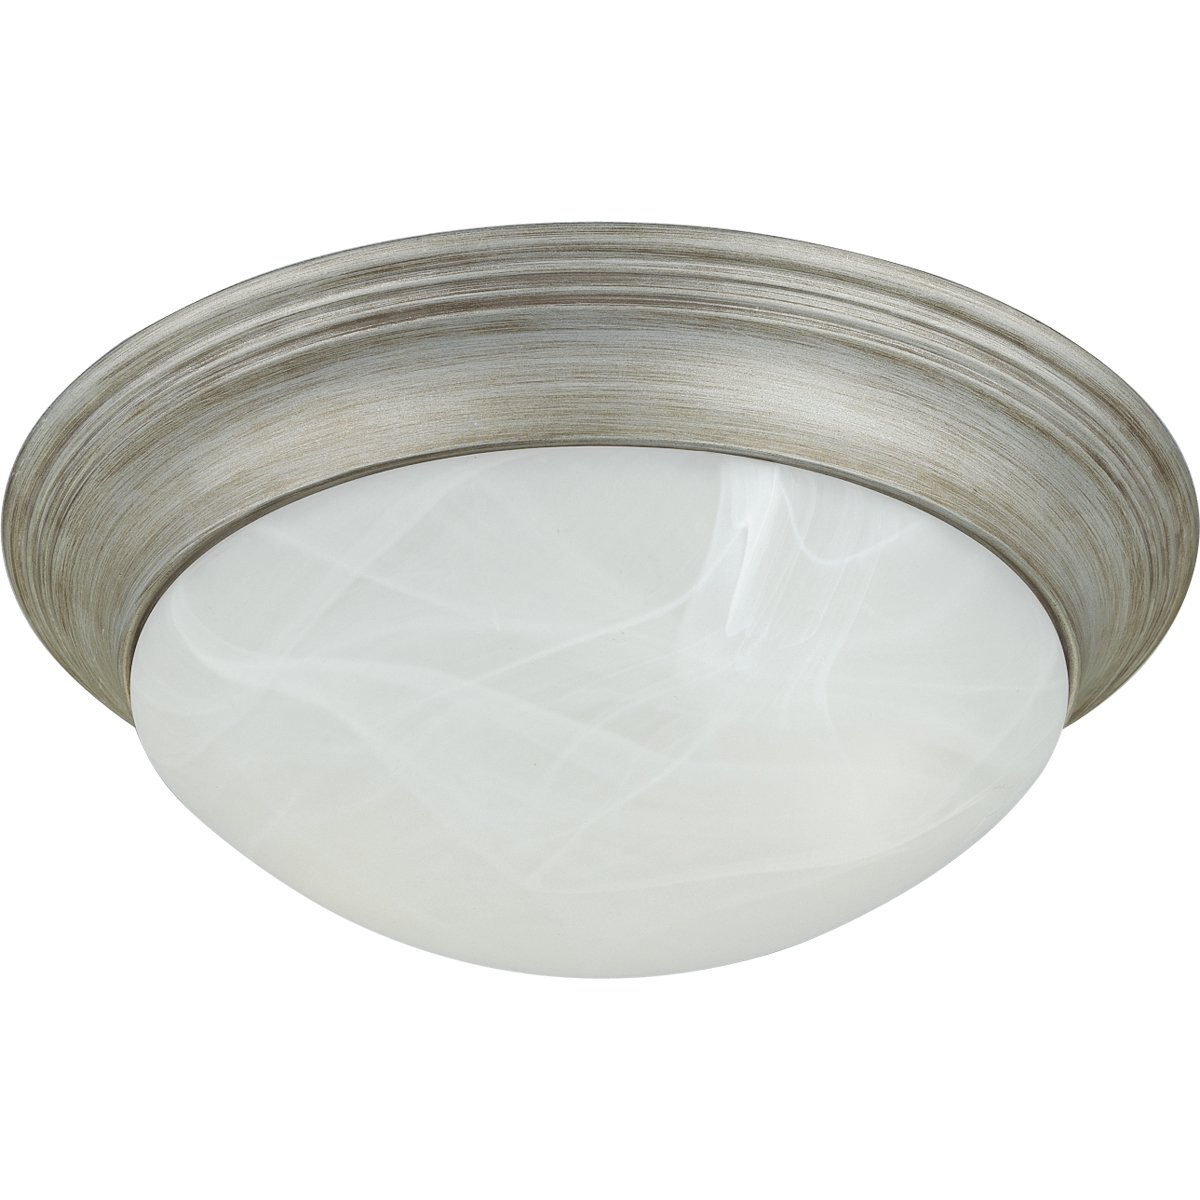
Image: The Progress Lighting P3689-44 Two-Light Close-to-Ceiling Fixture, showcasing its Oxford Silver finish and etched alabaster style glass shade. The fixture is designed for flush mounting to the ceiling.
Mode d'emploi
Once the fixture is fully installed and bulbs are in place, restore power at the main fuse box or circuit breaker. The fixture is operated via a standard wall switch (not included) connected to the circuit.
- Assurez-vous que l'eau est correctetage bulbs (max 60-watt medium base) are used to prevent overheating or damage.
- The fixture is designed for indoor use in dry locations only.
Entretien
Nettoyage:
To clean the fixture, ensure power is turned off. Wipe the fixture with a soft, dry cloth. Do not use abrasive cleaners, polishes, or solvents as they may damage the finish or glass. For the glass shade, a mild glass cleaner can be used sparingly on a cloth, then wiped dry.
Remplacement de l'ampoule :
To replace bulbs, turn off power at the circuit breaker. Gently twist the glass shade counter-clockwise to remove it. Unscrew the old bulbs and replace them with new 60-watt maximum medium base bulbs. Reattach the glass shade by twisting it clockwise until secure.
Dépannage
| Problème | Cause possible | Solution |
|---|---|---|
| La lumière ne s'allume pas. |
|
|
| La lumière clignote. |
|
|
Caractéristiques
| Fonctionnalité | Détail |
|---|---|
| Numéro de modèle | P3689-44 |
| Marque | Éclairage progressif |
| Finition | Oxford Silver |
| Type de verre | Etched Alabaster Style Glass |
| Dimensions (Largeur x Hauteur) | 14 inches (W) x 4-3/4 inches (H) |
| Nombre de lumières | 2 |
| Type d'ampoule | Base moyenne (E26) |
| Max Vattage par ampoule | 60 watts |
| Voltage | 120 volts |
| Source d'énergie | Électrique avec fil |
| Matériel | Verre, Métal |
| Code UPC | 785247368921 |
Garantie et assistance
Ce luminaire Progress Lighting est recouvert d'un Garantie constructeur d'un an à compter de la date d'achat. Cette garantie couvre les défauts de matériaux et de fabrication dans des conditions normales d'utilisation.
For warranty claims, technical support, or replacement parts, please contact Progress Lighting customer service. Keep your purchase receipt as proof of purchase.
Service clientèle de Progress Lighting : Refer to the official Progress Lighting webPour obtenir les coordonnées actuelles, veuillez consulter le site web ou l'emballage du produit.
Ask a question about this manual
Ask about setup, troubleshooting, compatibility, parts, safety, or missing instructions. Manuals+ will review the question and use this page’s manual context to help answer it.