
Karlsson KA4548
Manuel d'utilisation du réveil gélifié Karlsson KA4548
Modèle: KA4548
Introduction
Welcome to the user manual for your new Karlsson KA4548 Gummy Alarm Clock. This battery-powered LCD alarm clock is designed for simplicity and functionality, featuring a unique rubberized casing that seamlessly integrates all control buttons. Its clear LCD display provides time at a glance, and the blue backlight activates only when the light button is pressed, ensuring no disruptive light emission during the night. This manual will guide you through the setup, operation, maintenance, and troubleshooting of your alarm clock.
Consignes de sécurité
- Sécurité des batteries : Always use the specified battery type (3 AAA batteries). Do not mix old and new batteries, or different types of batteries. Remove batteries if the clock will not be used for an extended period to prevent leakage. Dispose of used batteries responsibly.
- Placement: Place the alarm clock on a stable, flat surface. Avoid placing it in direct sunlight, near heat sources, or in areas with high humidity.
- Nettoyage: Clean the clock with a soft, dry cloth. Do not use abrasive cleaners or immerse the clock in water.
- Enfants: Keep out of reach of small children. This product is not a toy.
Produit terminéview
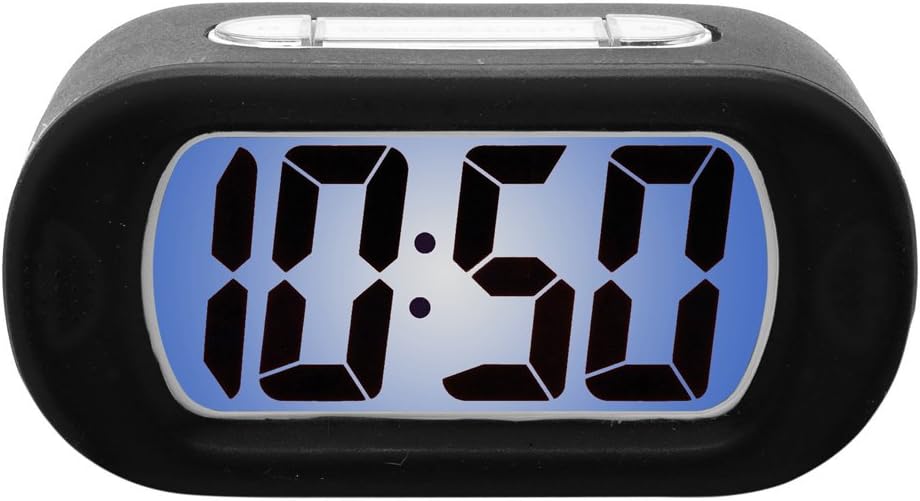
Figure 1: Karlsson KA4548 Gummy Alarm Clock. This image displays the Karlsson KA4548 Gummy Alarm Clock from a front-facing perspective. The clock features a black rubberized casing and a clear LCD screen with a blue backlight, currently displaying the time '10:50' in large, digital segments. The top of the clock shows subtle outlines of control buttons integrated into the rubber material.
Composants:
- Écran LCD : Affiche l'heure, l'état de l'alarme et d'autres indicateurs.
- Caoutchouté Casing: Durable and provides integrated button access.
- Boutons de contrôle : (Located on top/back, integrated into rubber) For setting time, alarm, snooze, and activating backlight.
- Compartiment à piles : Located on the back, for 3 AAA batteries.
Installation
Installation de la batterie :
- Repérez le compartiment à piles à l'arrière du réveil.
- Ouvrez le couvercle du compartiment à piles.
- Insérez 3 piles AAA neuves, en veillant à respecter la polarité (+ et -) comme indiqué à l'intérieur du compartiment.
- Close the battery compartment cover securely. The LCD display should now turn on.
Mode d'emploi
Réglage de l'heure :
- Press the 'SET' button (or equivalent, typically integrated into the rubber casing). The hour digits will start flashing.
- Use the '+' or '-' buttons (or up/down arrows) to adjust the hour.
- Press 'SET' again to confirm the hour and move to the minute setting. The minute digits will flash.
- Utilisez les boutons « + » ou « - » pour régler les minutes.
- Press 'SET' one more time to confirm the minutes and exit time setting mode.
Réglage de l'alarme :
- Press the 'ALARM SET' button (or similar, often labeled with an alarm icon). The alarm hour digits will start flashing.
- Utilisez les boutons « + » ou « - » pour régler l'heure de l'alarme.
- Press 'ALARM SET' again to confirm the alarm hour and move to the alarm minute setting. The alarm minute digits will flash.
- Utilisez les boutons « + » ou « - » pour régler les minutes de l'alarme.
- Press 'ALARM SET' one more time to confirm the alarm minutes and exit alarm setting mode.
- Ensure the alarm is activated. There is usually a dedicated 'ALARM ON/OFF' switch or button. A small alarm icon should appear on the display when the alarm is active.
Fonction de répétition:
When the alarm sounds, press the 'SNOOZE' button (typically a large button on top). The alarm will temporarily stop and sound again after a few minutes (usually 5-9 minutes, depending on the model).
Fonction de rétroéclairage :
To illuminate the display in the dark, press the 'LIGHT' button (often integrated with the snooze button). The blue backlight will activate for a few seconds and then turn off automatically to conserve battery life. The display does not remain continuously lit.
Entretien
Nettoyage:
Wipe the clock's surface with a soft, dry, lint-free cloth. For stubborn marks on the rubber casing, a slightly damp cloth can be used, but ensure no moisture enters the electronic components. Do not use chemical cleaners, solvents, or abrasive materials.
Remplacement de la batterie :
When the display dims or the alarm function becomes unreliable, it is time to replace the batteries. Follow the battery installation steps outlined in the 'Setup' section. Always replace all three AAA batteries at the same time with new ones.
Dépannage
- L'écran est vide ou sombre :
Solution: Vérifiez la polarité des piles. Remplacez-les par des piles AAA neuves. - L'alarme ne sonne pas :
Solution: Ensure the alarm is set and activated (check for alarm icon on display). Verify that the time and alarm time are correctly set. Replace batteries if they are low. - Backlight does not work or is very dim:
Solution: Press the 'LIGHT' button firmly. If it still doesn't work, replace the batteries. Note that the backlight is designed to be momentary, not continuously lit. - Les boutons ne répondent pas :
Solution: Ensure batteries are correctly installed and have sufficient power. Try removing and reinserting batteries to reset the device. - Affichage de l'heure incorrect :
Solution: Reset the time following the 'Setting the Time' instructions.
Caractéristiques
| Fonctionnalité | Détail |
|---|---|
| Numéro de modèle | KA4548 |
| Marque | Karlsson |
| Dimensions du produit | 14.73 x 5.08 x 7.62 cm |
| Poids | 220 g |
| Couleur | Noir |
| Type d'affichage | LCD numérique |
| Source d'énergie | Battery (3 x AAA required) |
| Piles incluses | Non |
| Caractéristiques spéciales | Alarm, Momentary Backlight |
| Style | Design moderne |
| Assemblage requis | Non |
Garantie et assistance
Les produits Karlsson sont fabriqués selon des normes de qualité élevées. Pour plus d'informations concernant la garantie, veuillez consulter la carte de garantie fournie avec votre achat ou visiter le site officiel de Karlsson. website. For technical support or further assistance, please contact Karlsson customer service through their official channels.
Ask a question about this manual
Ask about setup, troubleshooting, compatibility, parts, safety, or missing instructions. Manuals+ will review the question and use this page’s manual context to help answer it.